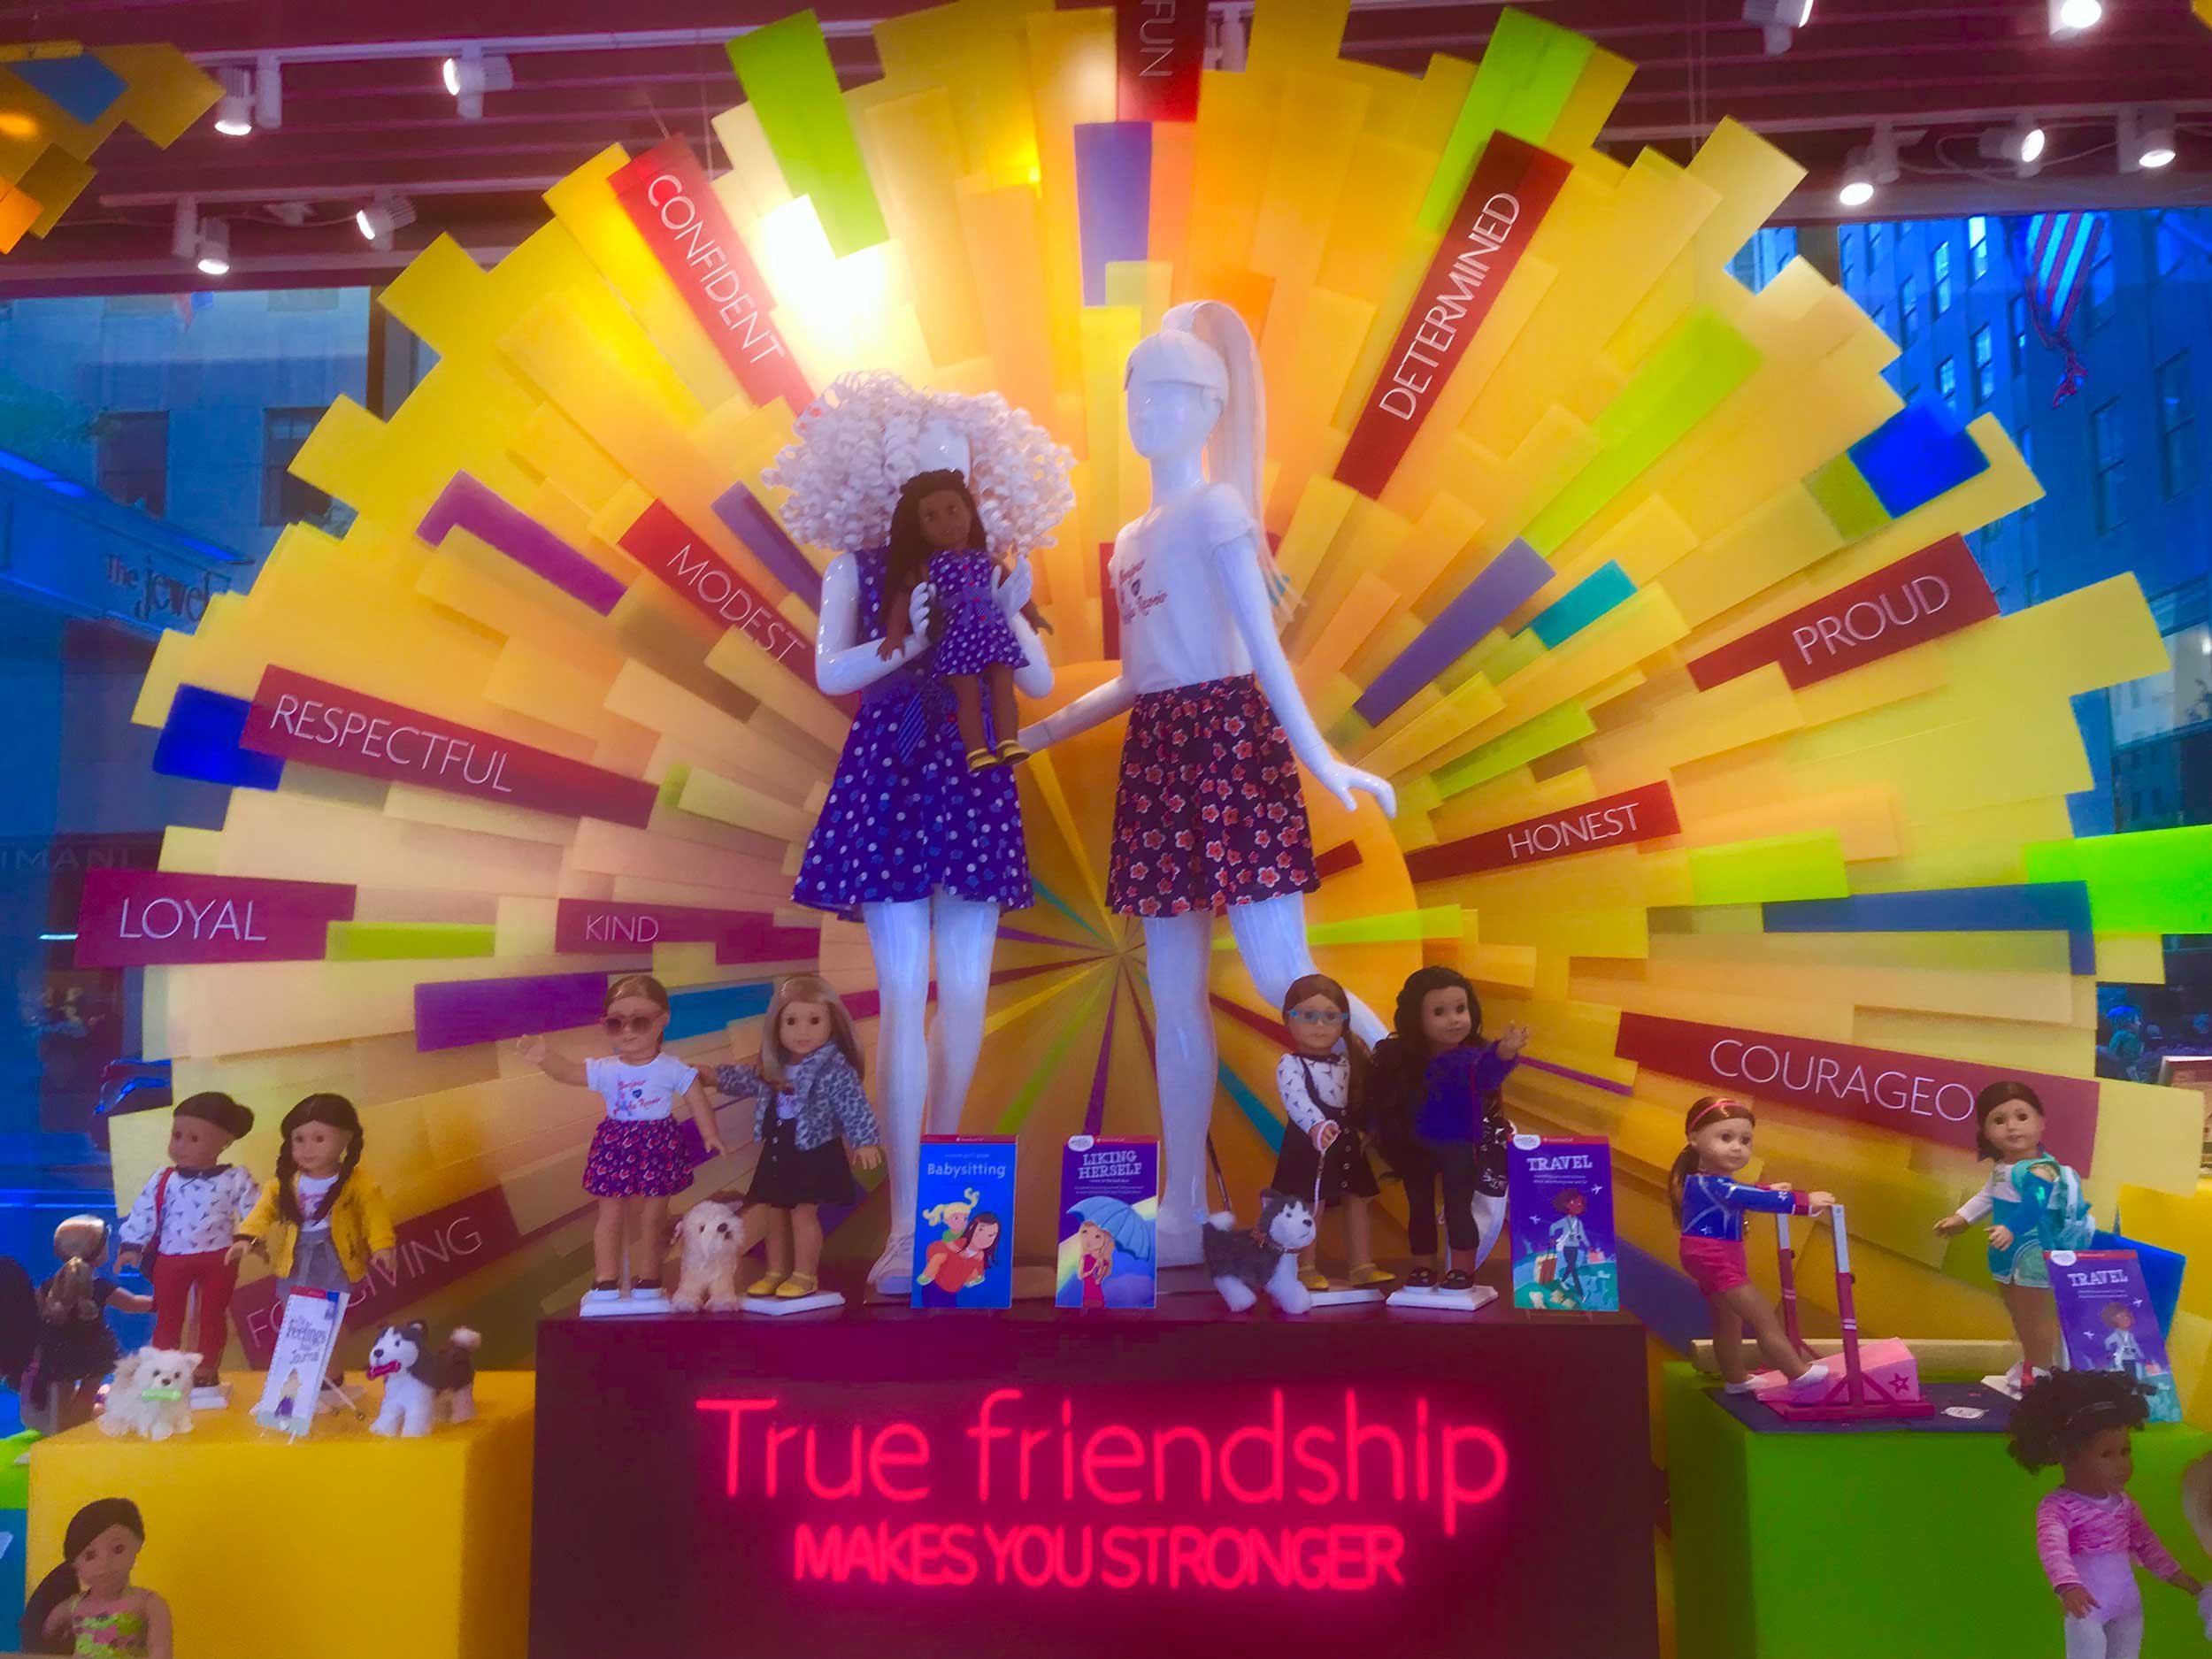
American Girl Summer 2019 Product Launch
This is one of my favorite projects EVER! It was a huge structure, almost 12 feet tall. It was a complex build. It was fun, beautiful and vibrant—with the bright color palette and spectacular Satinice acrylic used. It was a tedious process with all the details and matrix—but, it was very fulfilling seeing it all come together! I enjoy letting my brain get meticulously engrossed in the creative journey, along with keeping my focus on all the details, execution/installation, and organization of all the moving parts.
From concept to creation—brainstorm to installation—I collaborated with my fellow coworkers (Retail Store Design Creative team), brand copywriting partners, our talented NY Visual Merchandising Retail Team, and third party vendors to create a fun/vibrant product window to launch our Summer 2019 product line. As lead designer on this project, I took our initial concept and made it an executable success—from creating meticulously layered Illustrator files for the vendor, to developing intricate matrices for the individual parts/pieces required, and working closely with our vendor to iron out the details and troubleshoot install solutions.
The Design Process
-
![]()
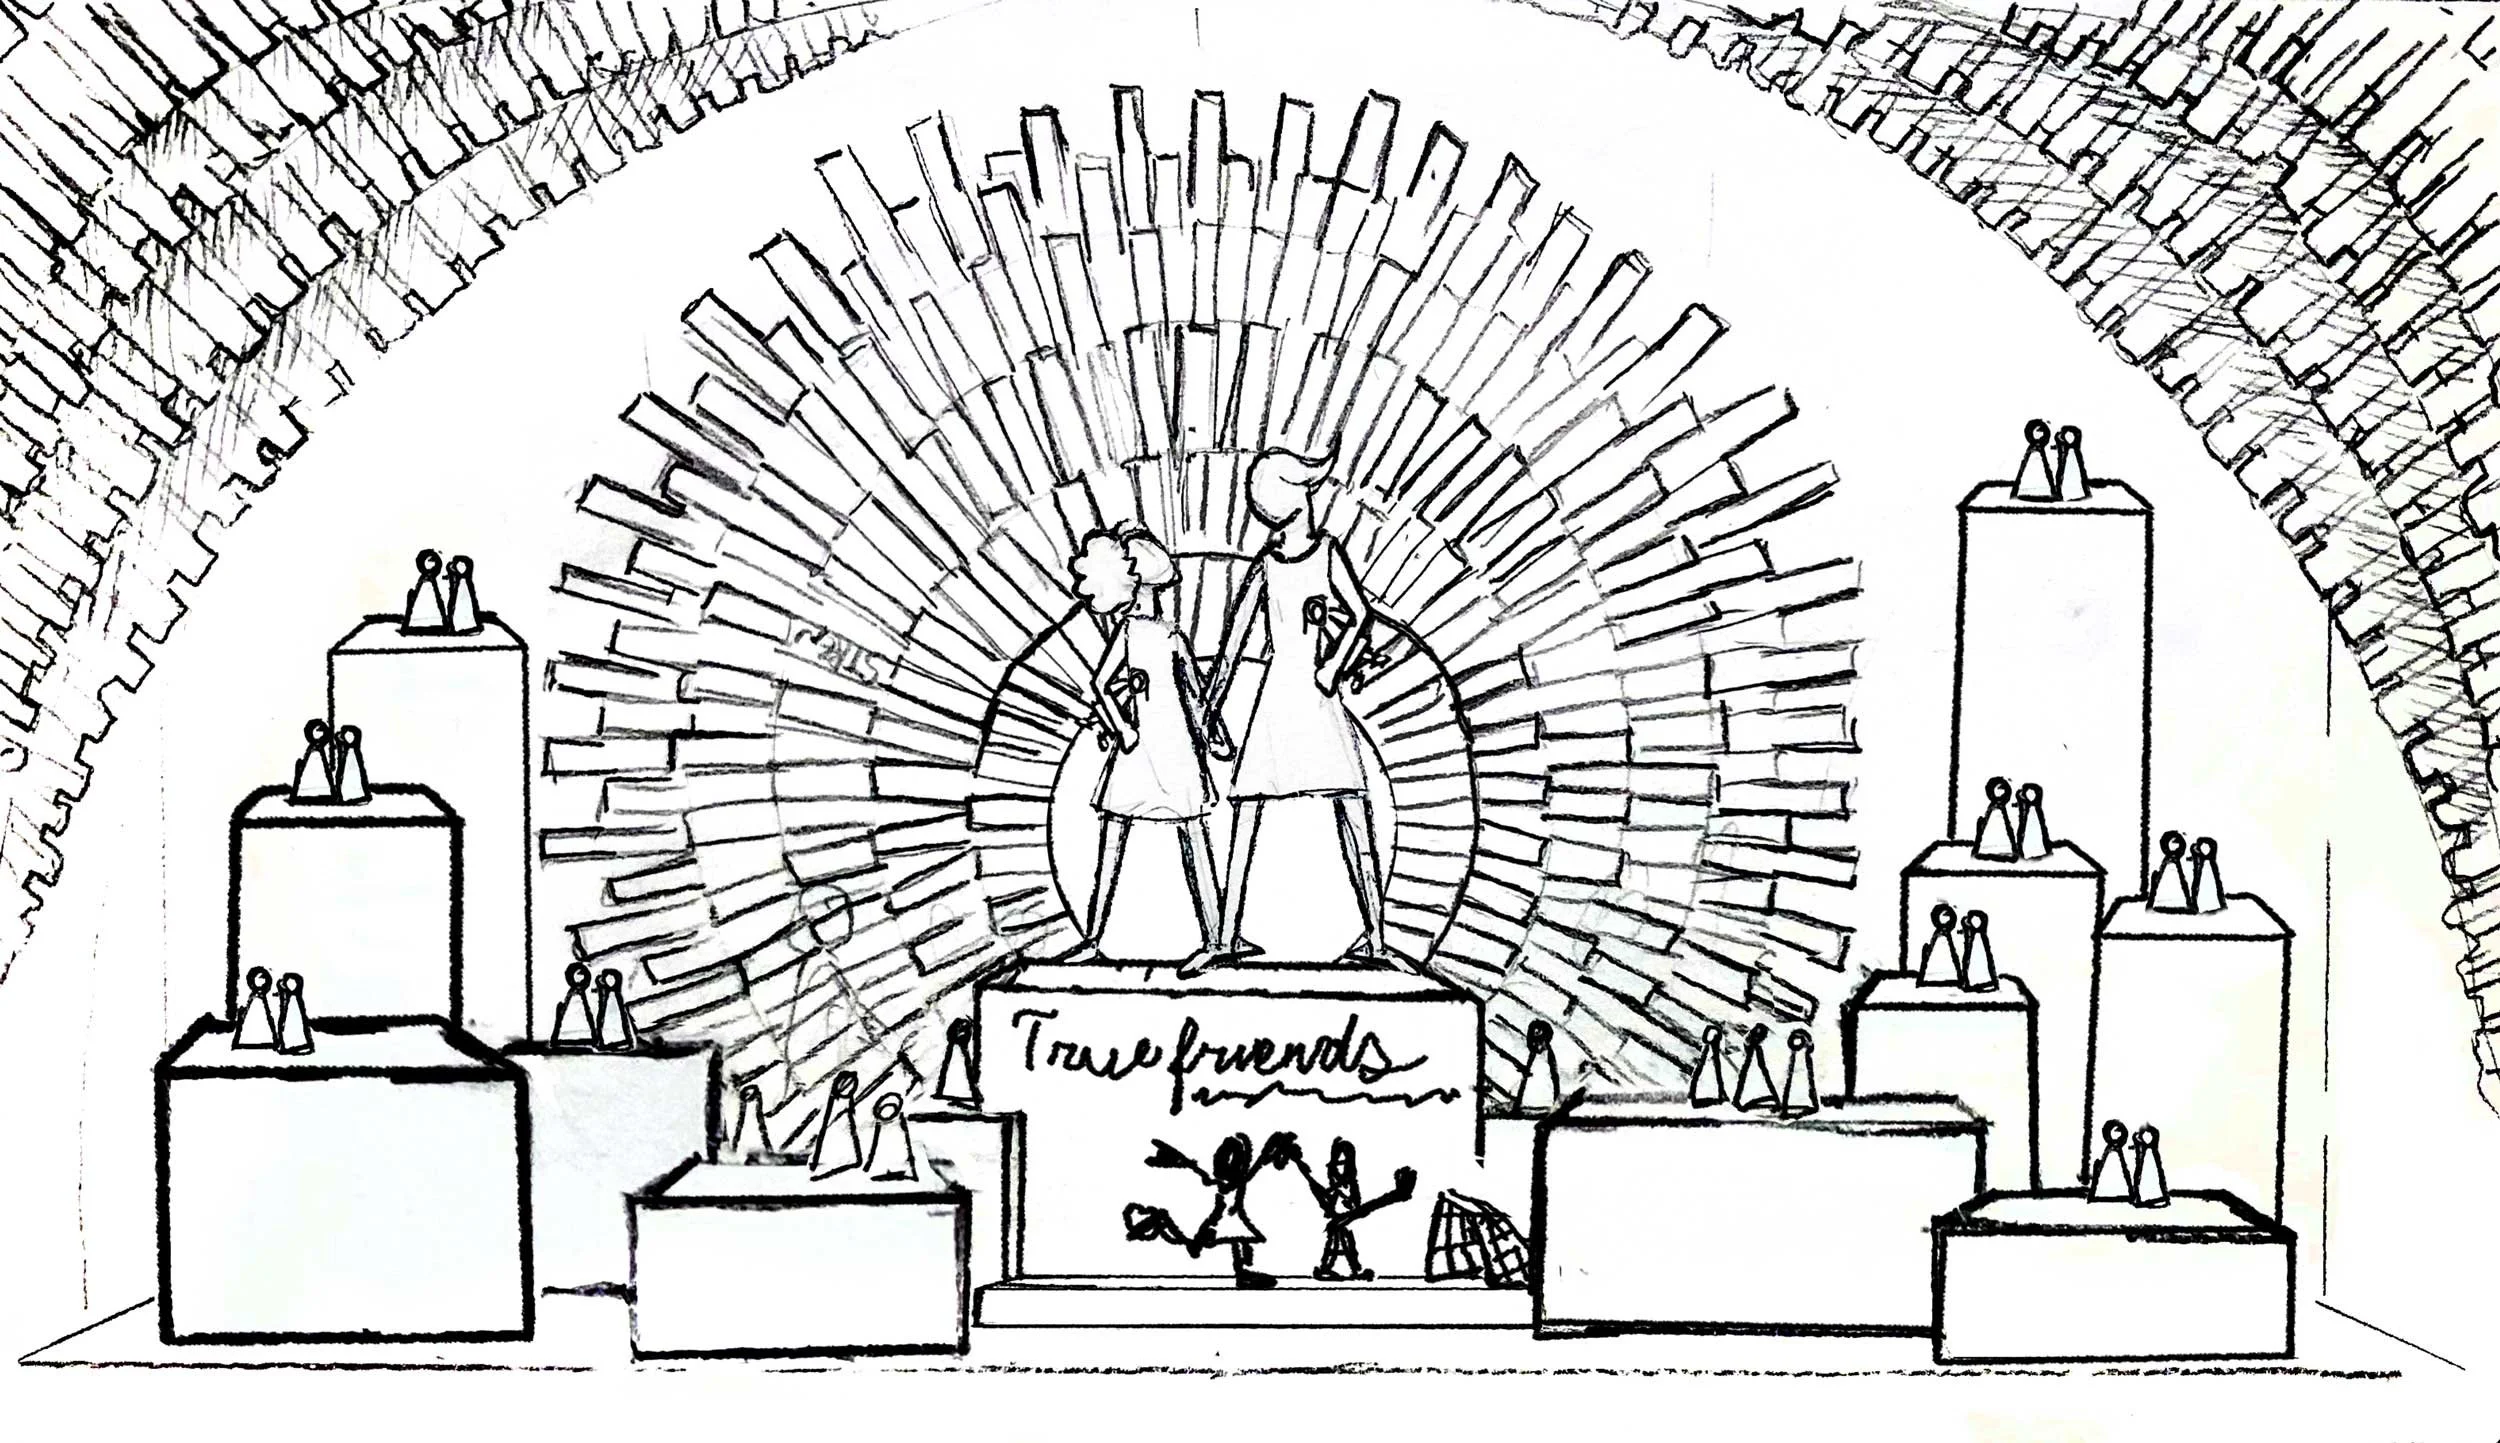
Overall Window Concept
**Original sketch by Chris Miraglia/Visual Merchandising Manager @ American Girl NY-Rockefeller
-
![]()
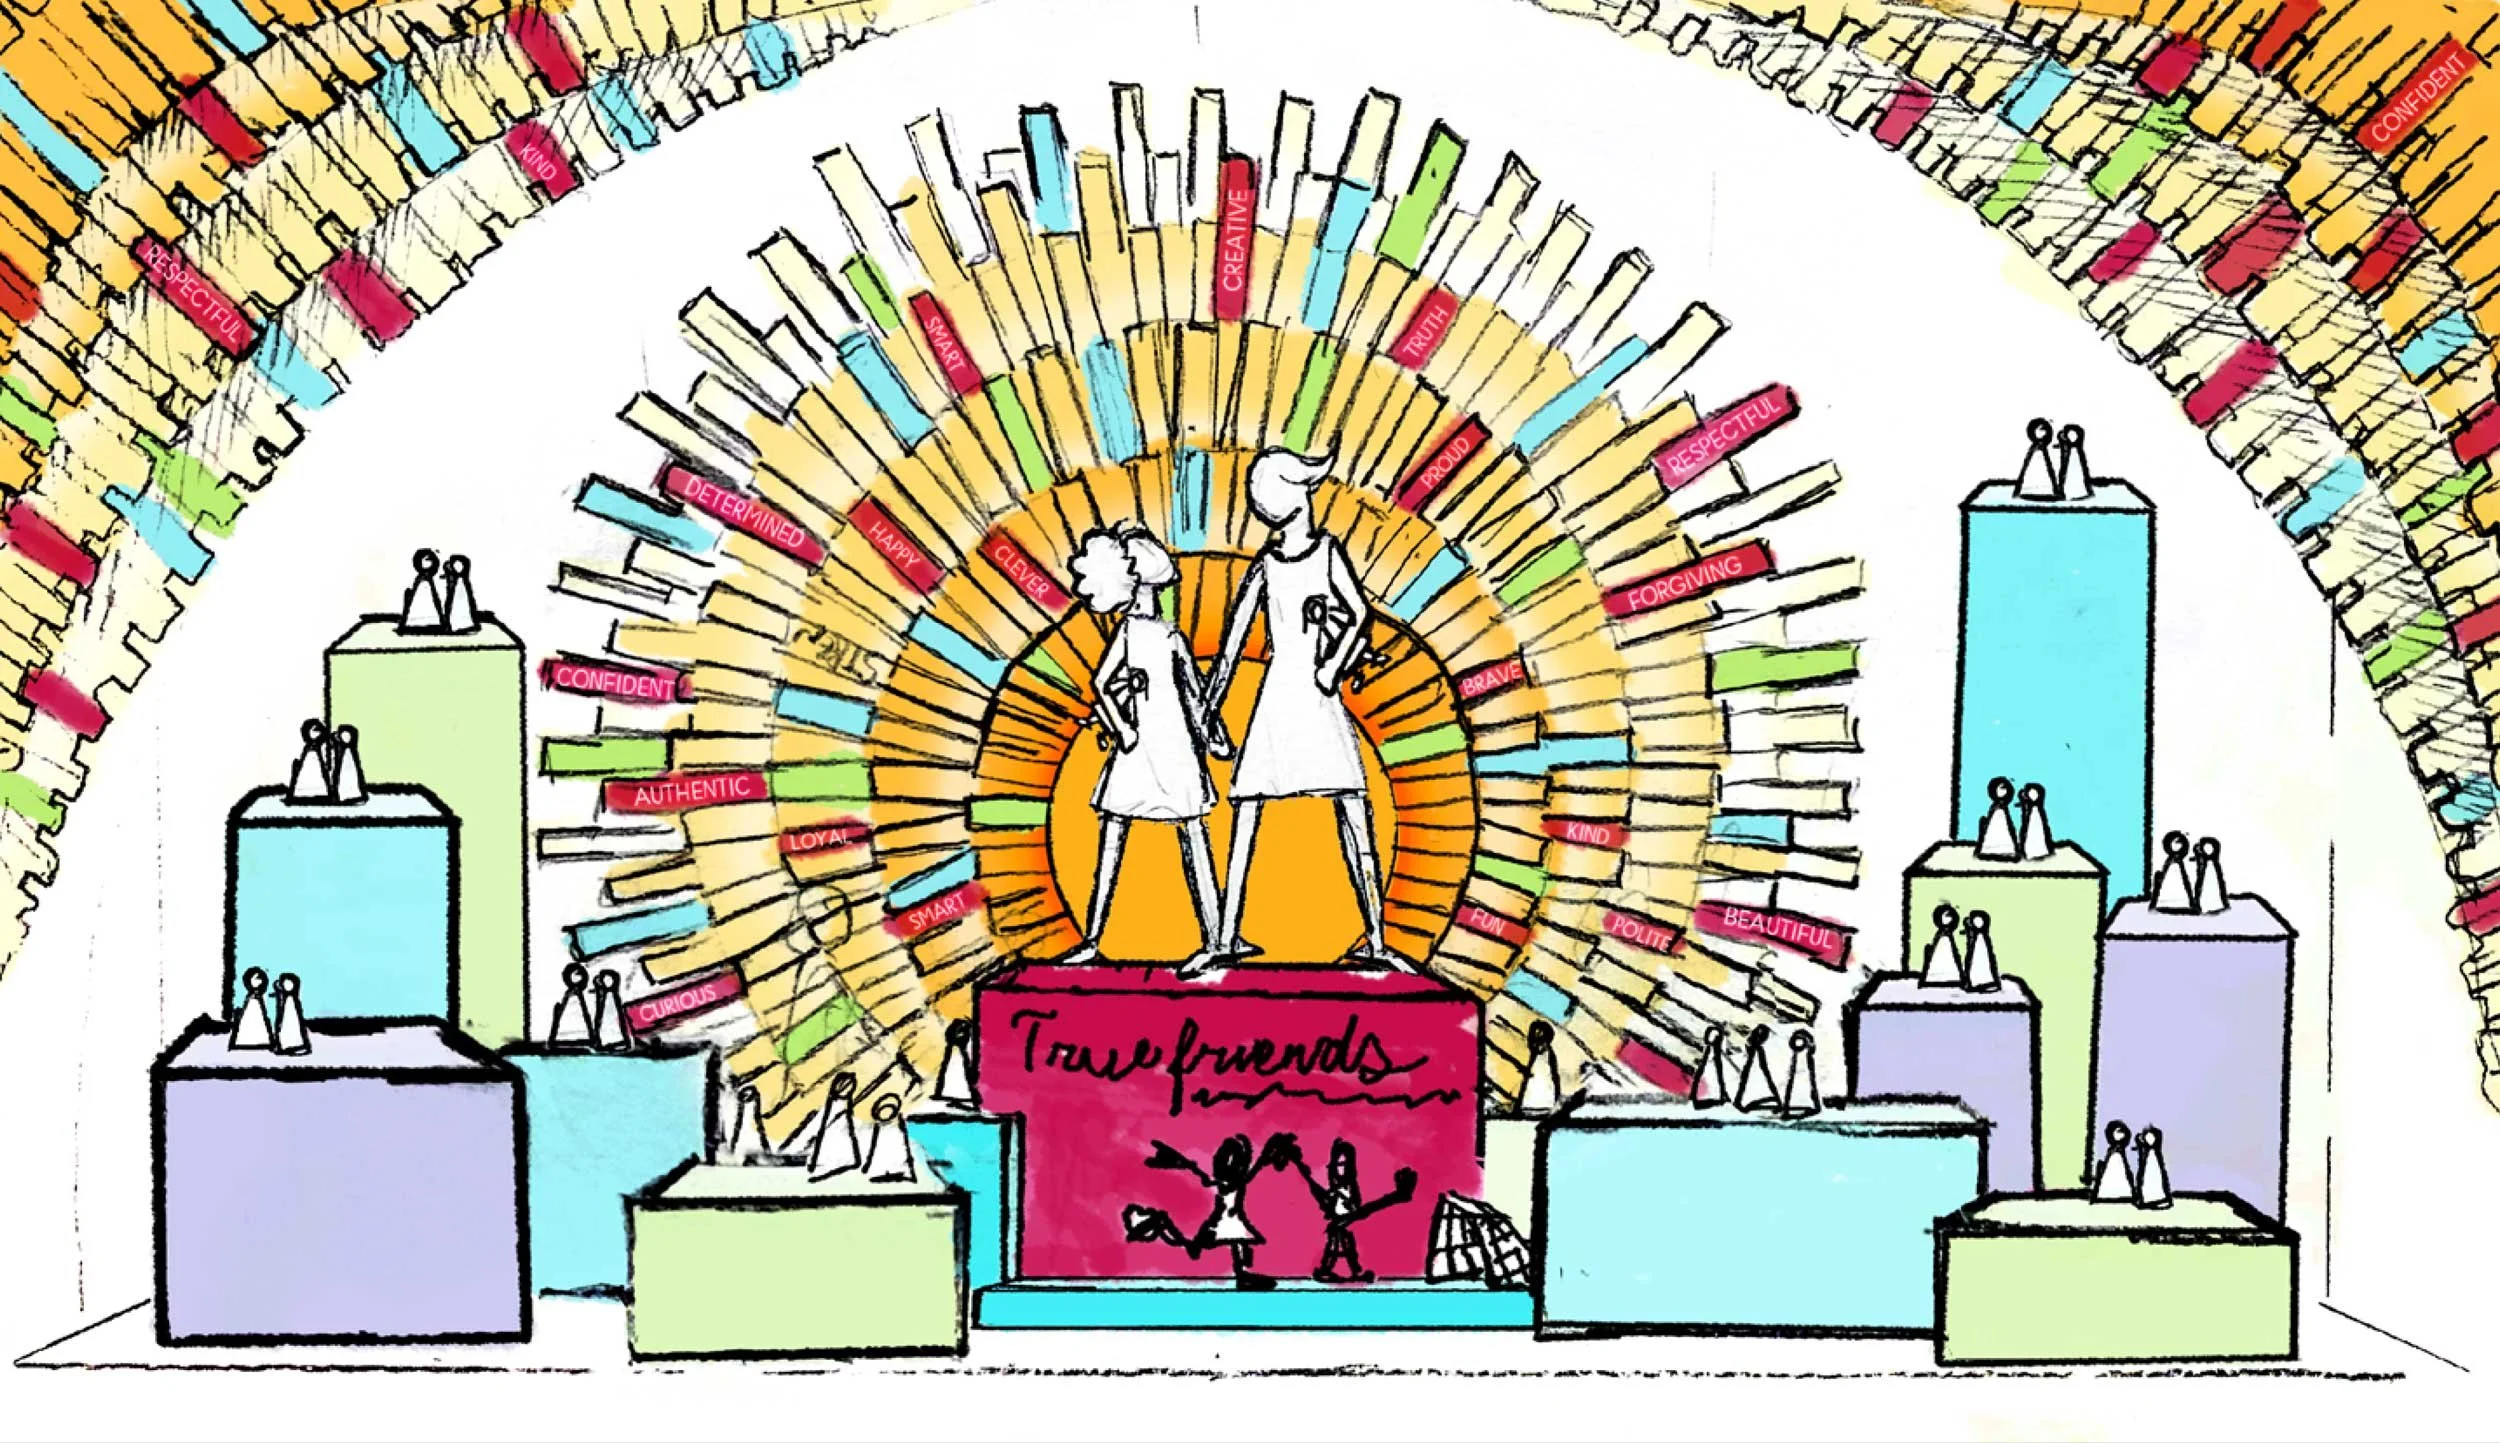
Color Palette
Colored sketch, with attribute words added, for creative approval with senior management
-
![]()
Vector Composite Image
Now comes the FUN part, making the creative vision a reality—a tangible, larger than life window display—with vector (Adobe Illustrator) artwork files! Through collaboration with our vendor, I worked thoroughly with them to be sure no detail was overlooked. Providing layered artwork files—identifying every part/piece—along with a detailed matrix (Excel spreadsheet) to keep us all on the same page in production and final execution.
-
![]()
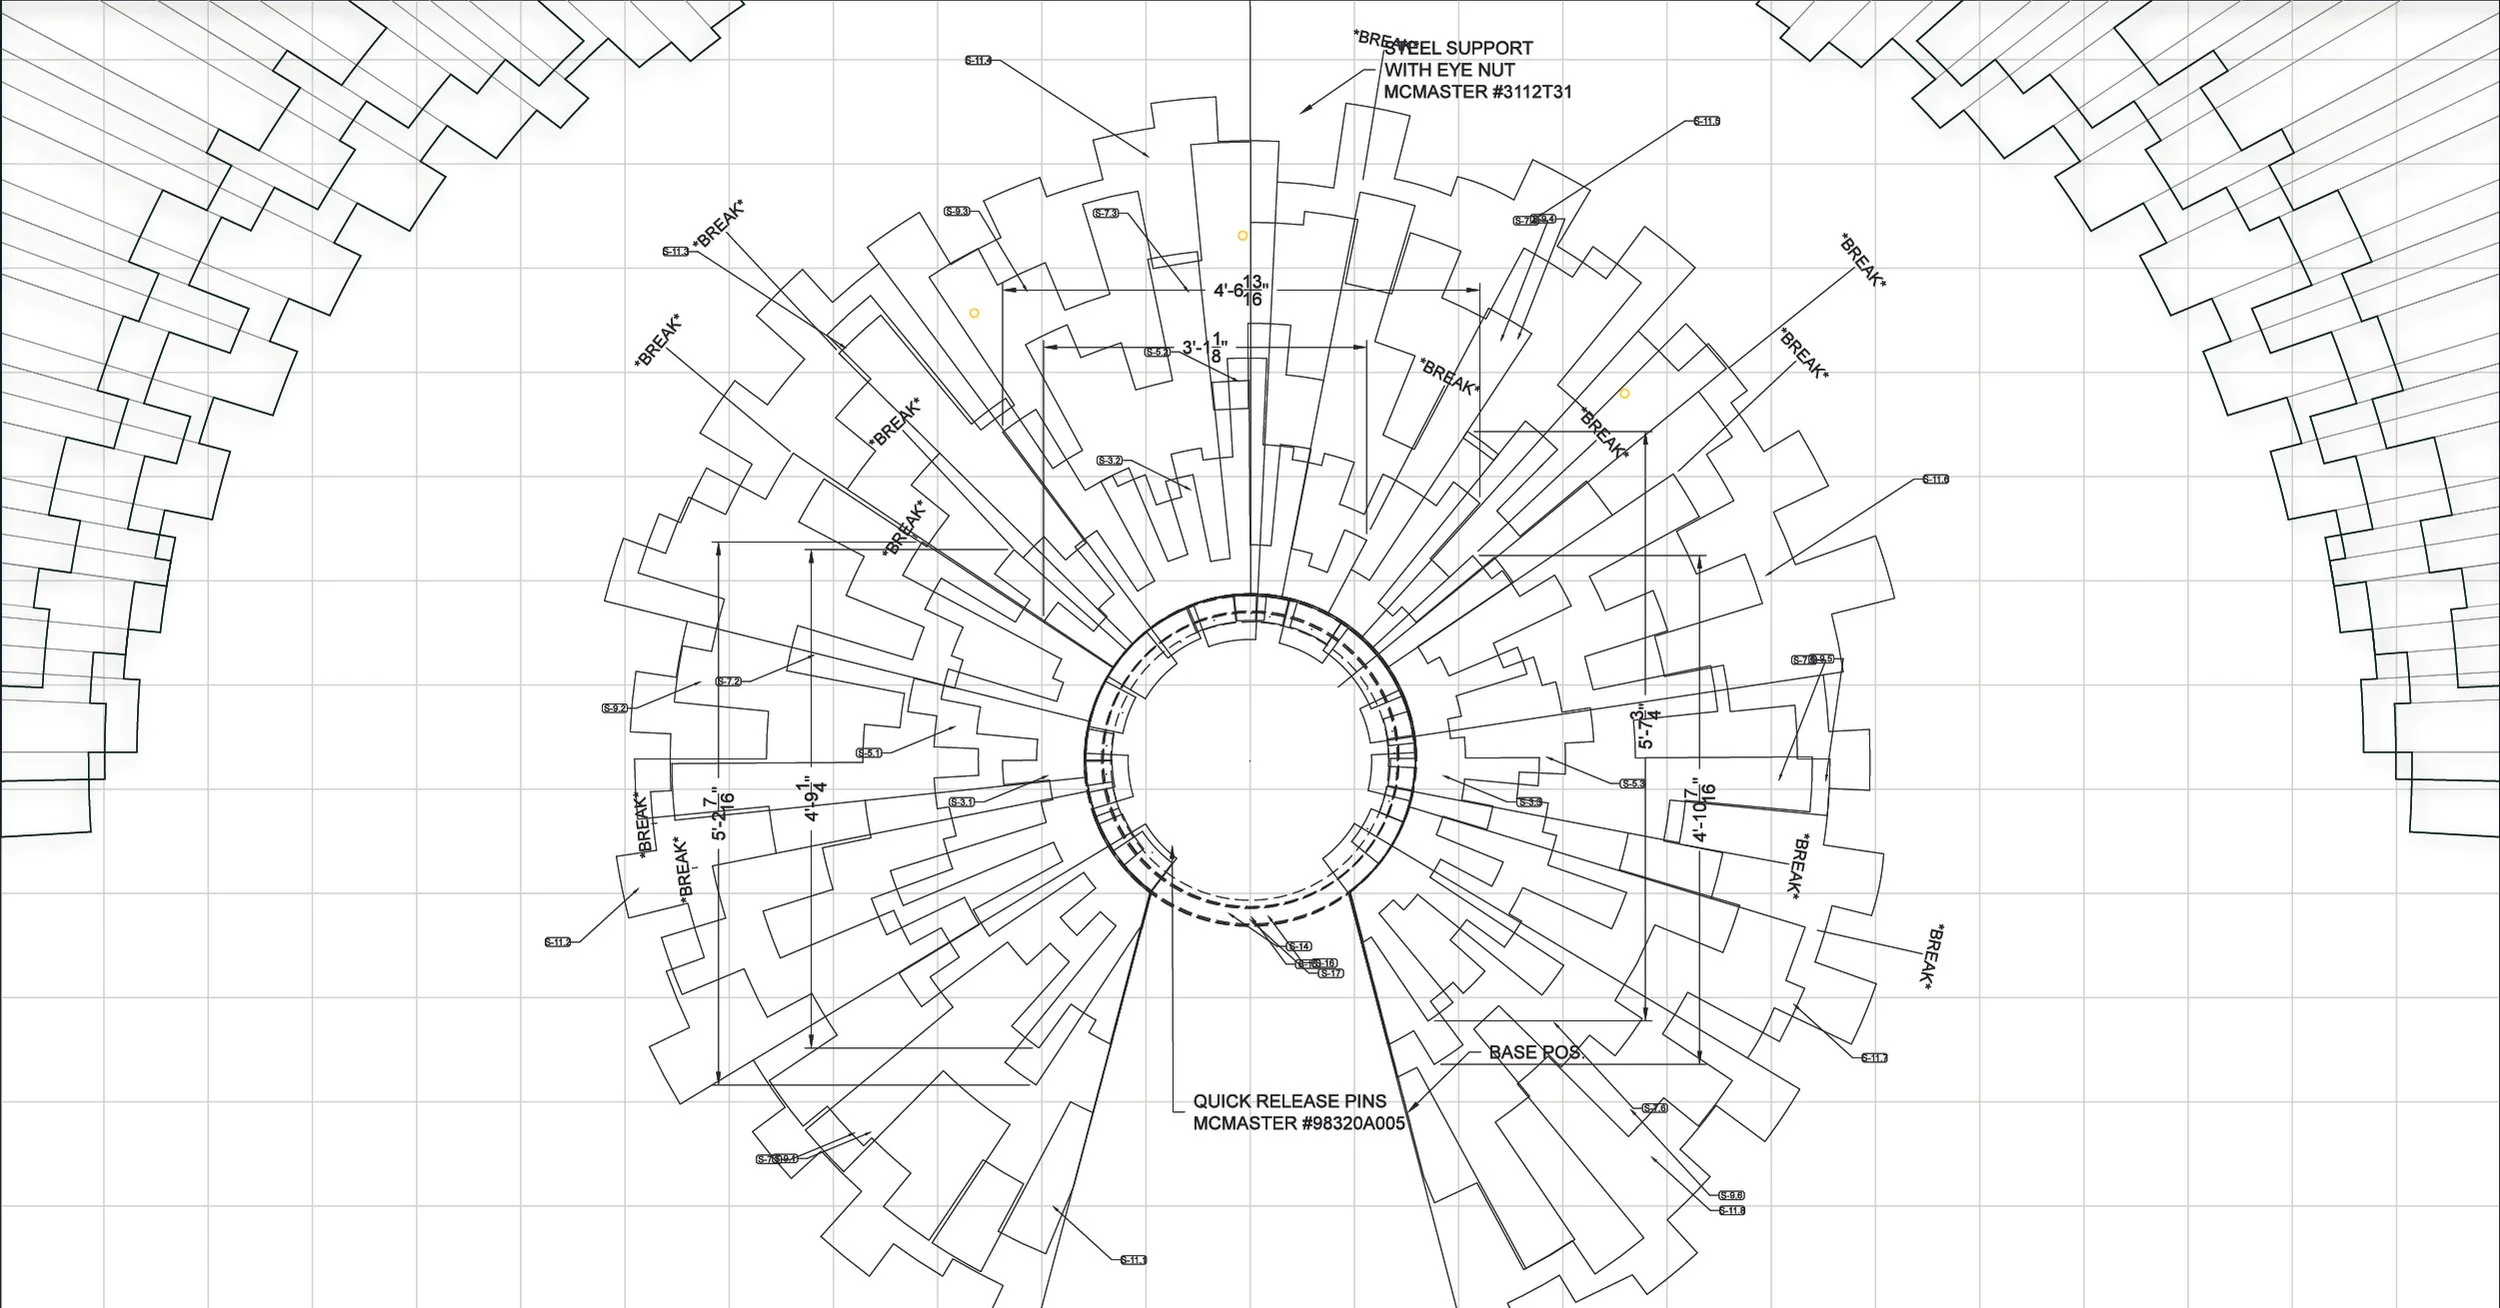
Tech Drawing (layered)
In collaboration with our vendor, I determined size, number of pieces per each layer, and verified tech drawings
-
![]()
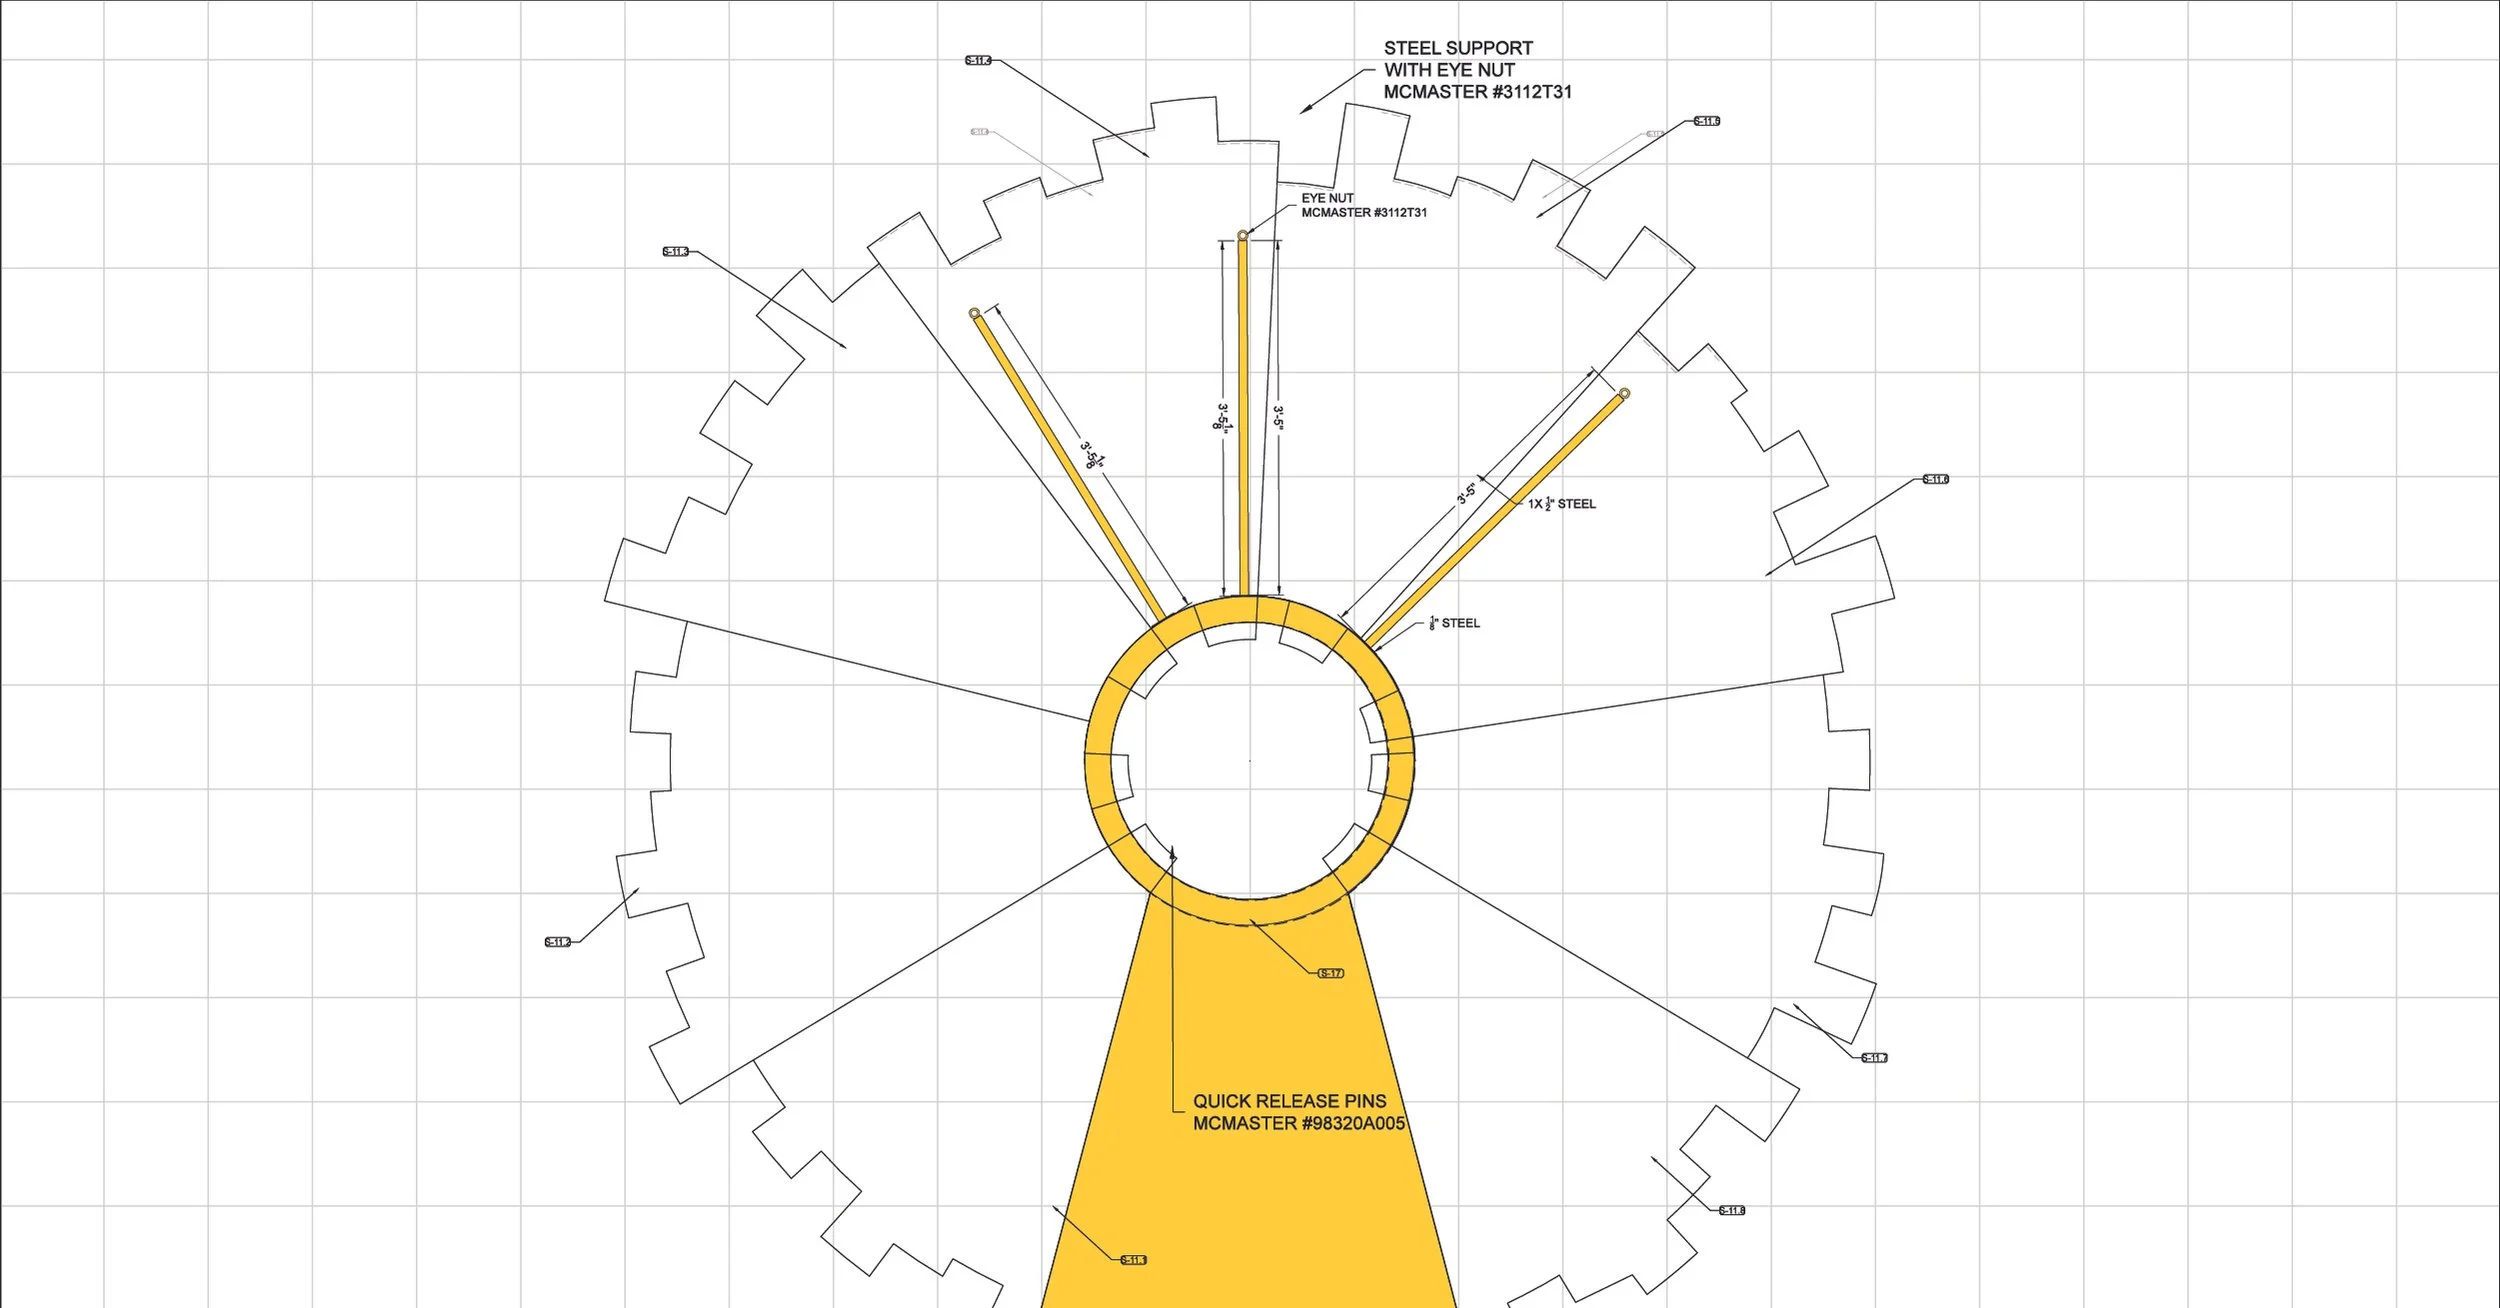
Base Frame Structure
In collaboration with our vendor, we created a structure that would be strong/sturdy enough to bare the weight of all the acrylic layers, and stabilize the entire structure vertically.
-
![]()
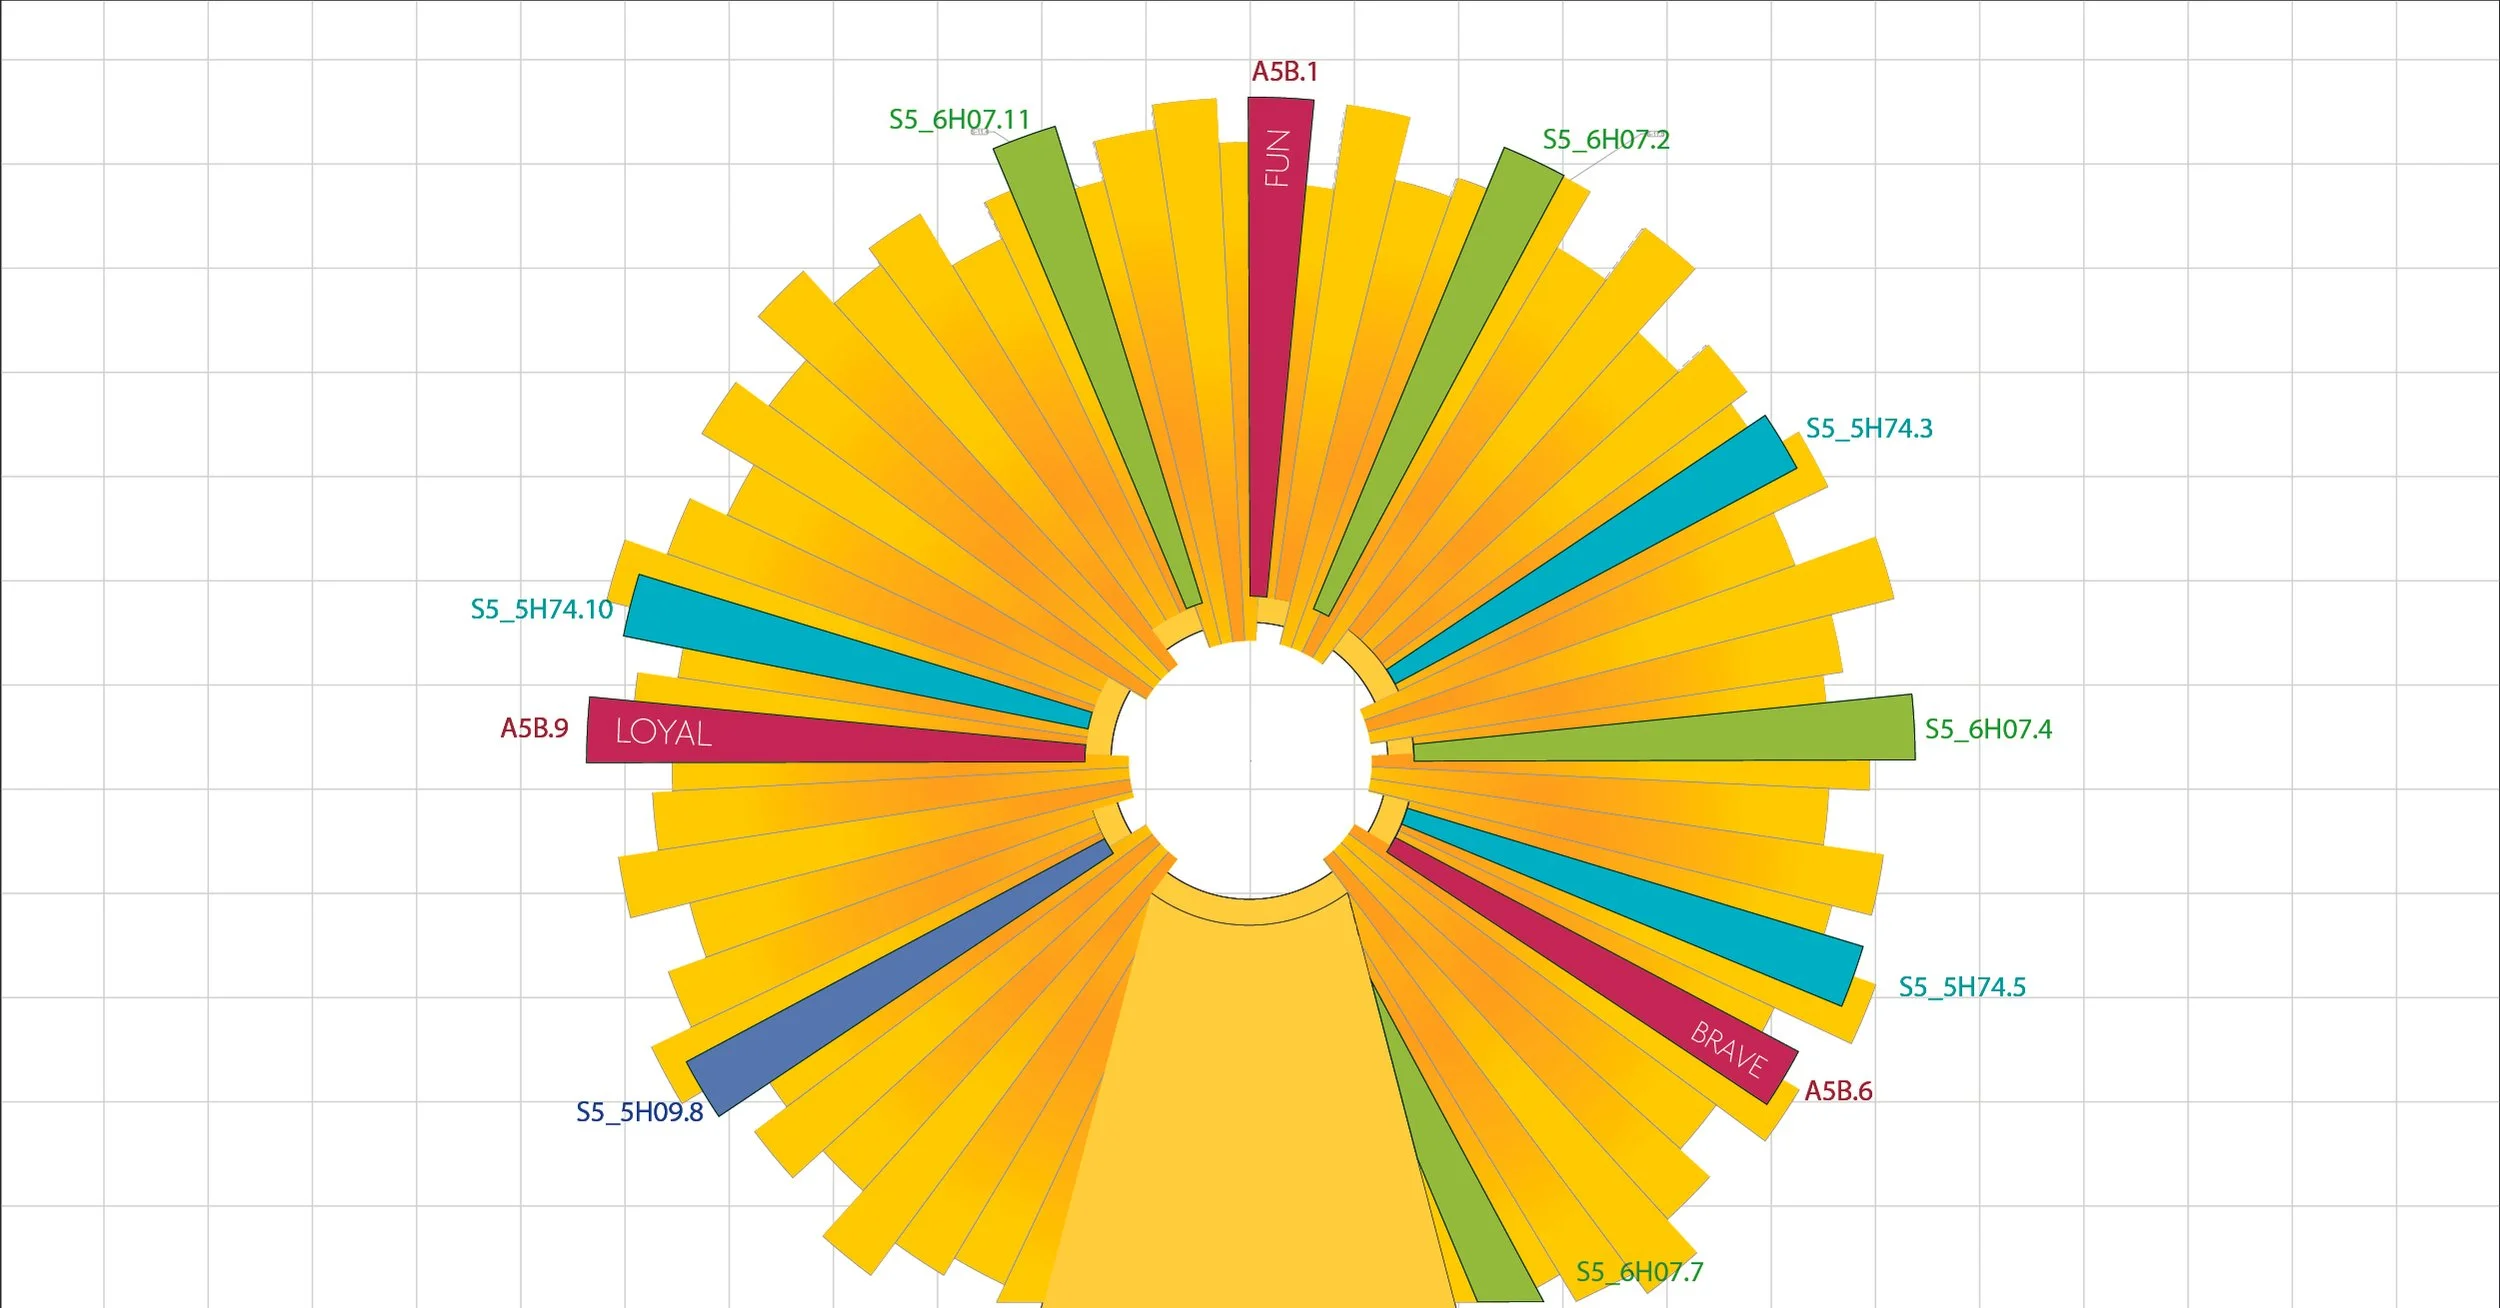
Sun: Layer 5
Combination of 4-color printed clear acrylic (yellow gradient)—etched for dimensionality—4-color printed berry (red) clear acrylic rays with white vinyl lettering applied, and bright colored Satinice acrylic rays
-
![]()
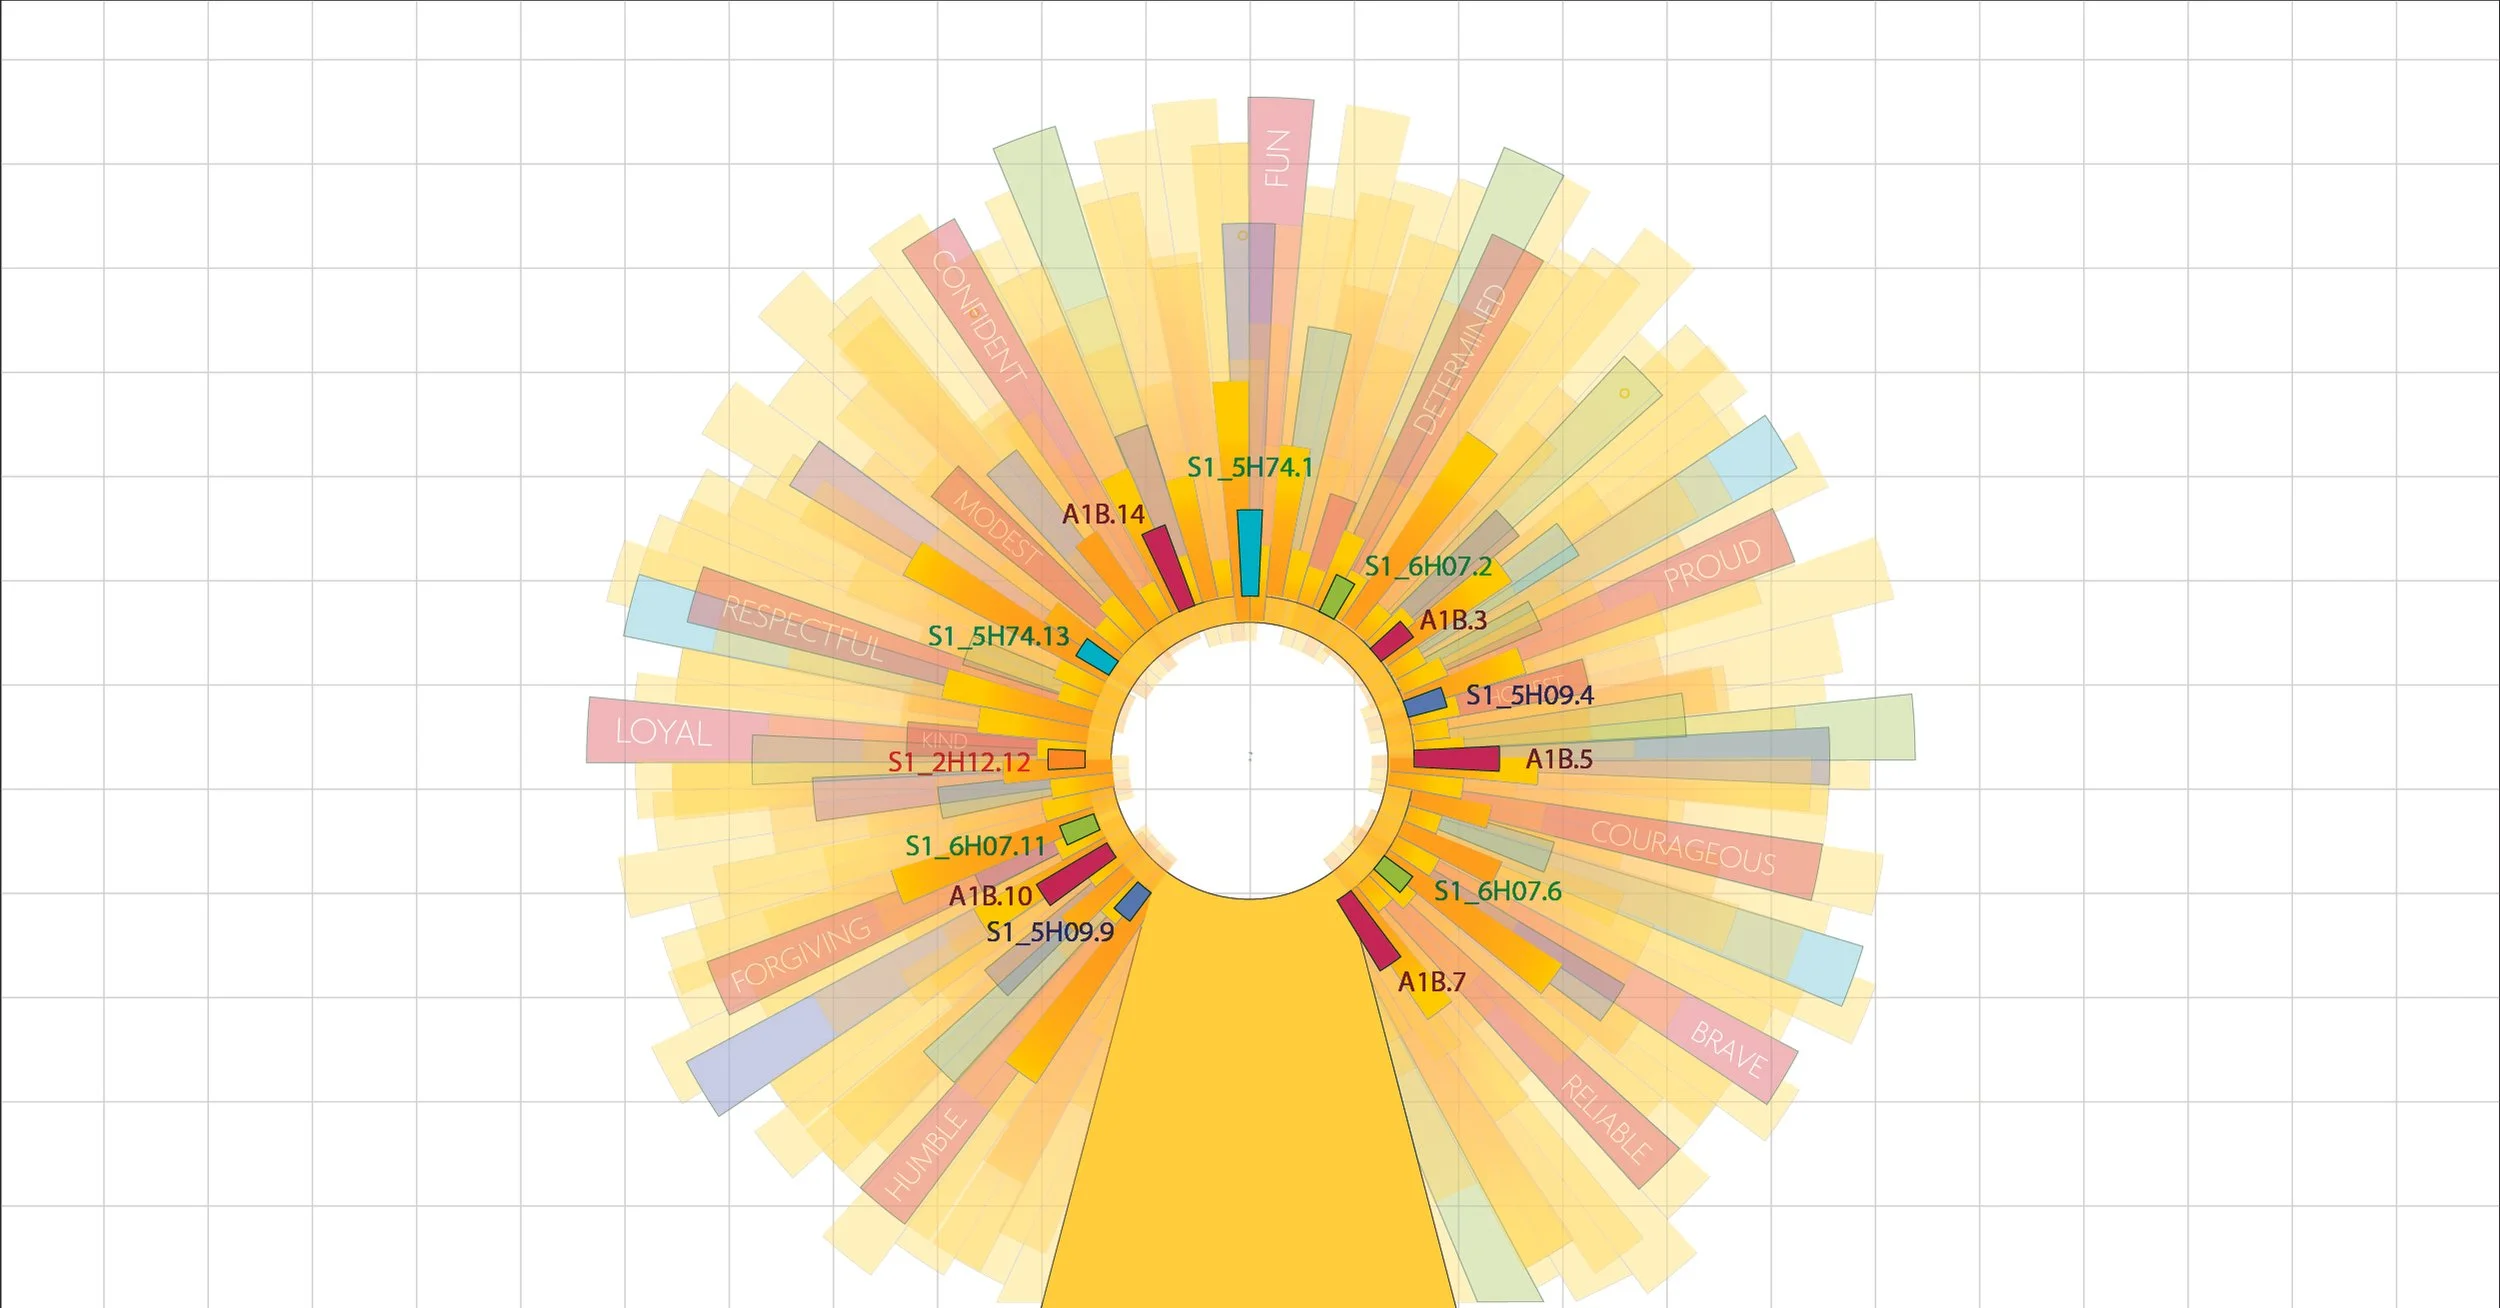
Sun: Layer 4
Combination of 4-color printed clear acrylic (yellow gradient)—etched for dimensionality—4-color printed berry (red) clear acrylic rays with white vinyl lettering applied, and bright colored Satinice acrylic rays
-
![]()
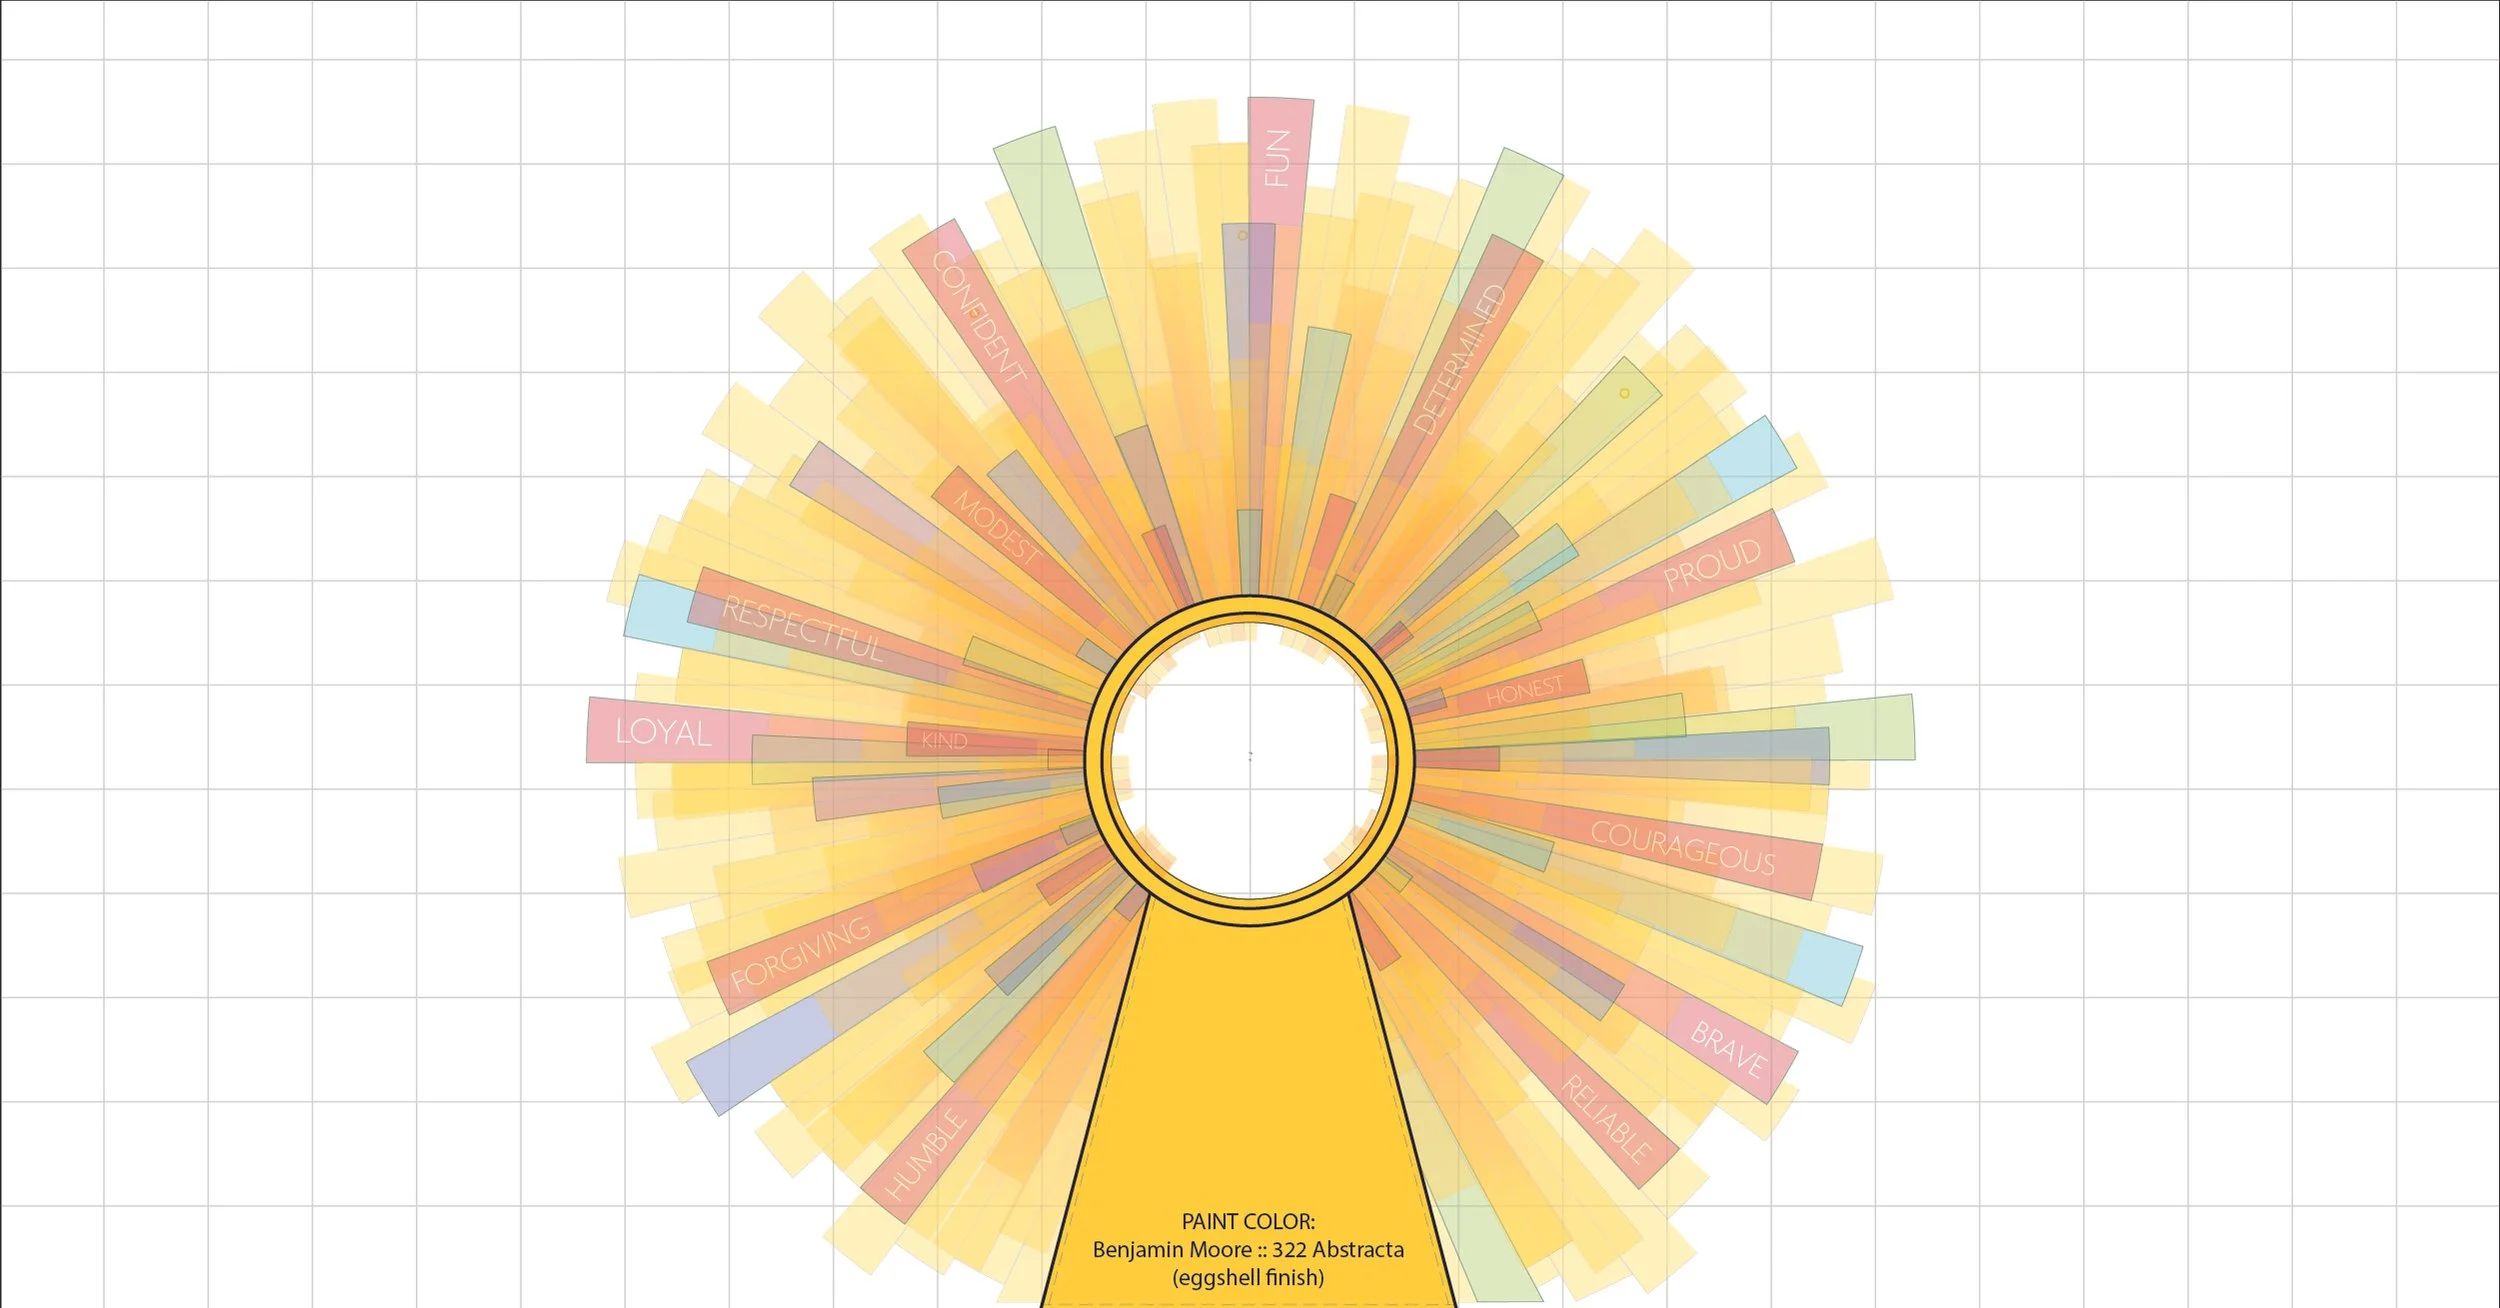
Sun: Layer 3
Combination of 4-color printed clear acrylic (yellow gradient)—etched for dimensionality—4-color printed berry (red) clear acrylic rays with white vinyl lettering applied, and bright colored Satinice acrylic rays
-
![]()
Sun: Layer 2
Combination of 4-color printed clear acrylic (yellow gradient)—etched for dimensionality—4-color printed berry (red) clear acrylic rays with white vinyl lettering applied, and bright colored Satinice acrylic rays
-
![]()
Sun: Layer 1
Combination of 4-color printed clear acrylic (yellow gradient)—etched for dimensionality—4-color printed berry (red) clear acrylic rays with white vinyl lettering applied, and bright colored Satinice acrylic rays
-
![]()
Sun: Front Frame Cover
Painted 3/4" MDF applied to front of frame
-
![]()
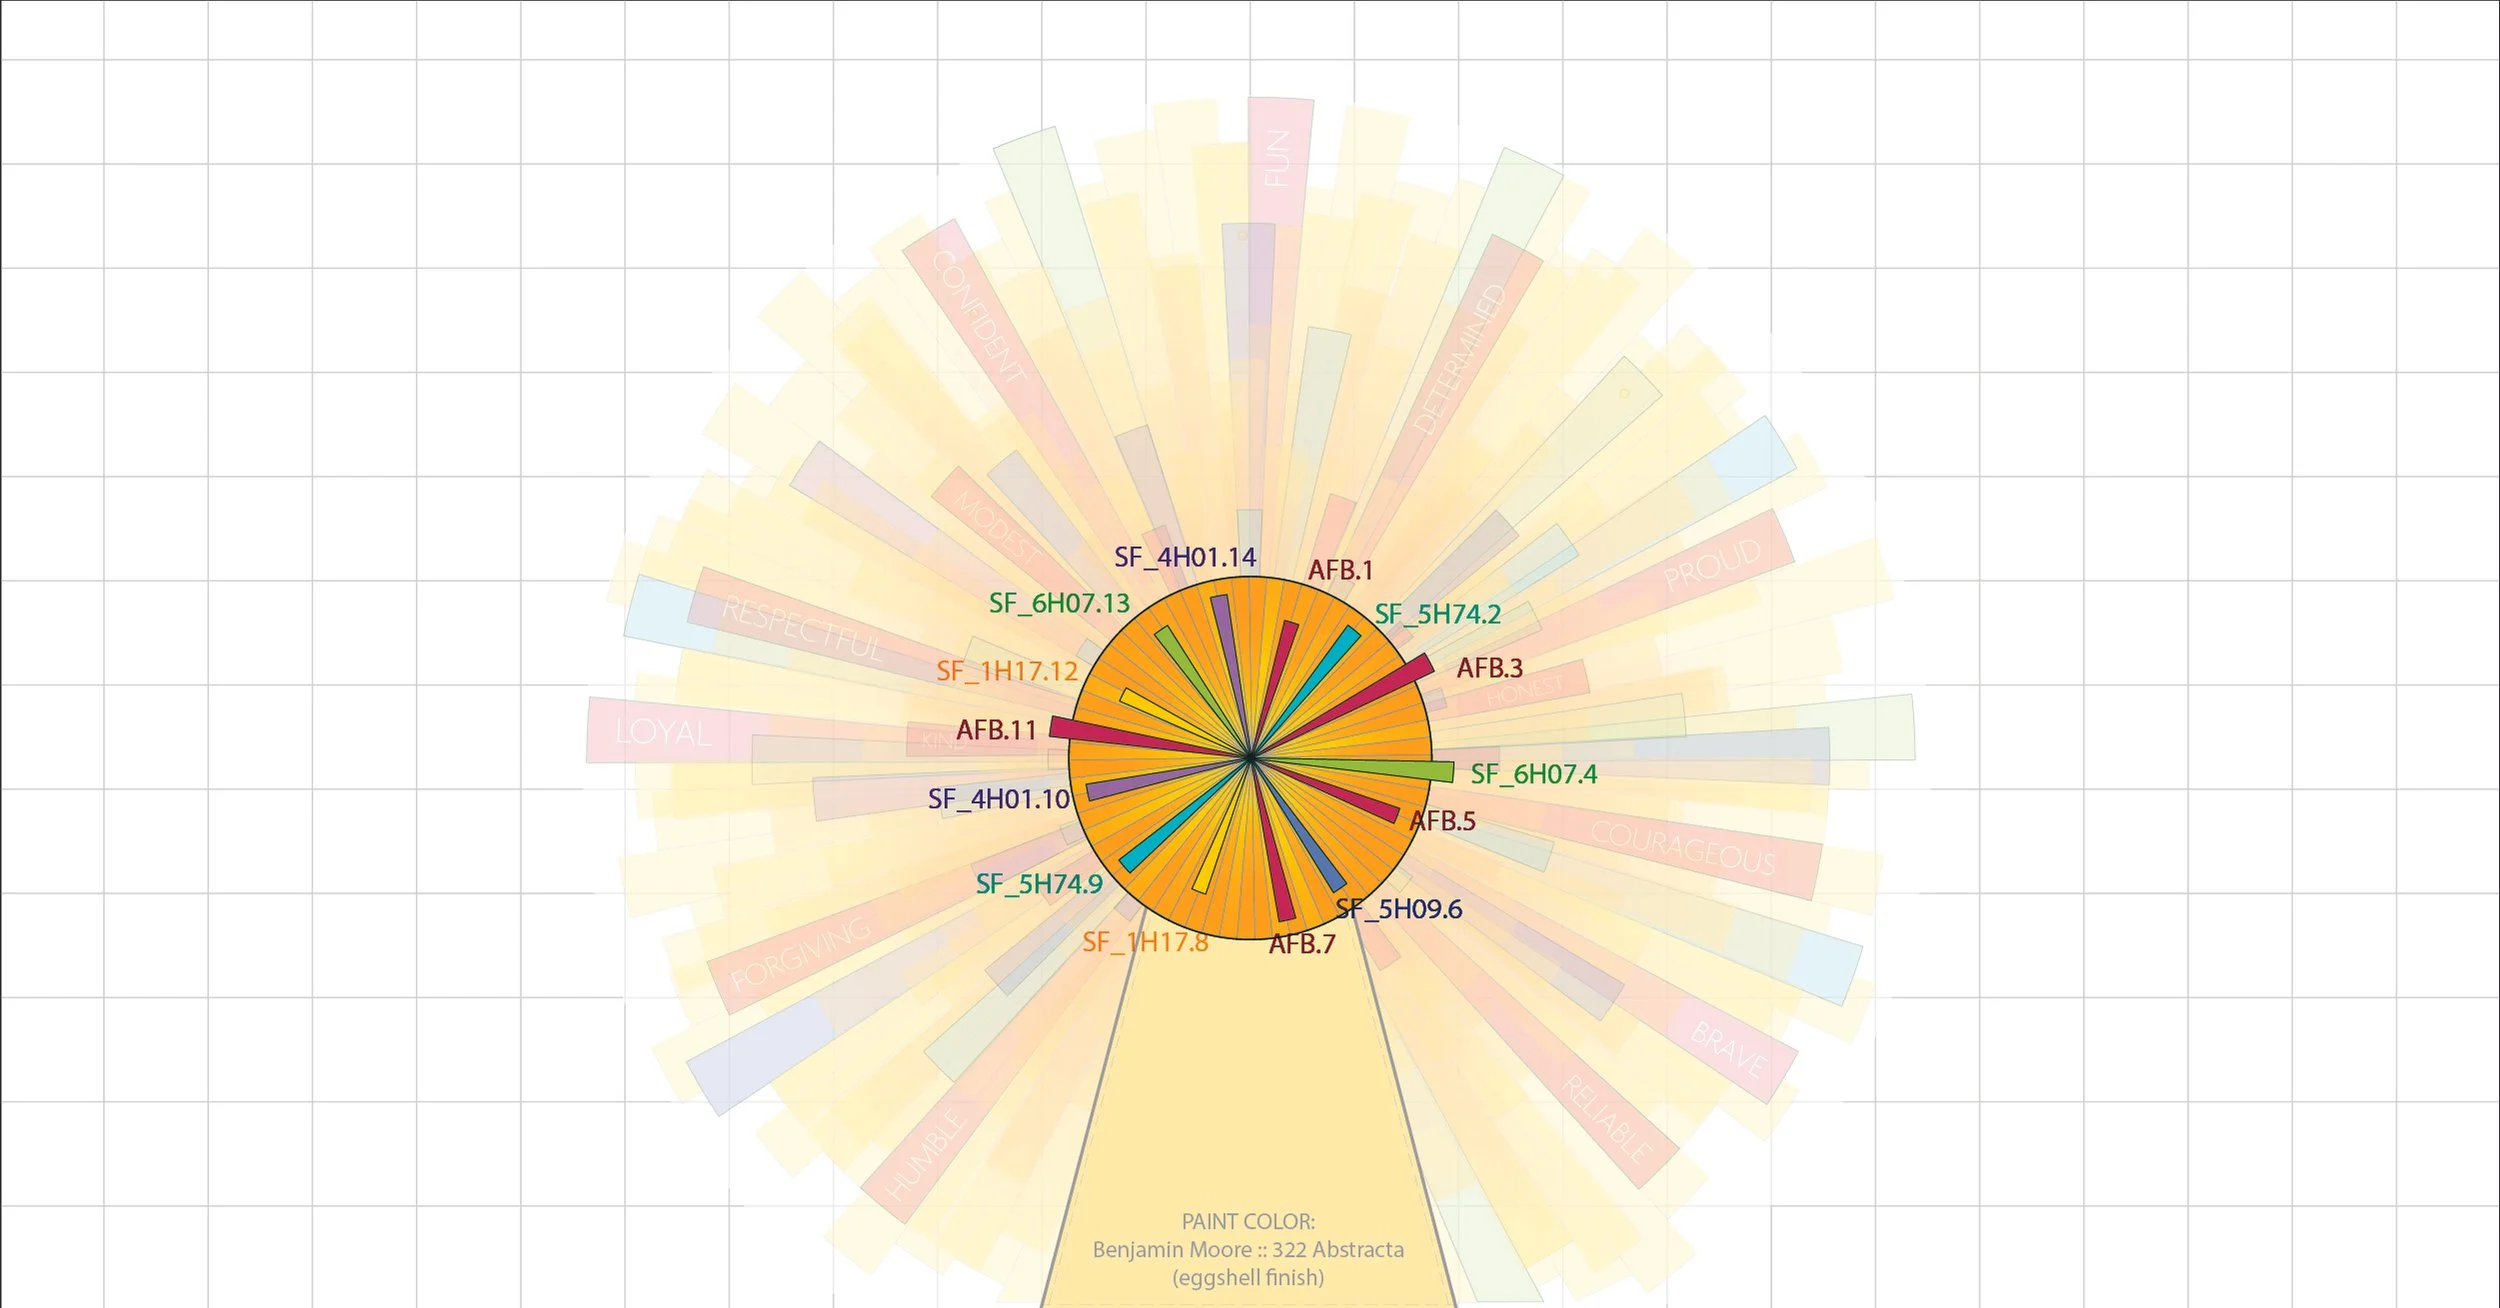
Sun: Face
Combination of 4-color printed clear acrylic (yellow gradient)—etched for dimensionality—4-color printed berry (red) clear acrylic rays, and bright colored Satinice acrylic rays
-
![]()
Corners: Layer 3
Combination of 4-color printed clear acrylic (yellow gradient)—etched for dimensionality—4-color printed berry (red) clear acrylic rays, and bright colored Satinice acrylic rays
-
![]()
Corners: Layer 2
Combination of 4-color printed clear acrylic (yellow gradient)—etched for dimensionality—4-color printed berry (red) clear acrylic rays, and bright colored Satinice acrylic rays
-
![]()
Corners: Layer 1
Combination of 4-color printed clear acrylic (yellow gradient)—etched for dimensionality—4-color printed berry (red) clear acrylic rays, and bright colored Satinice acrylic rays
Installation Guide
-
![]()
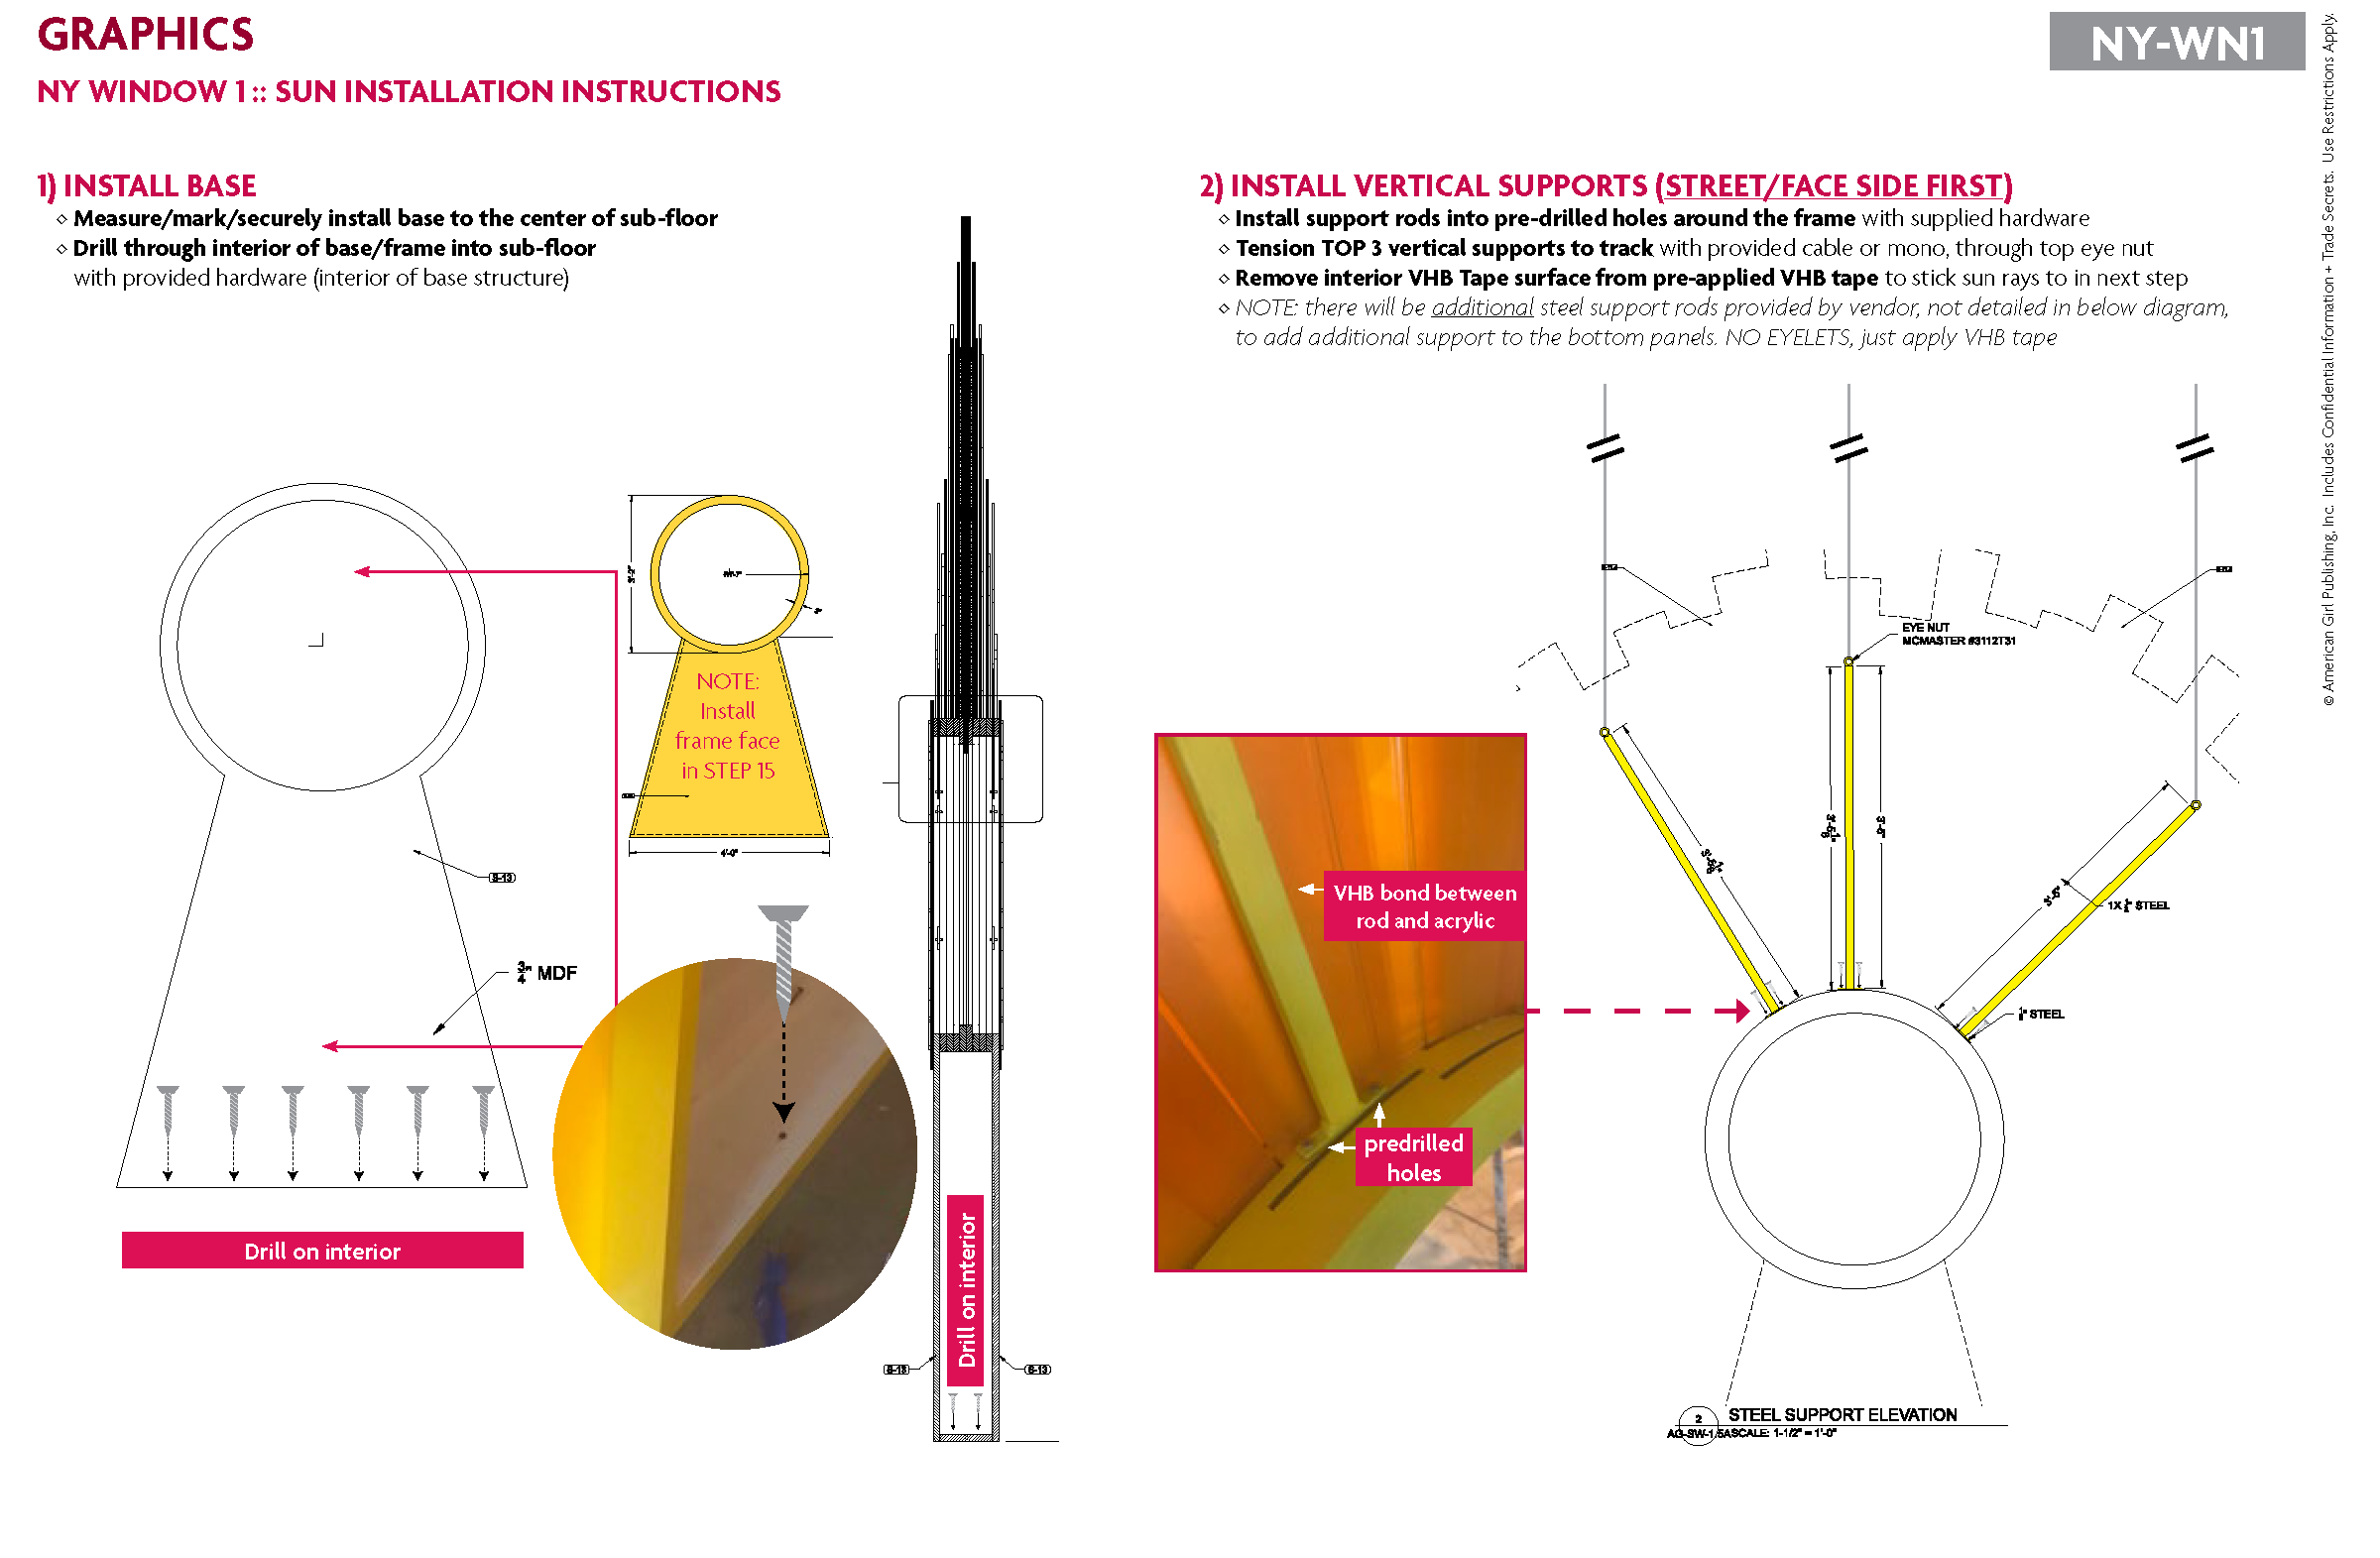
STEP 1+2: Install Guide
Instructional pages from the step-by-step window installation guide I created for our retail visual store team onsite
-
![]()
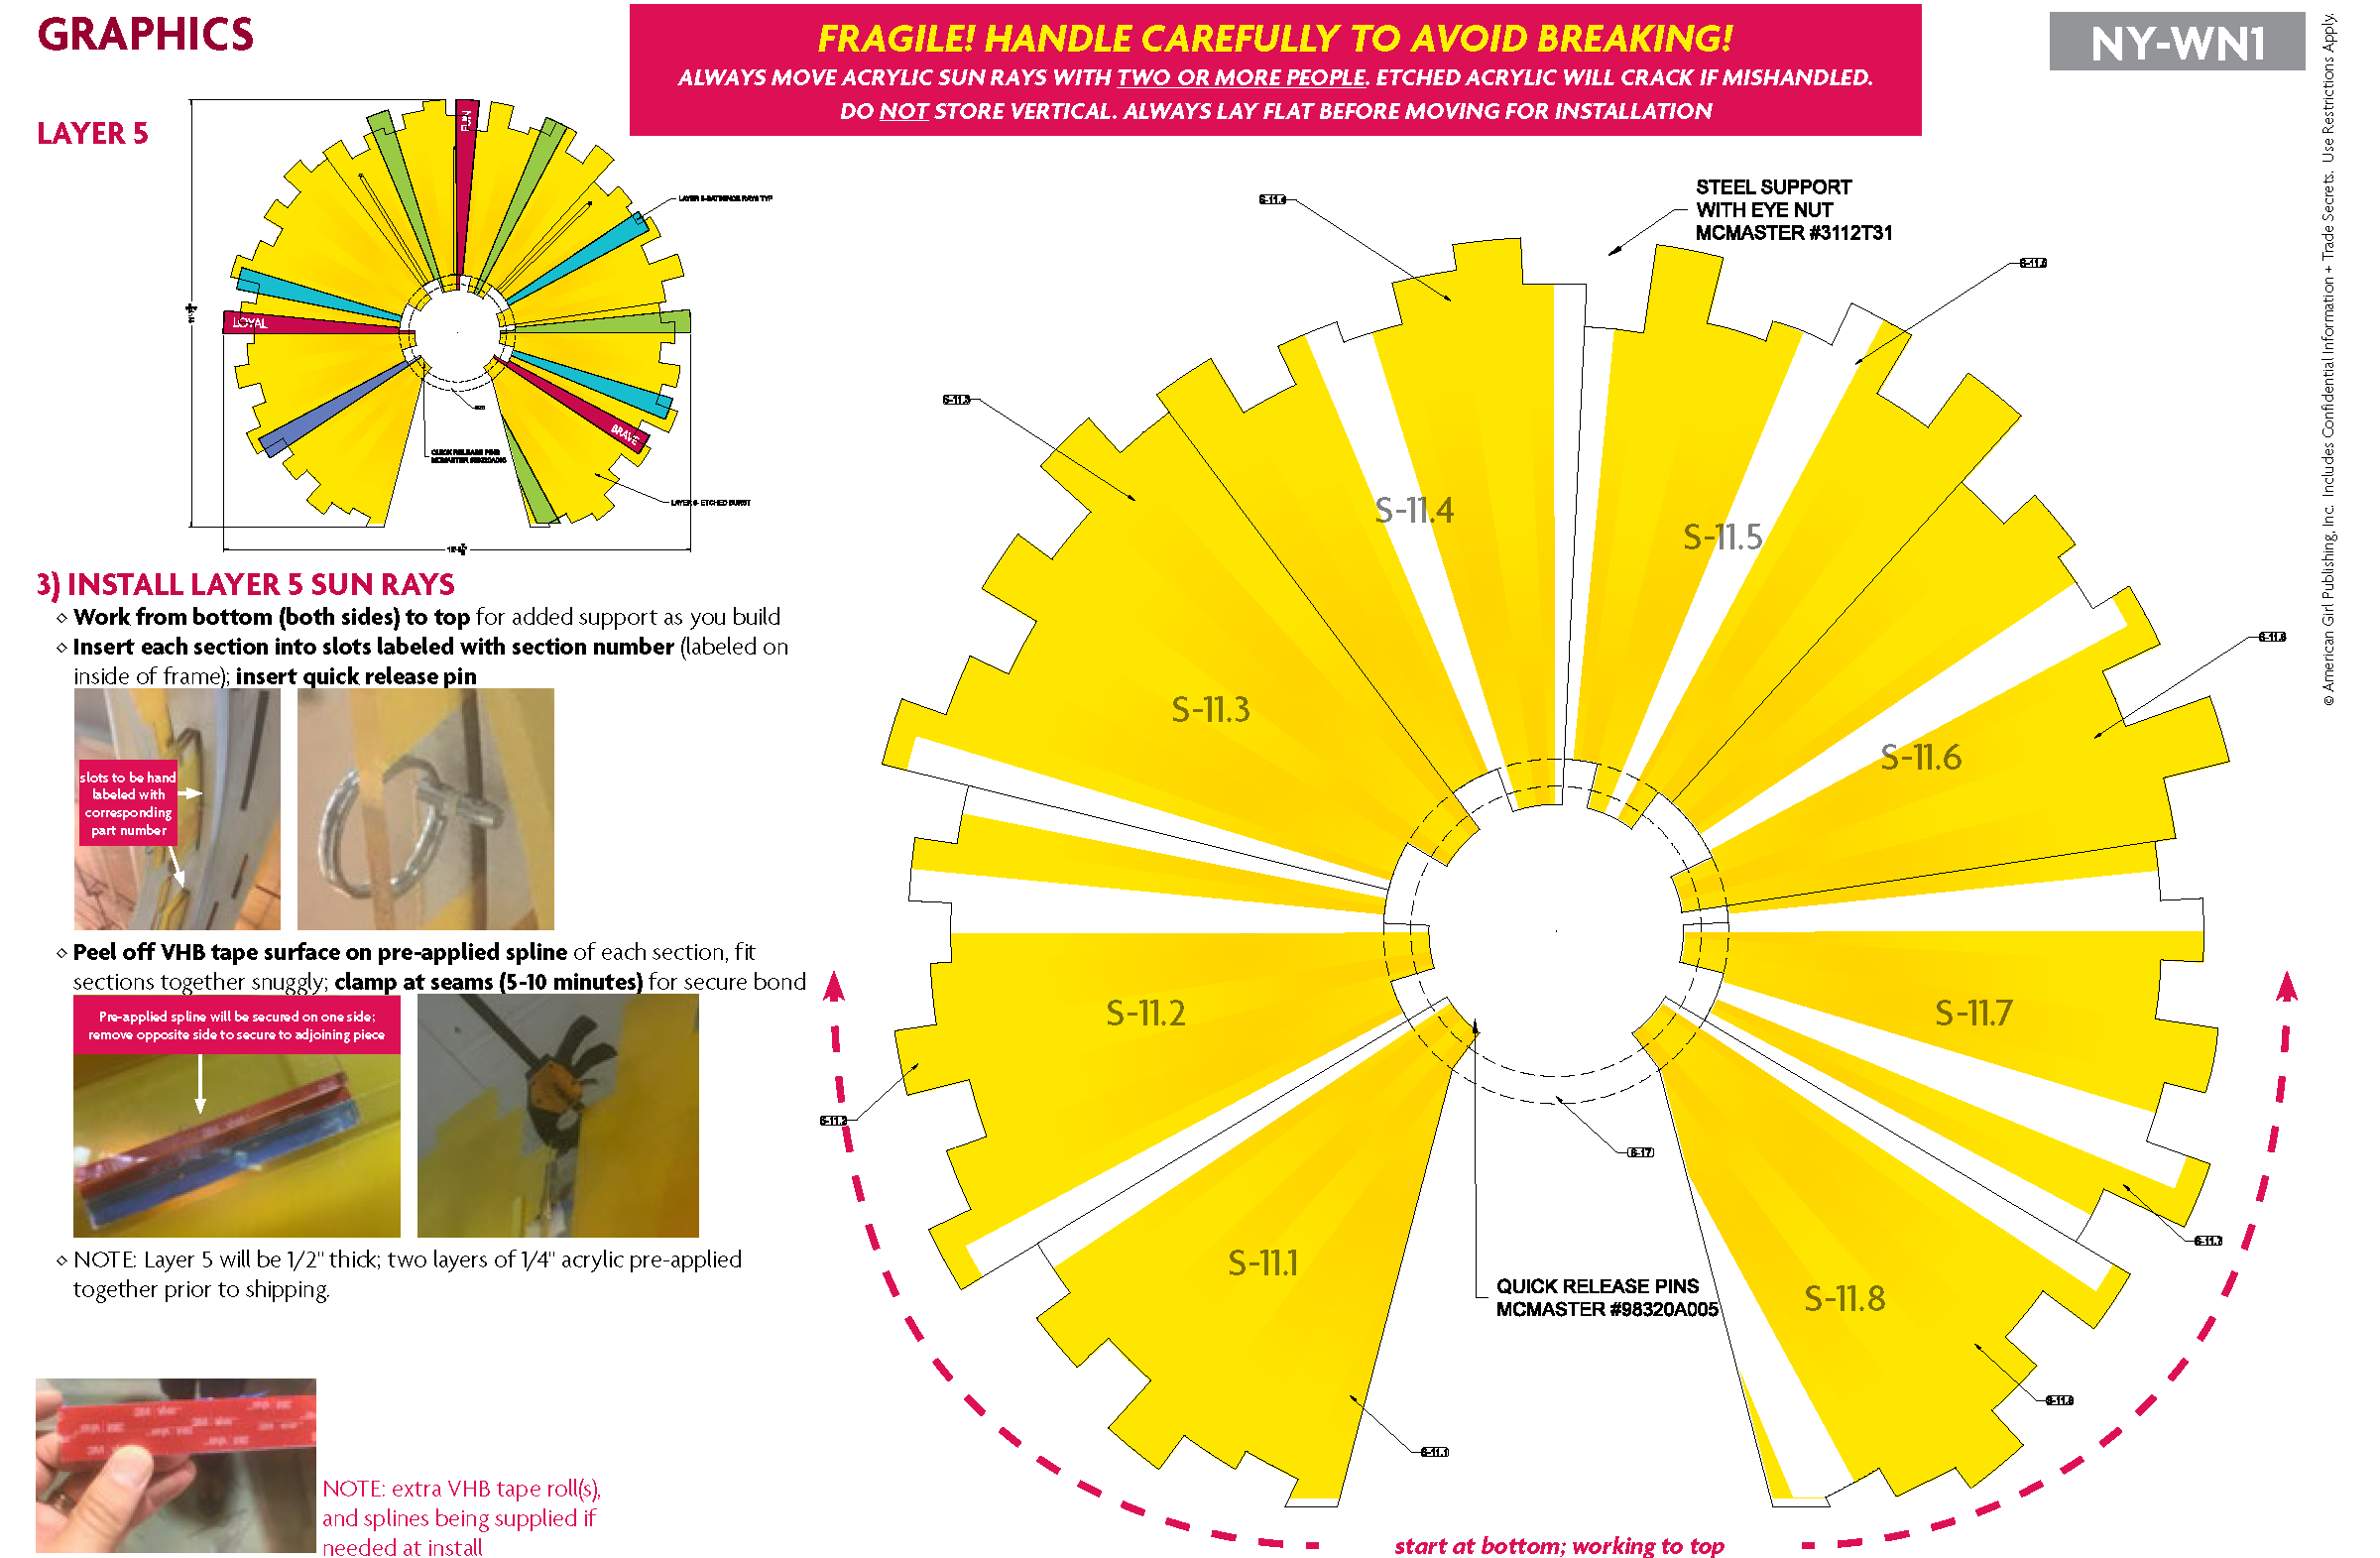
STEP 3: Install Guide
Instructional pages from the step-by-step window installation guide I created for our retail visual store team onsite
-
![]()
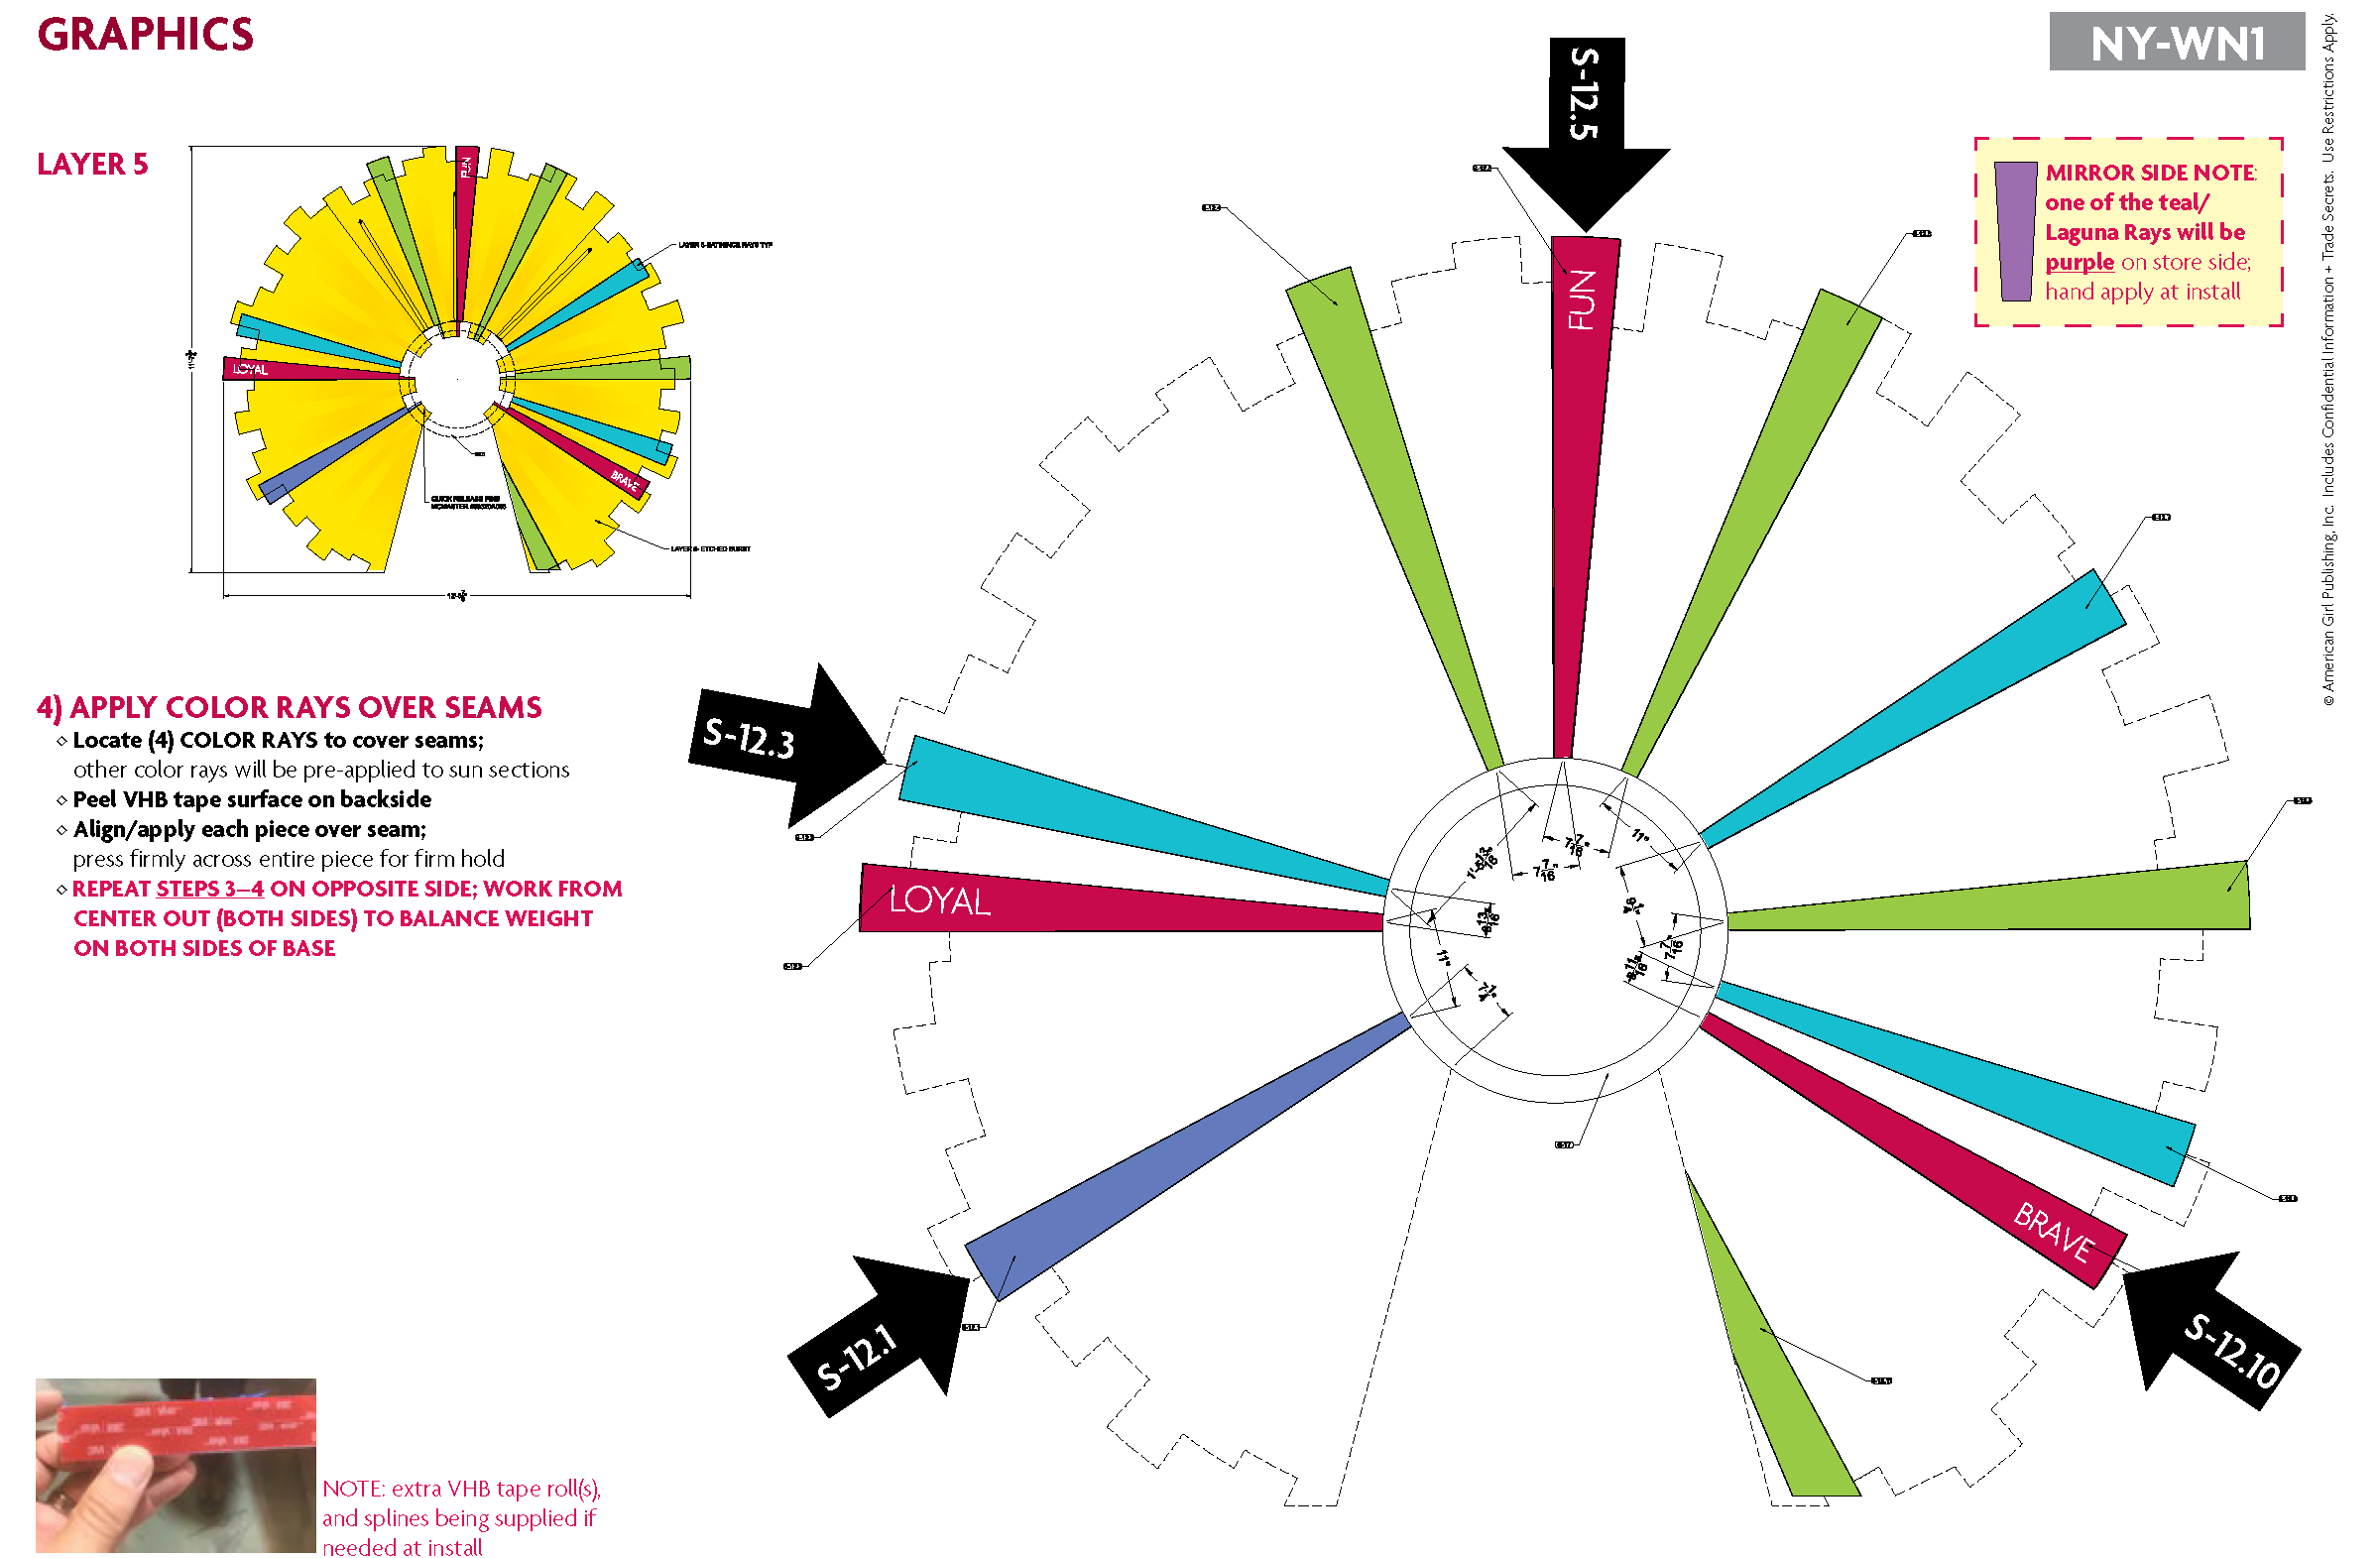
STEP 4: Install Guide
Instructional pages from the step-by-step window installation guide I created for our retail visual store team onsite
-
![]()
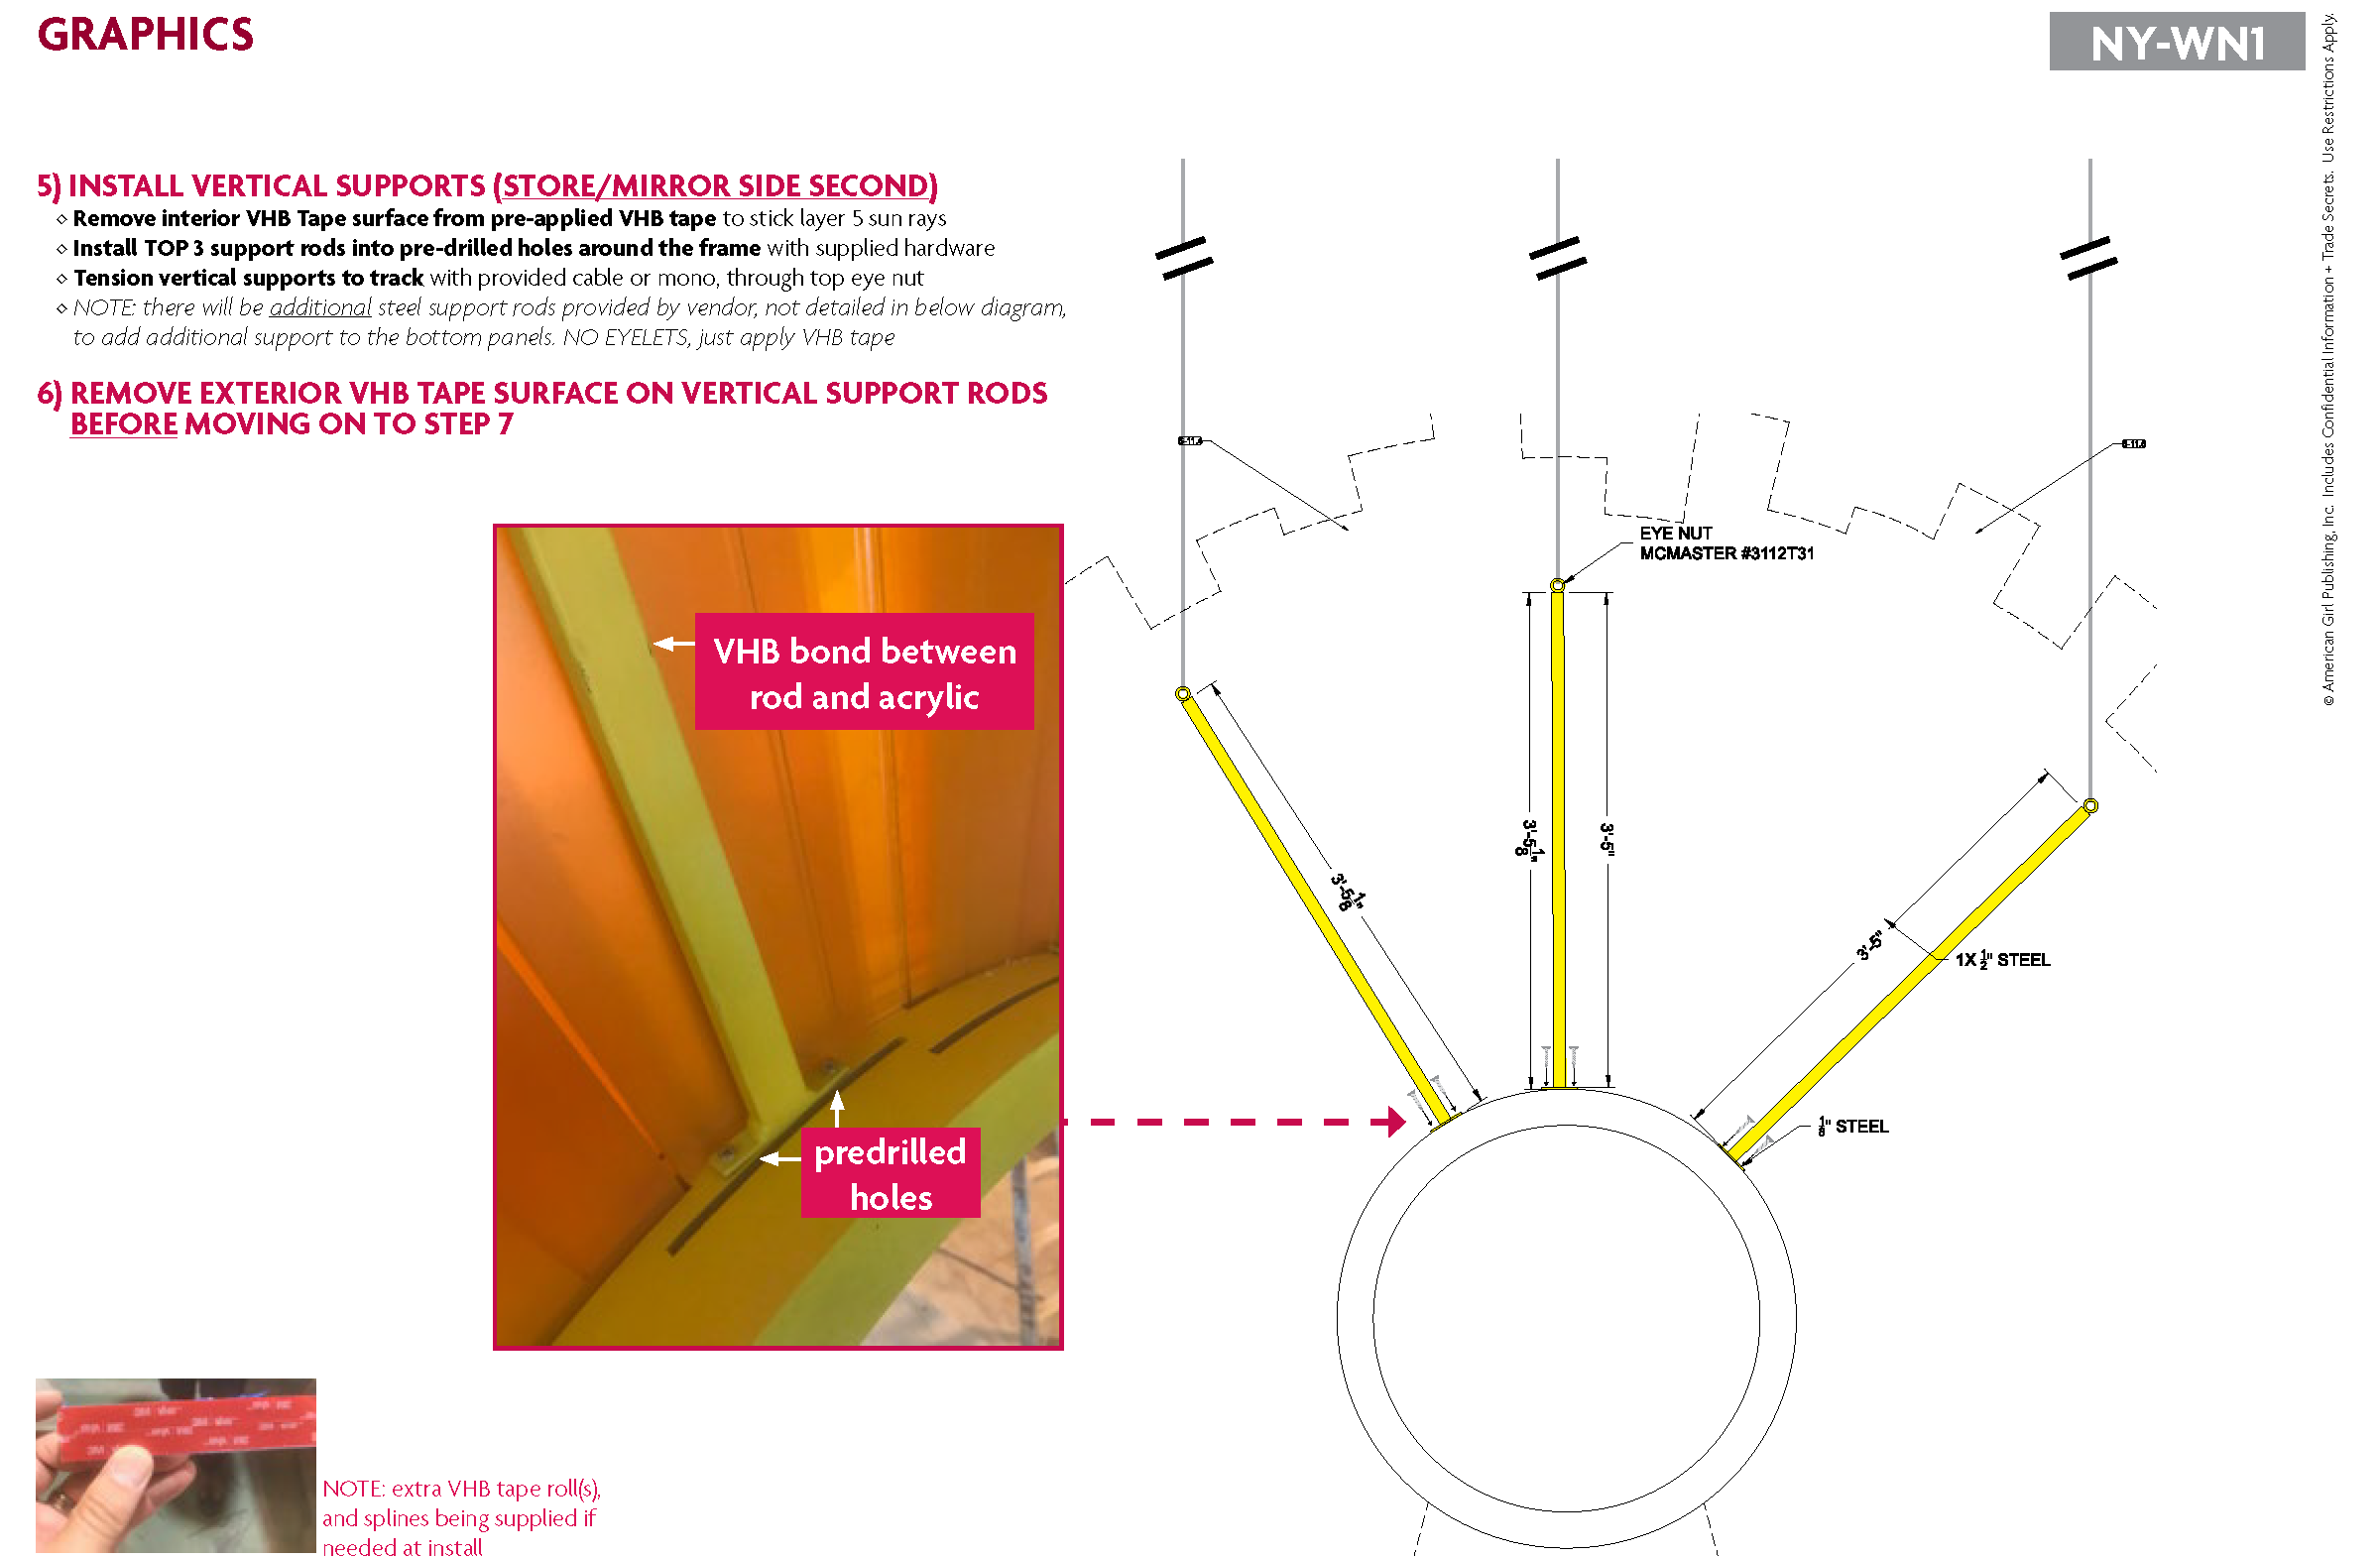
STEP 5+6: Install Guide
Instructional pages from the step-by-step window installation guide I created for our retail visual store team onsite
-
![]()
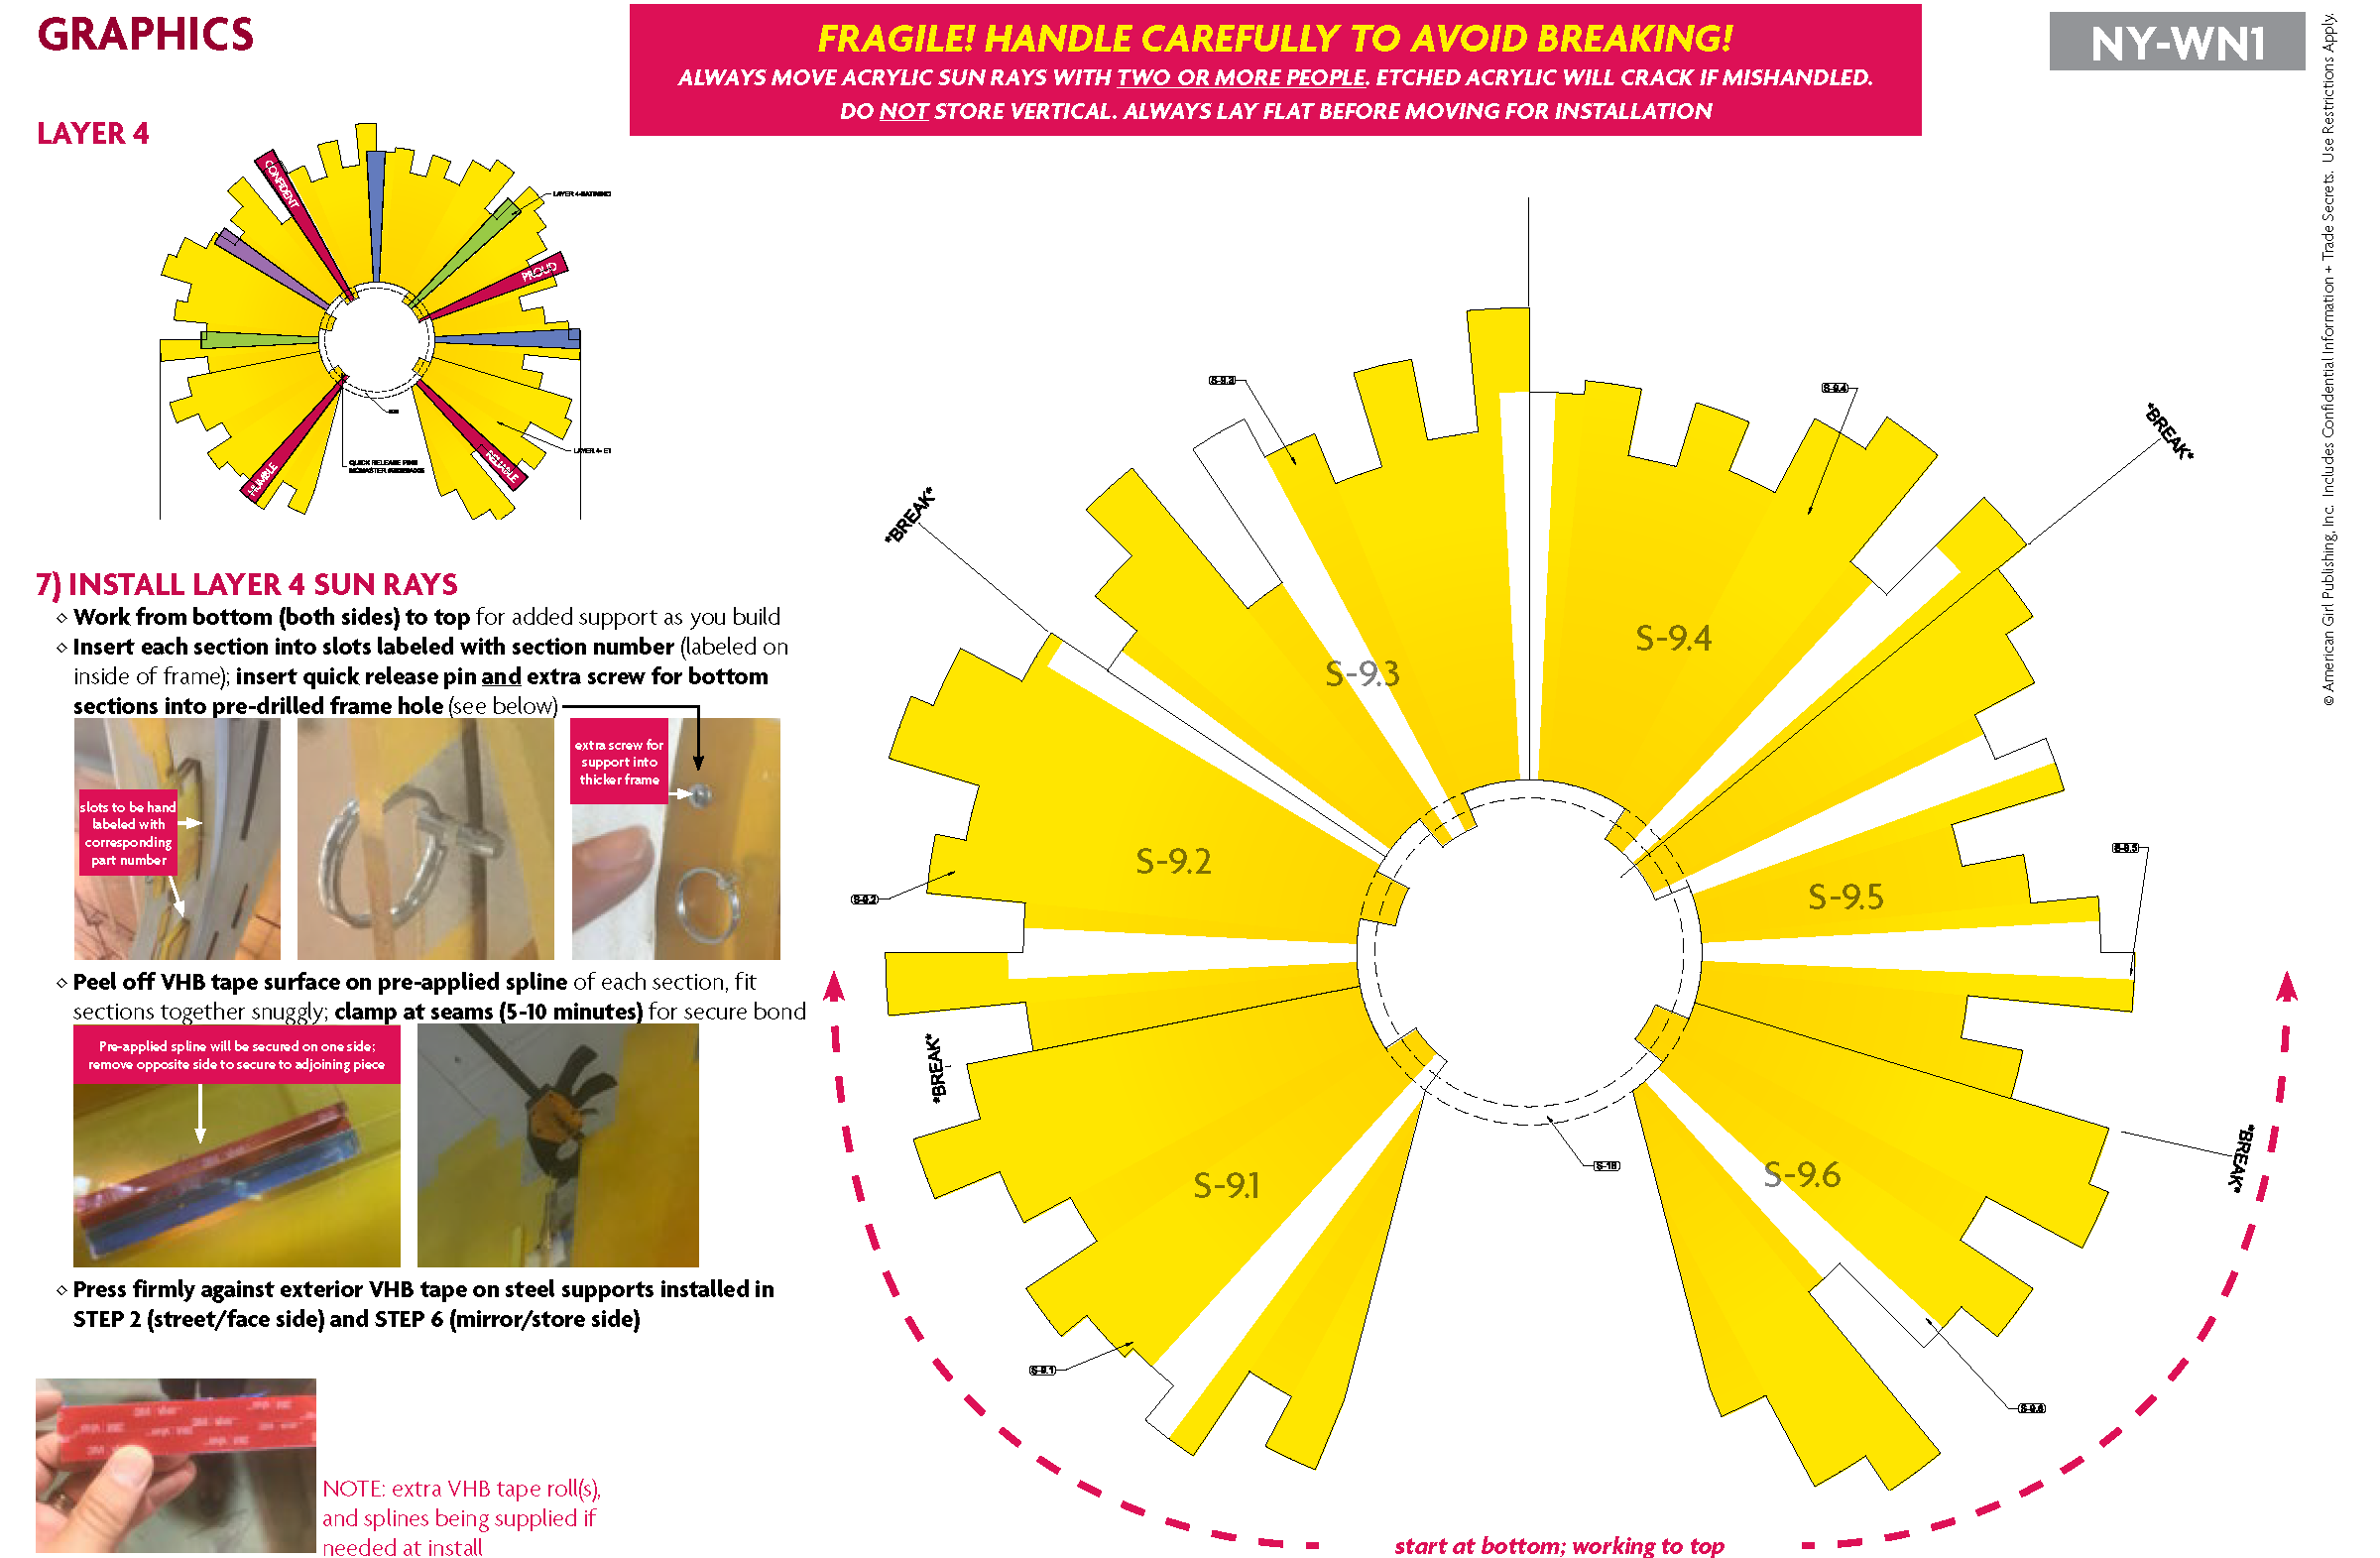
STEP 7: Install Guide
Instructional pages from the step-by-step window installation guide I created for our retail visual store team onsite
-
![]()
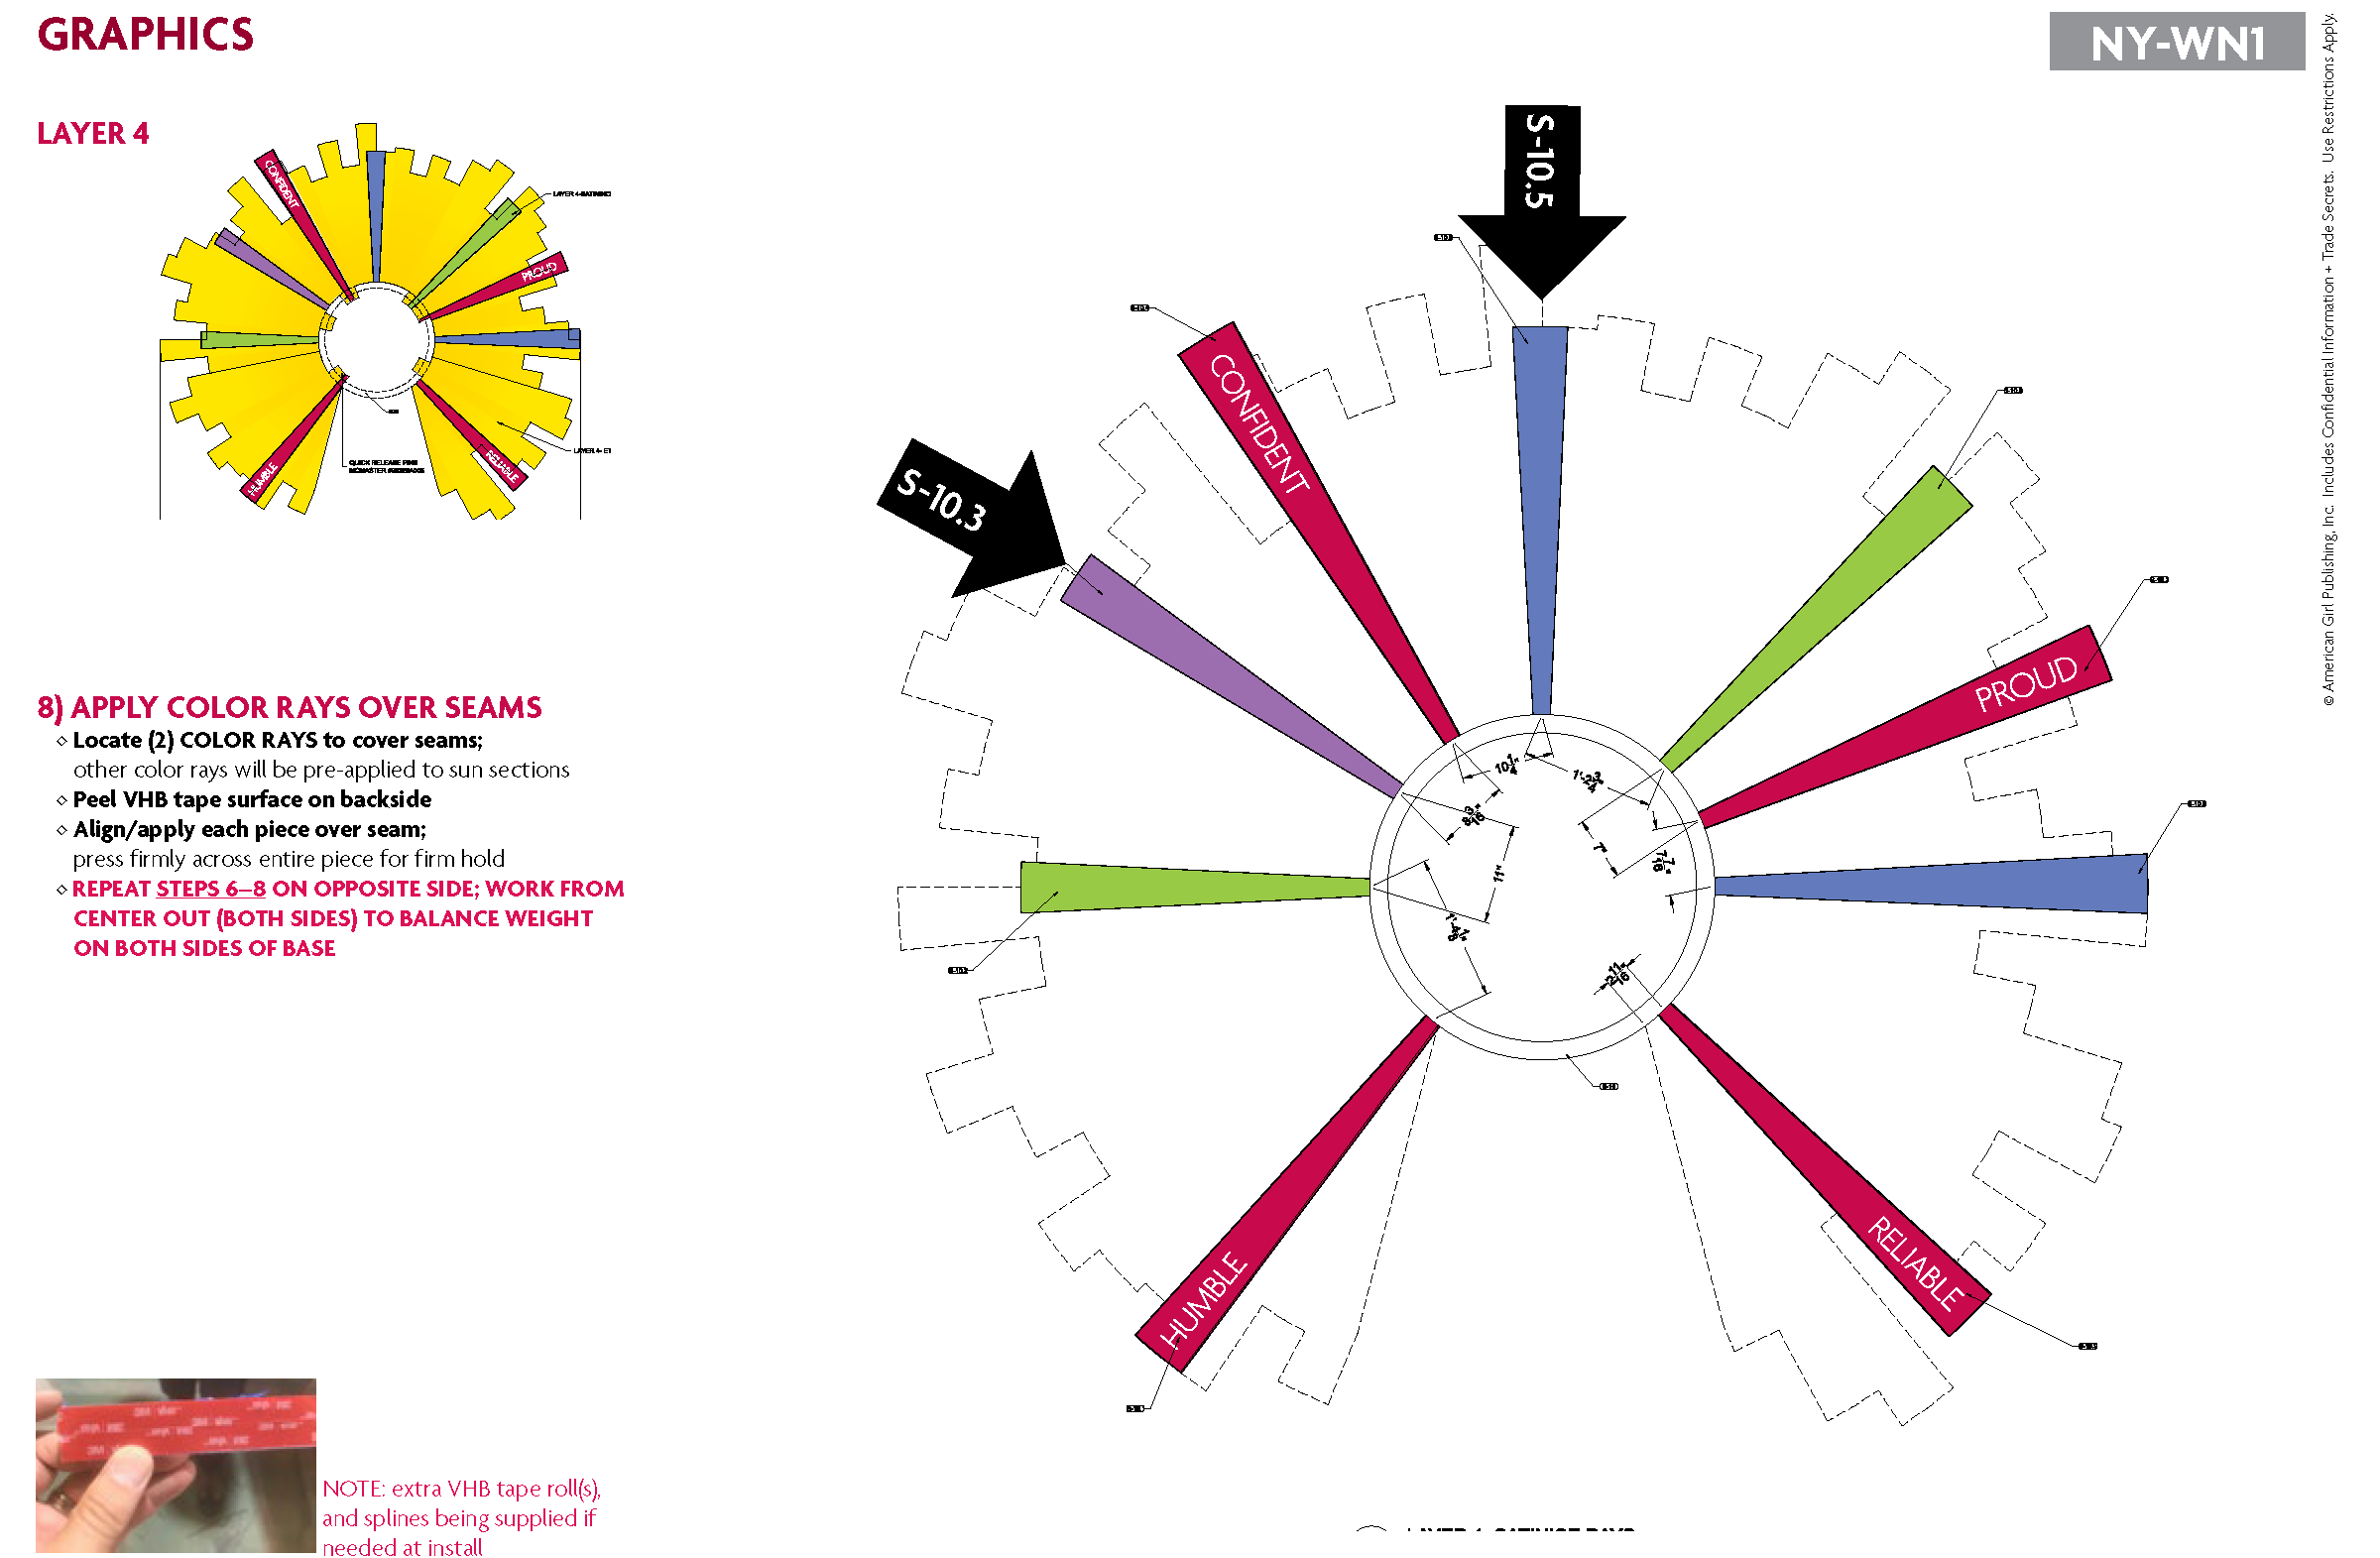
STEP 8: Install Guide
Instructional pages from the step-by-step window installation guide I created for our retail visual store team onsite
-
![]()
STEP 9: Install Guide
Instructional pages from the step-by-step window installation guide I created for our retail visual store team onsite
-
![]()
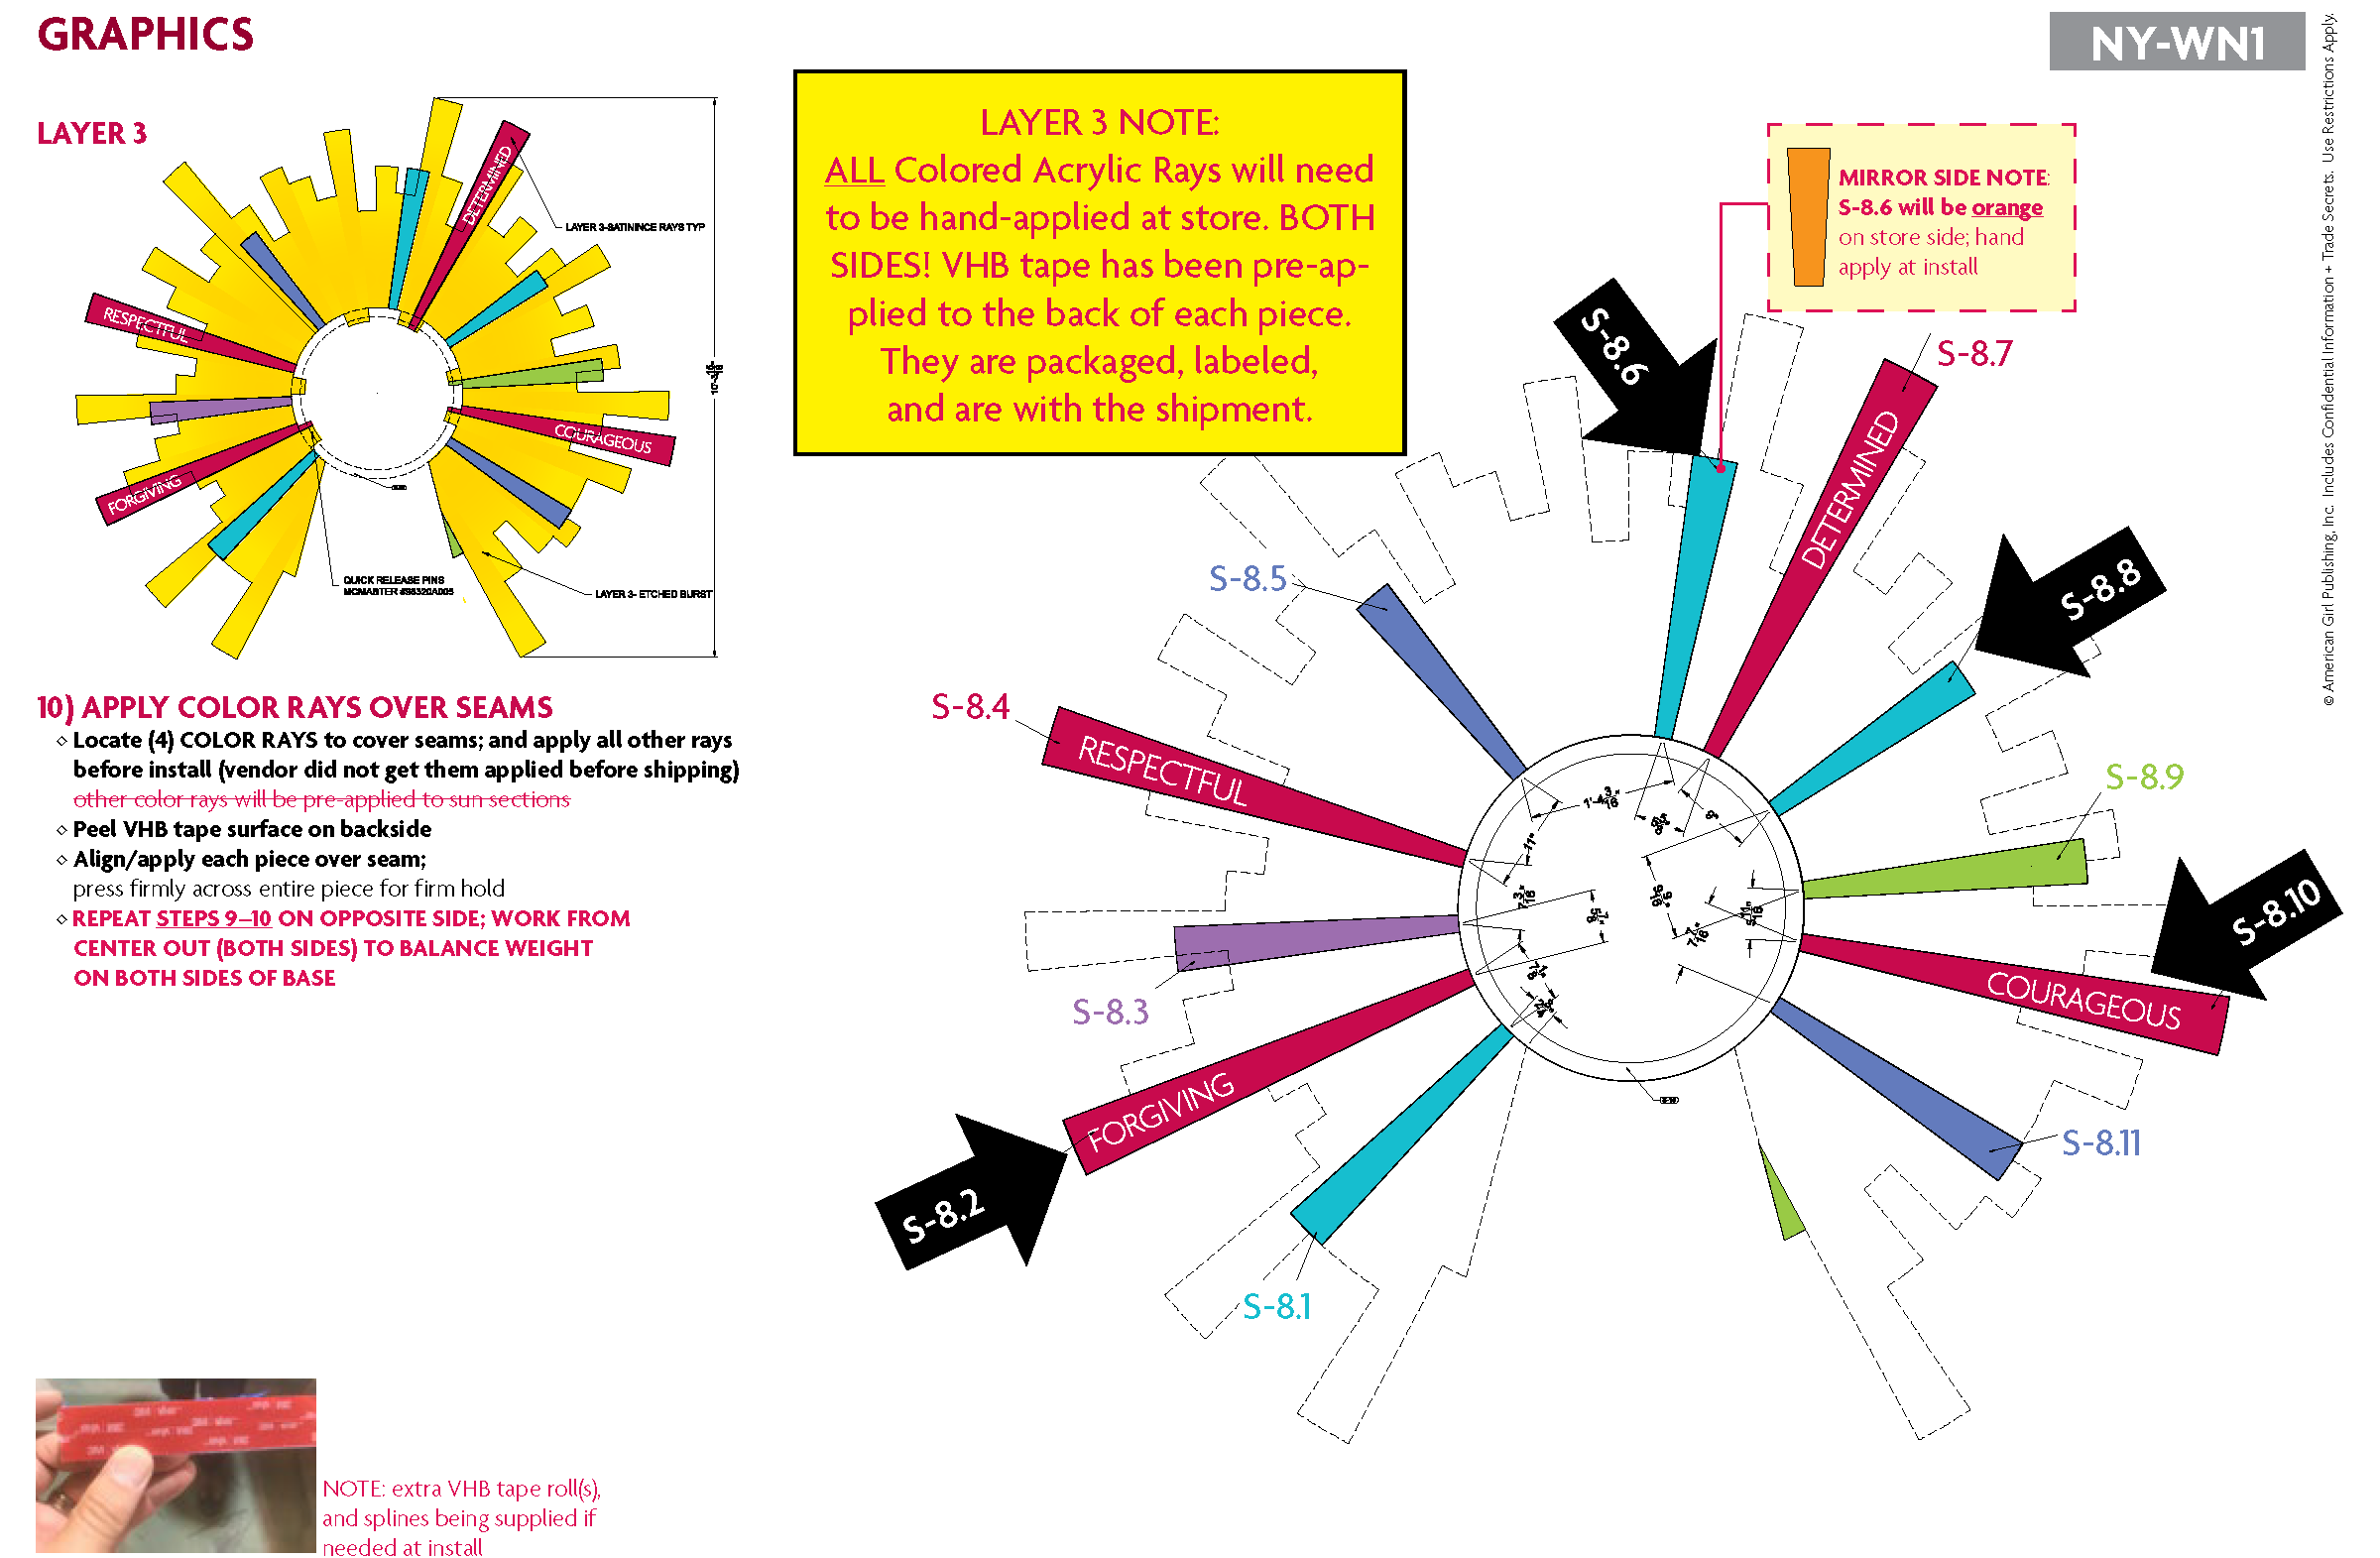
STEP 10: Install Guide
Instructional pages from the step-by-step window installation guide I created for our retail visual store team onsite
-
![]()
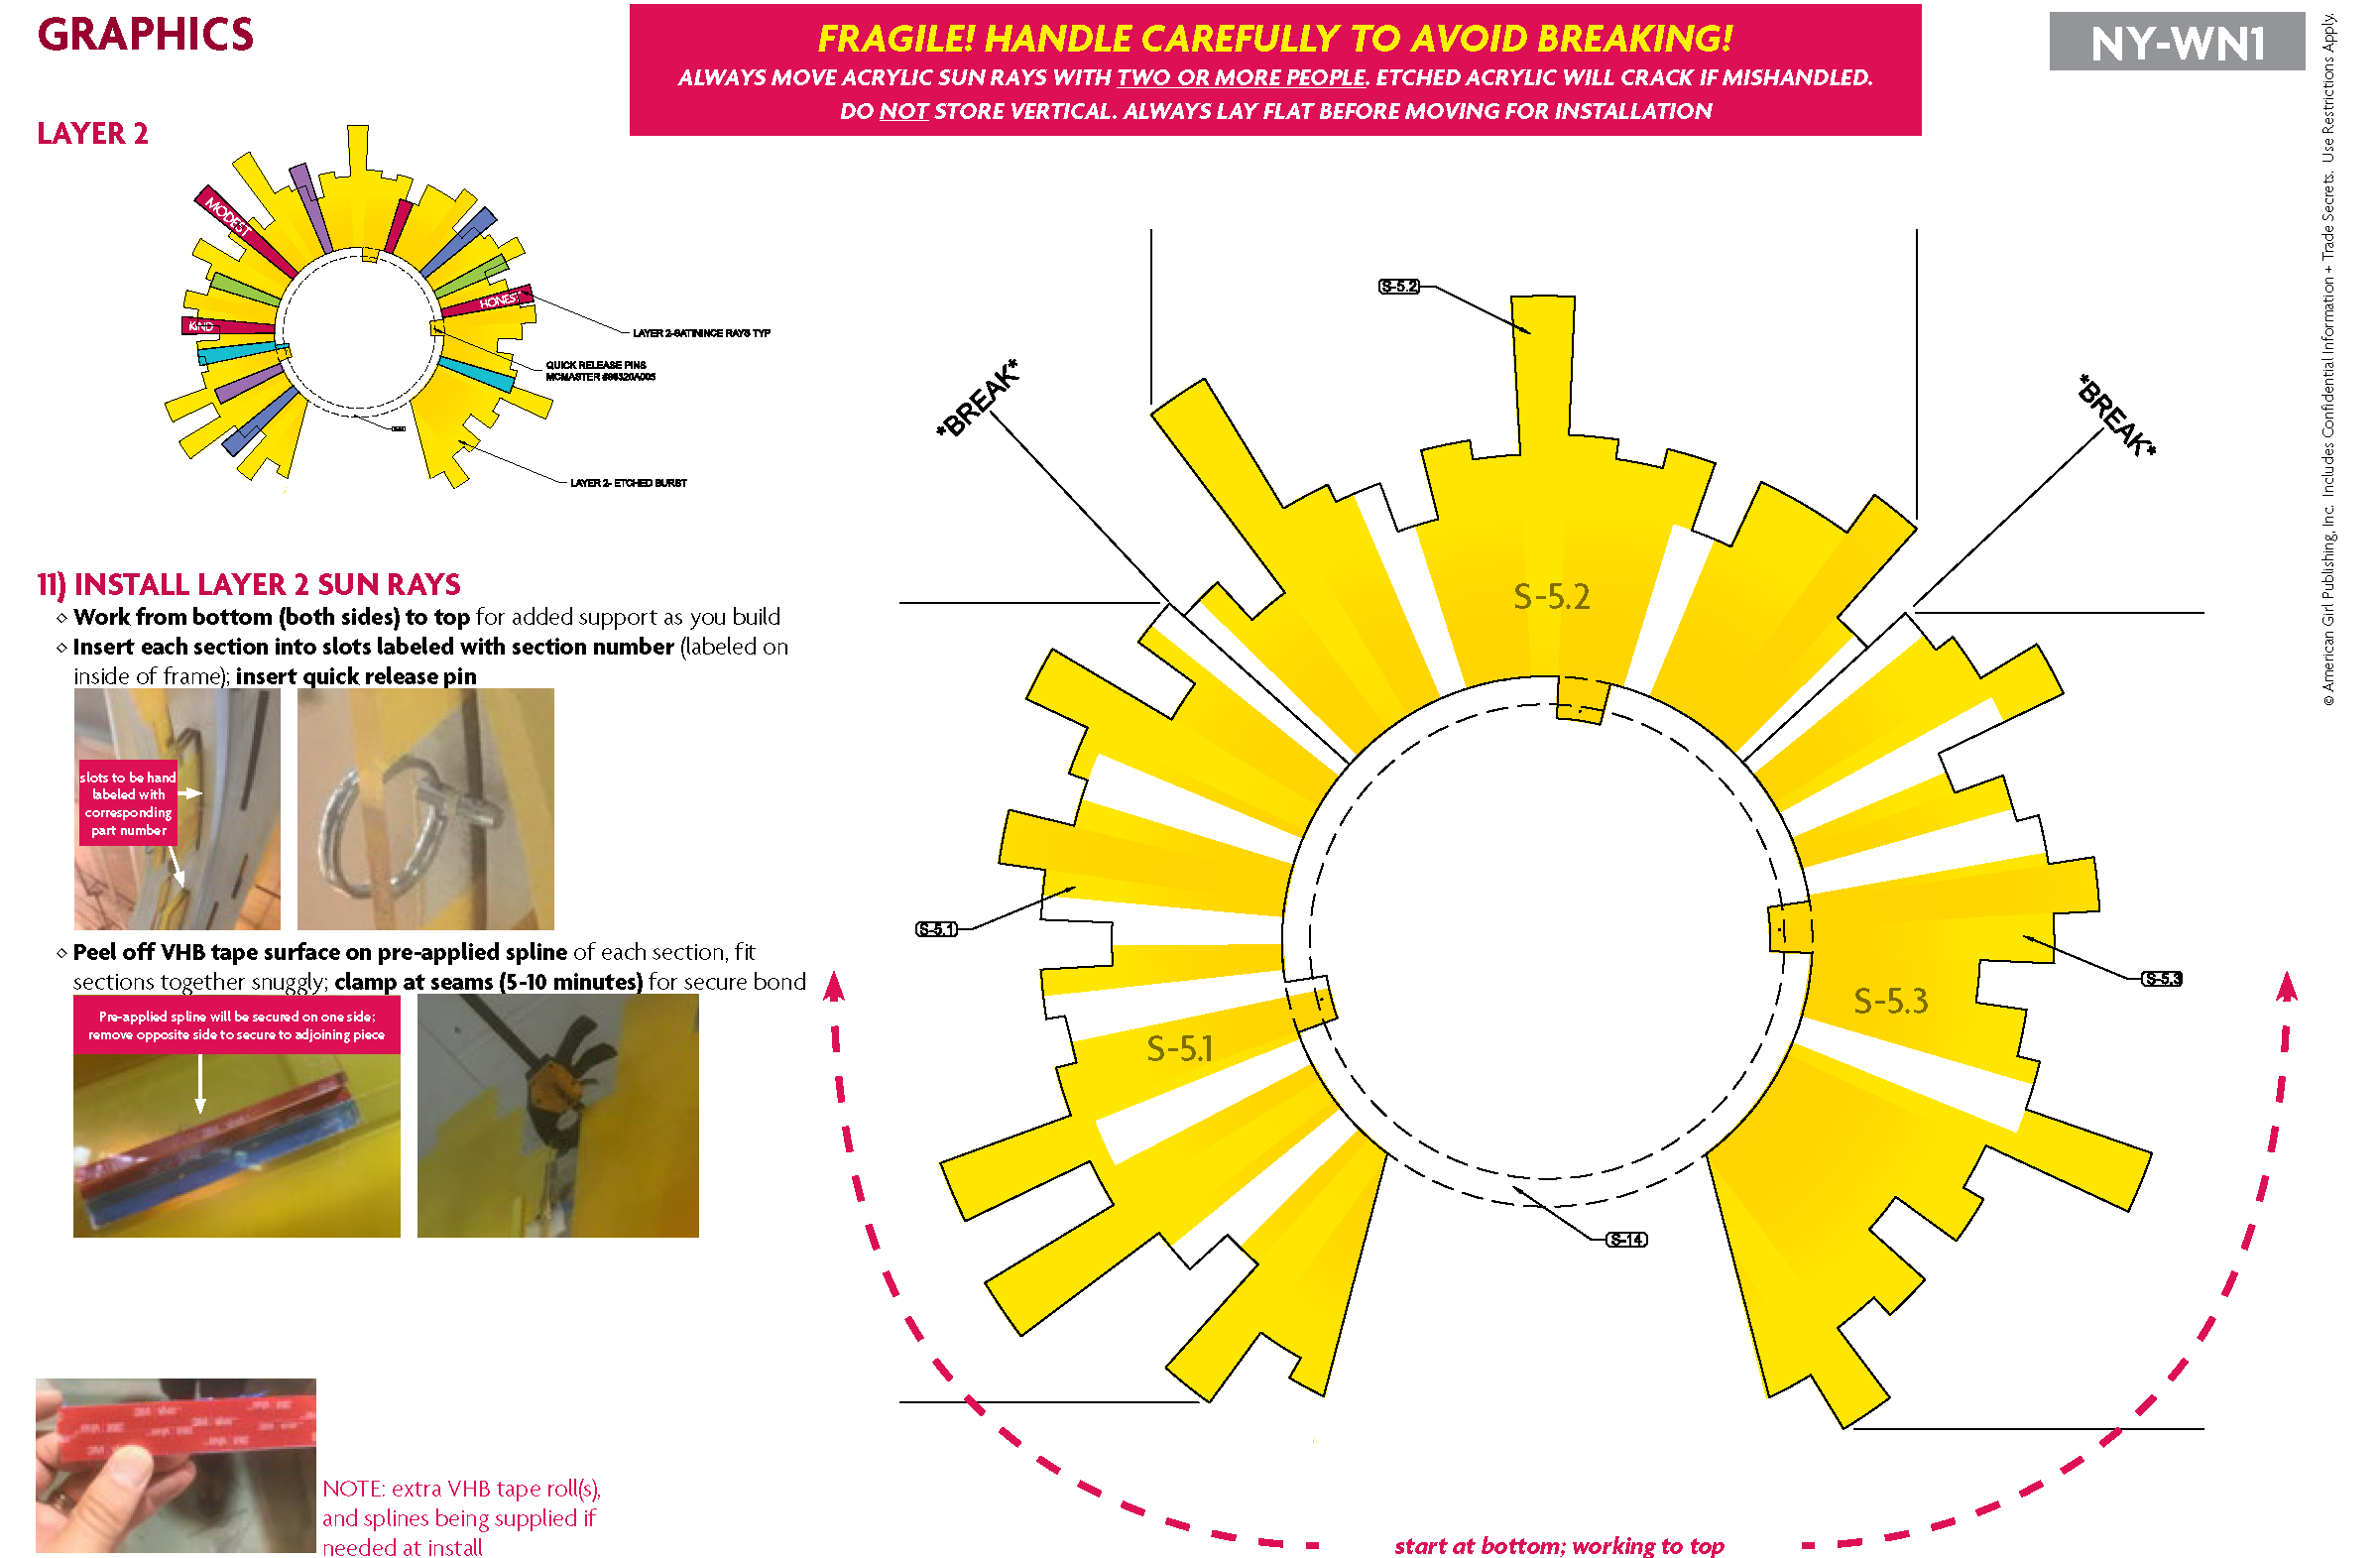
STEP 11: Install Guide
Instructional pages from the step-by-step window installation guide I created for our retail visual store team onsite
-
![]()
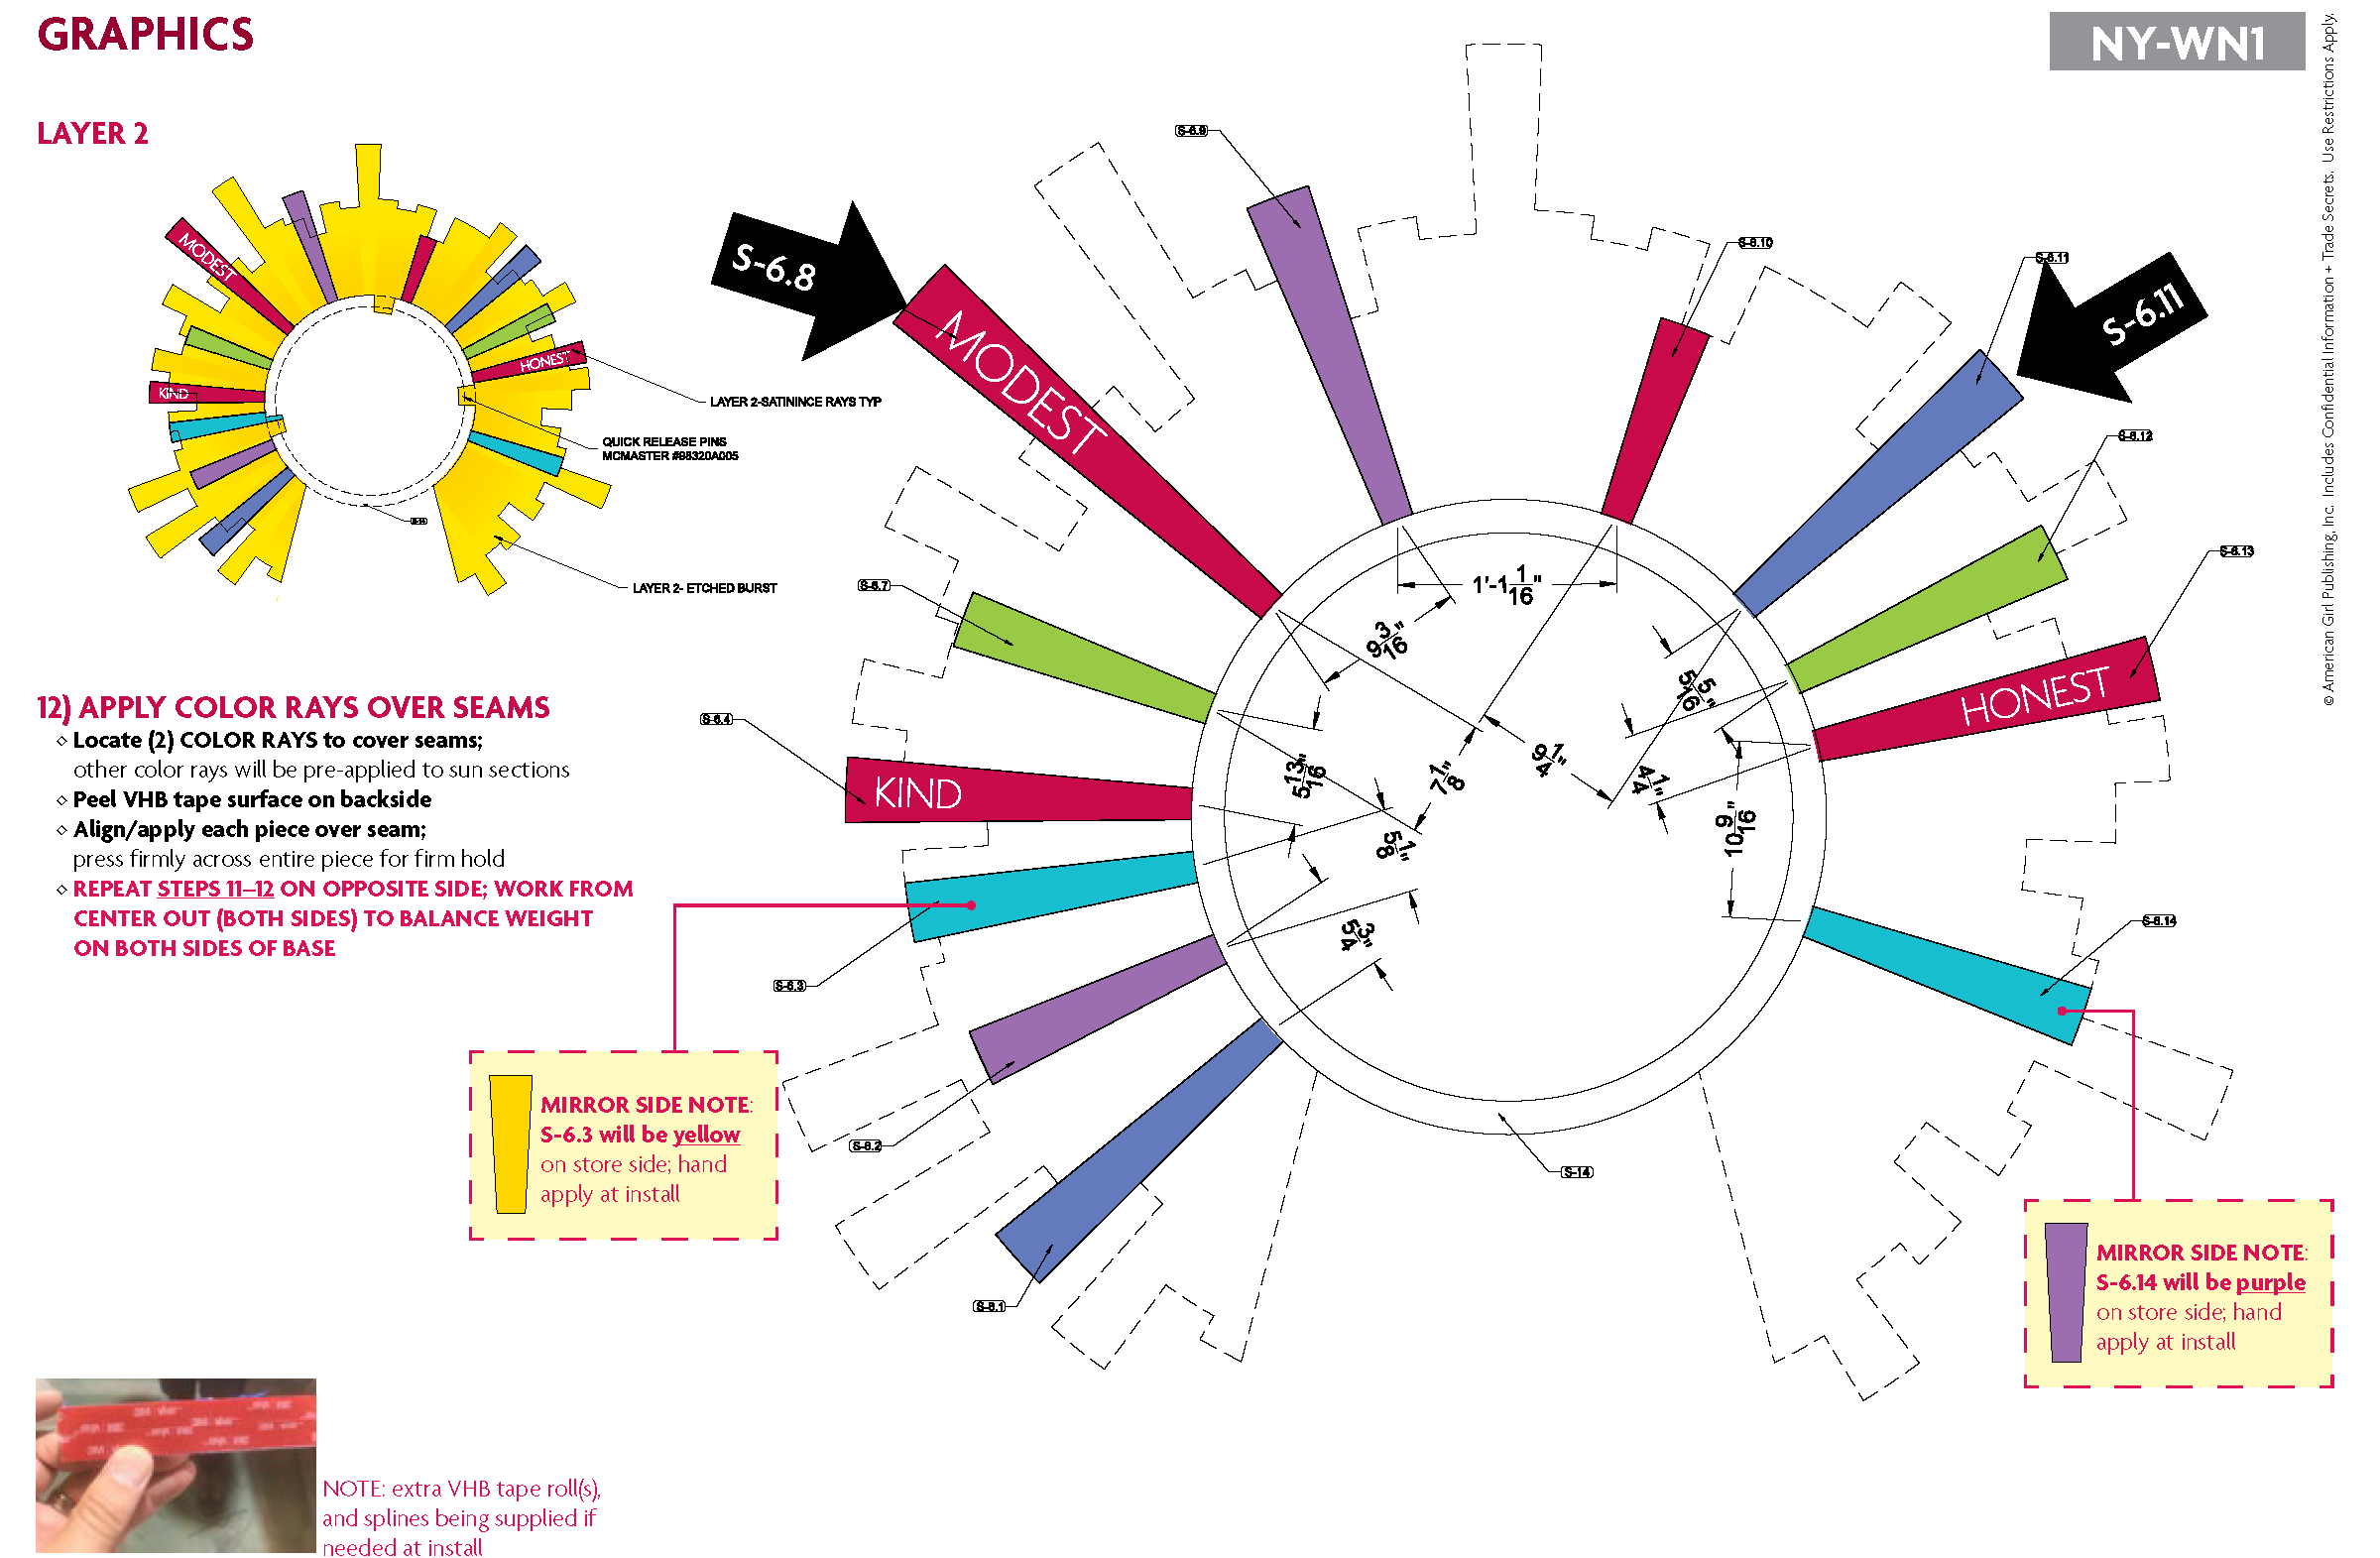
STEP 12: Install Guide
Instructional pages from the step-by-step window installation guide I created for our retail visual store team onsite
-
![]()
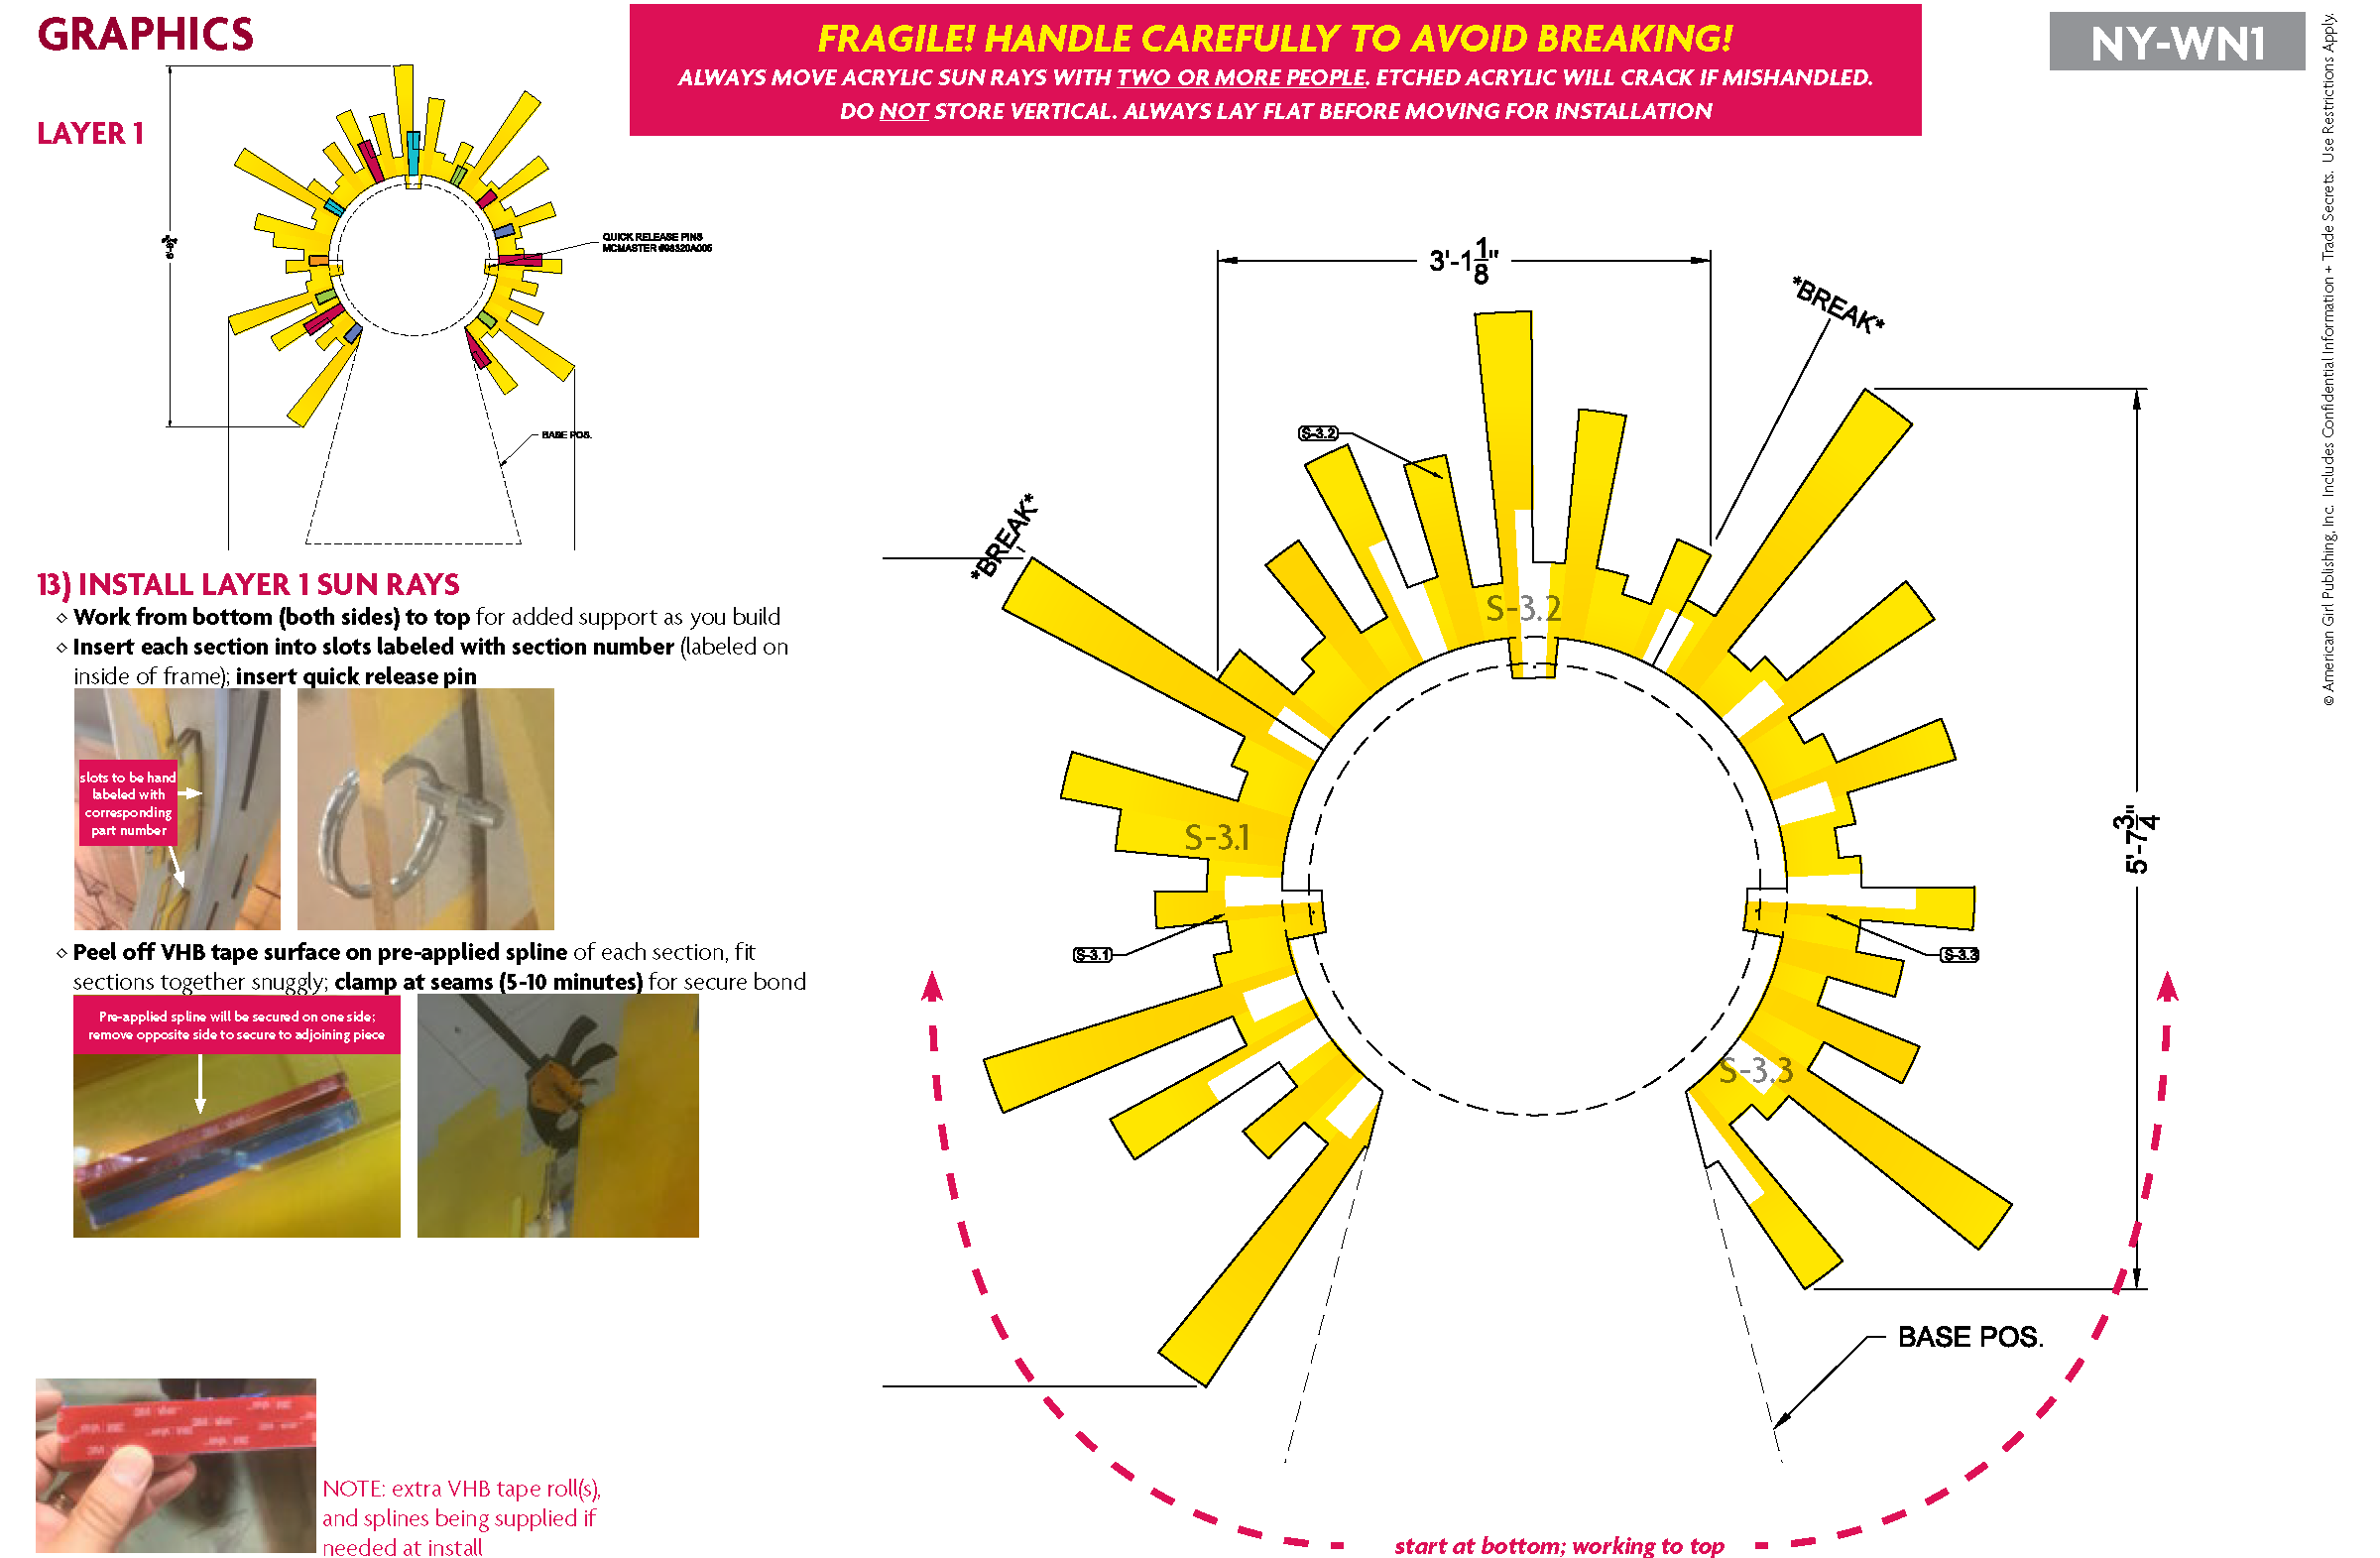
STEP 13: Install Guide
Instructional pages from the step-by-step window installation guide I created for our retail visual store team onsite
-
![]()
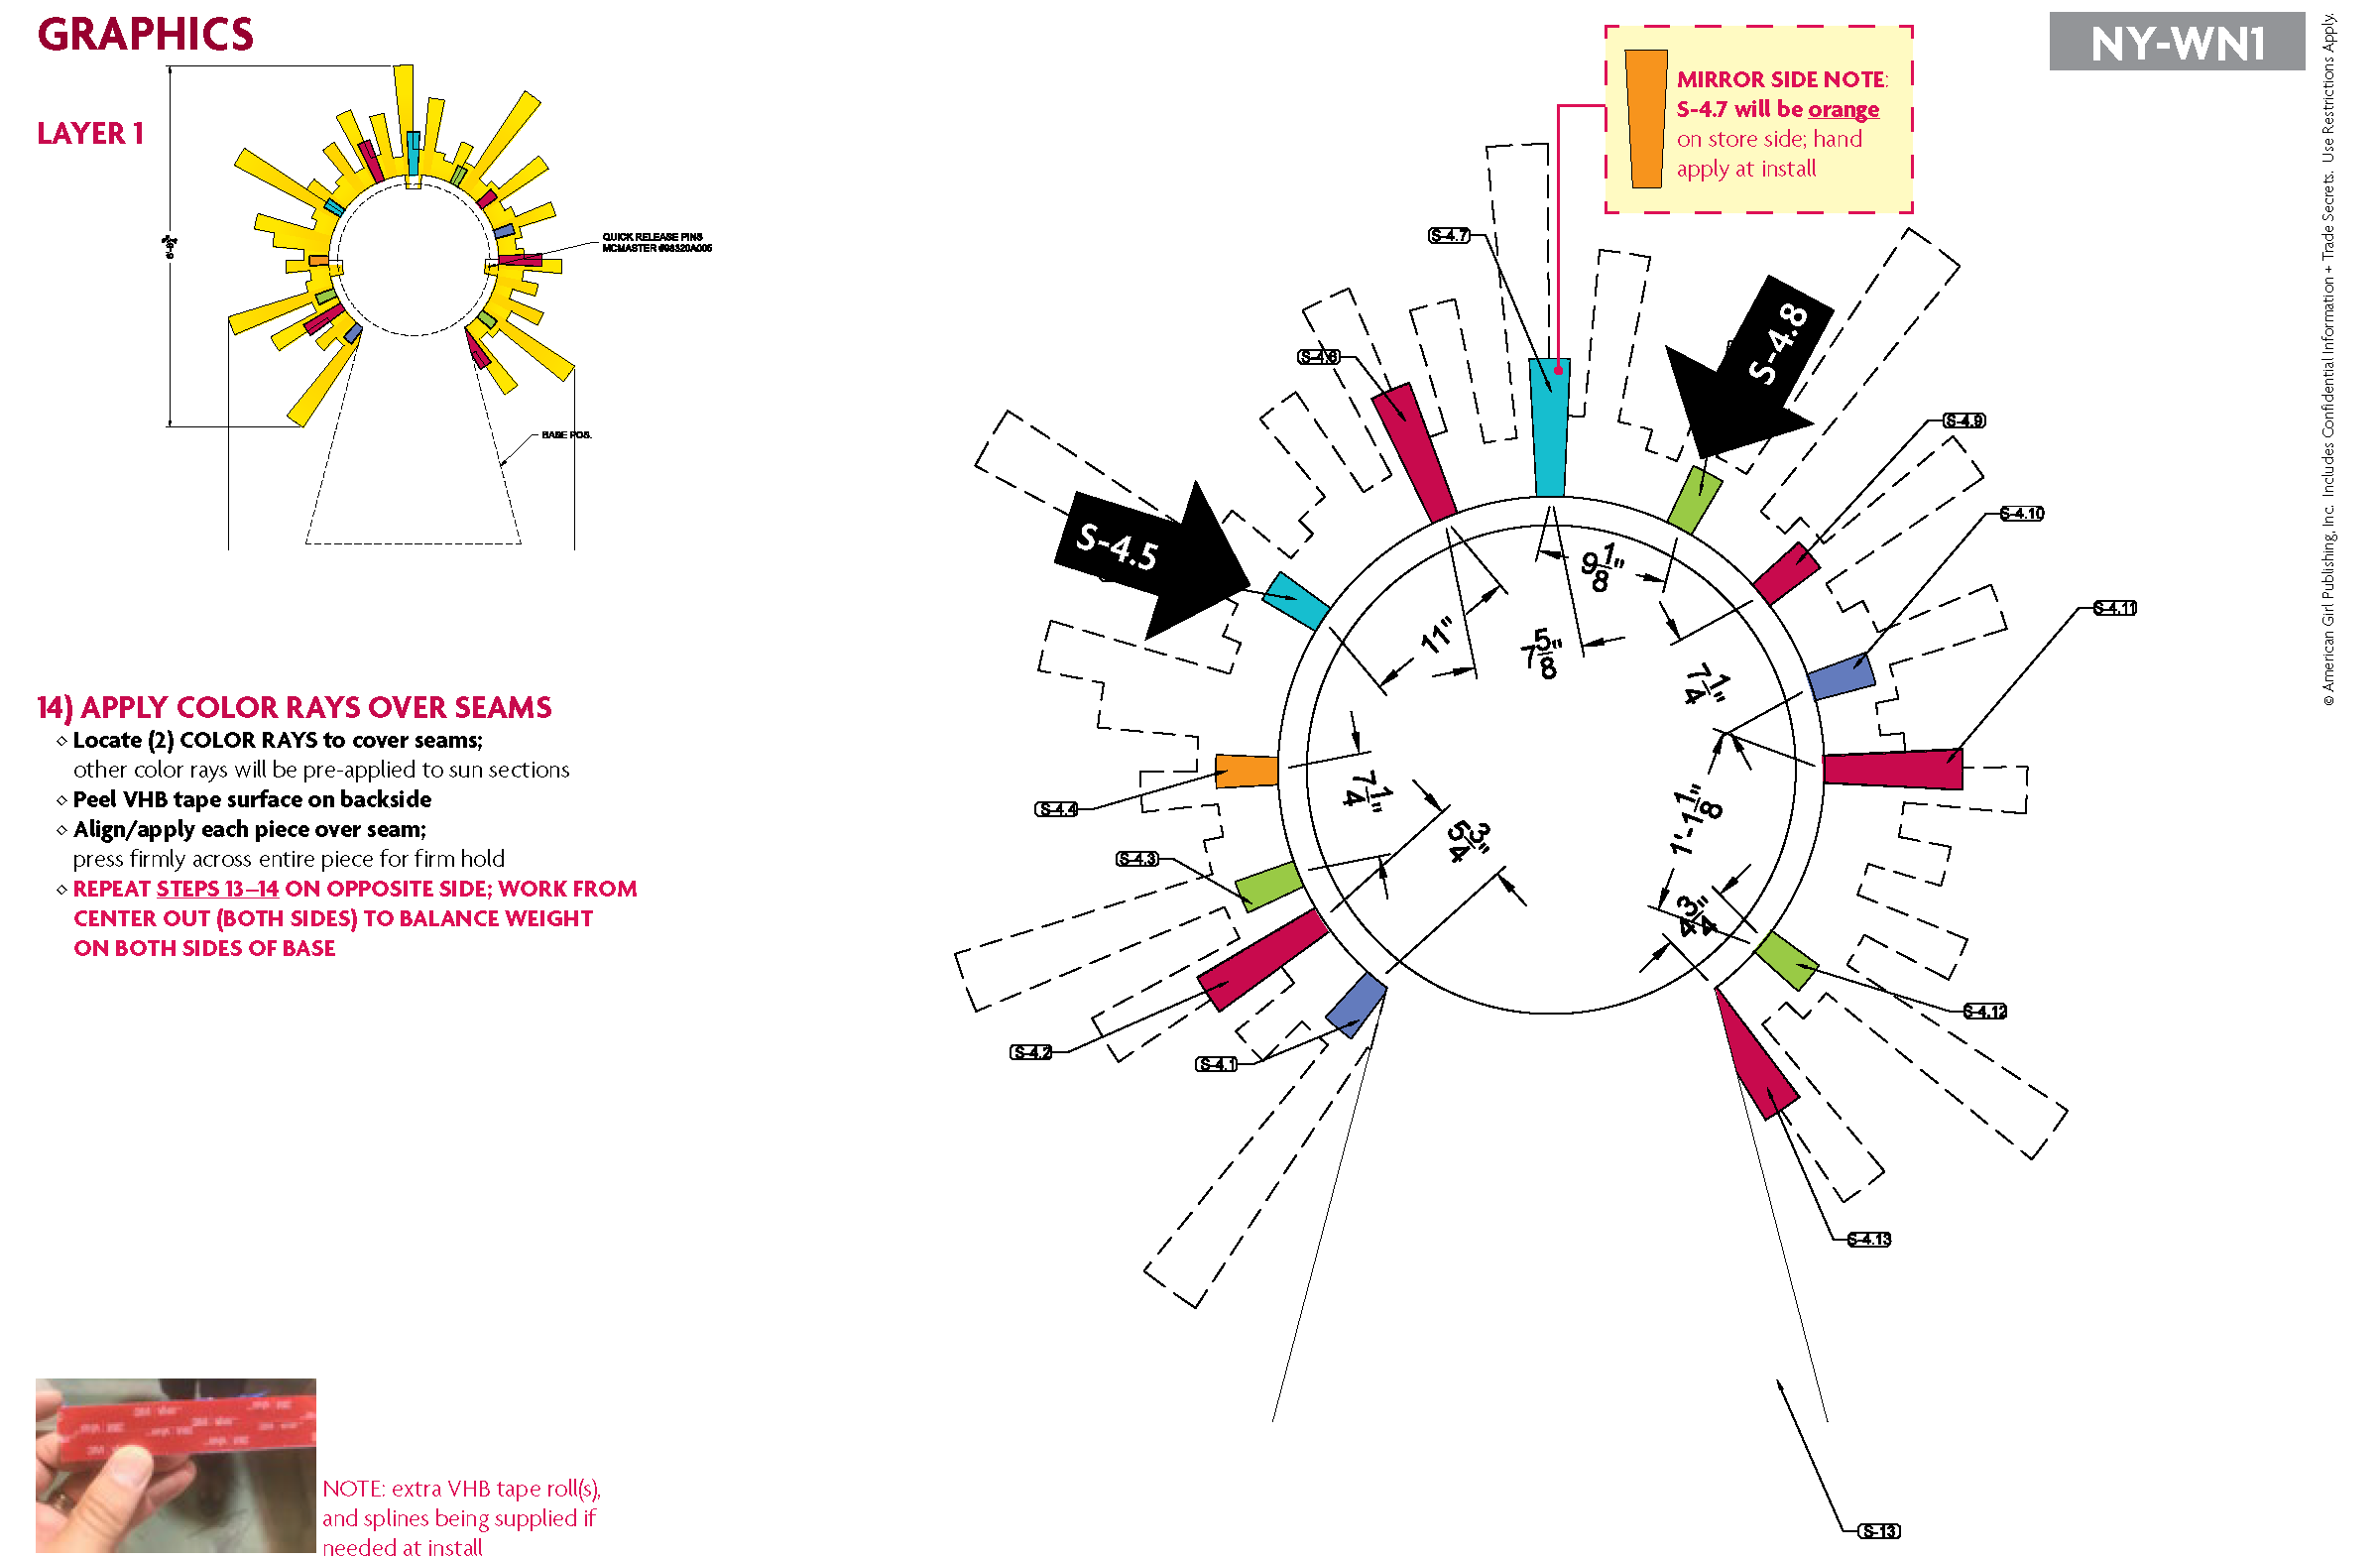
STEP 14: Install Guide
Instructional pages from the step-by-step window installation guide I created for our retail visual store team onsite
-
![]()
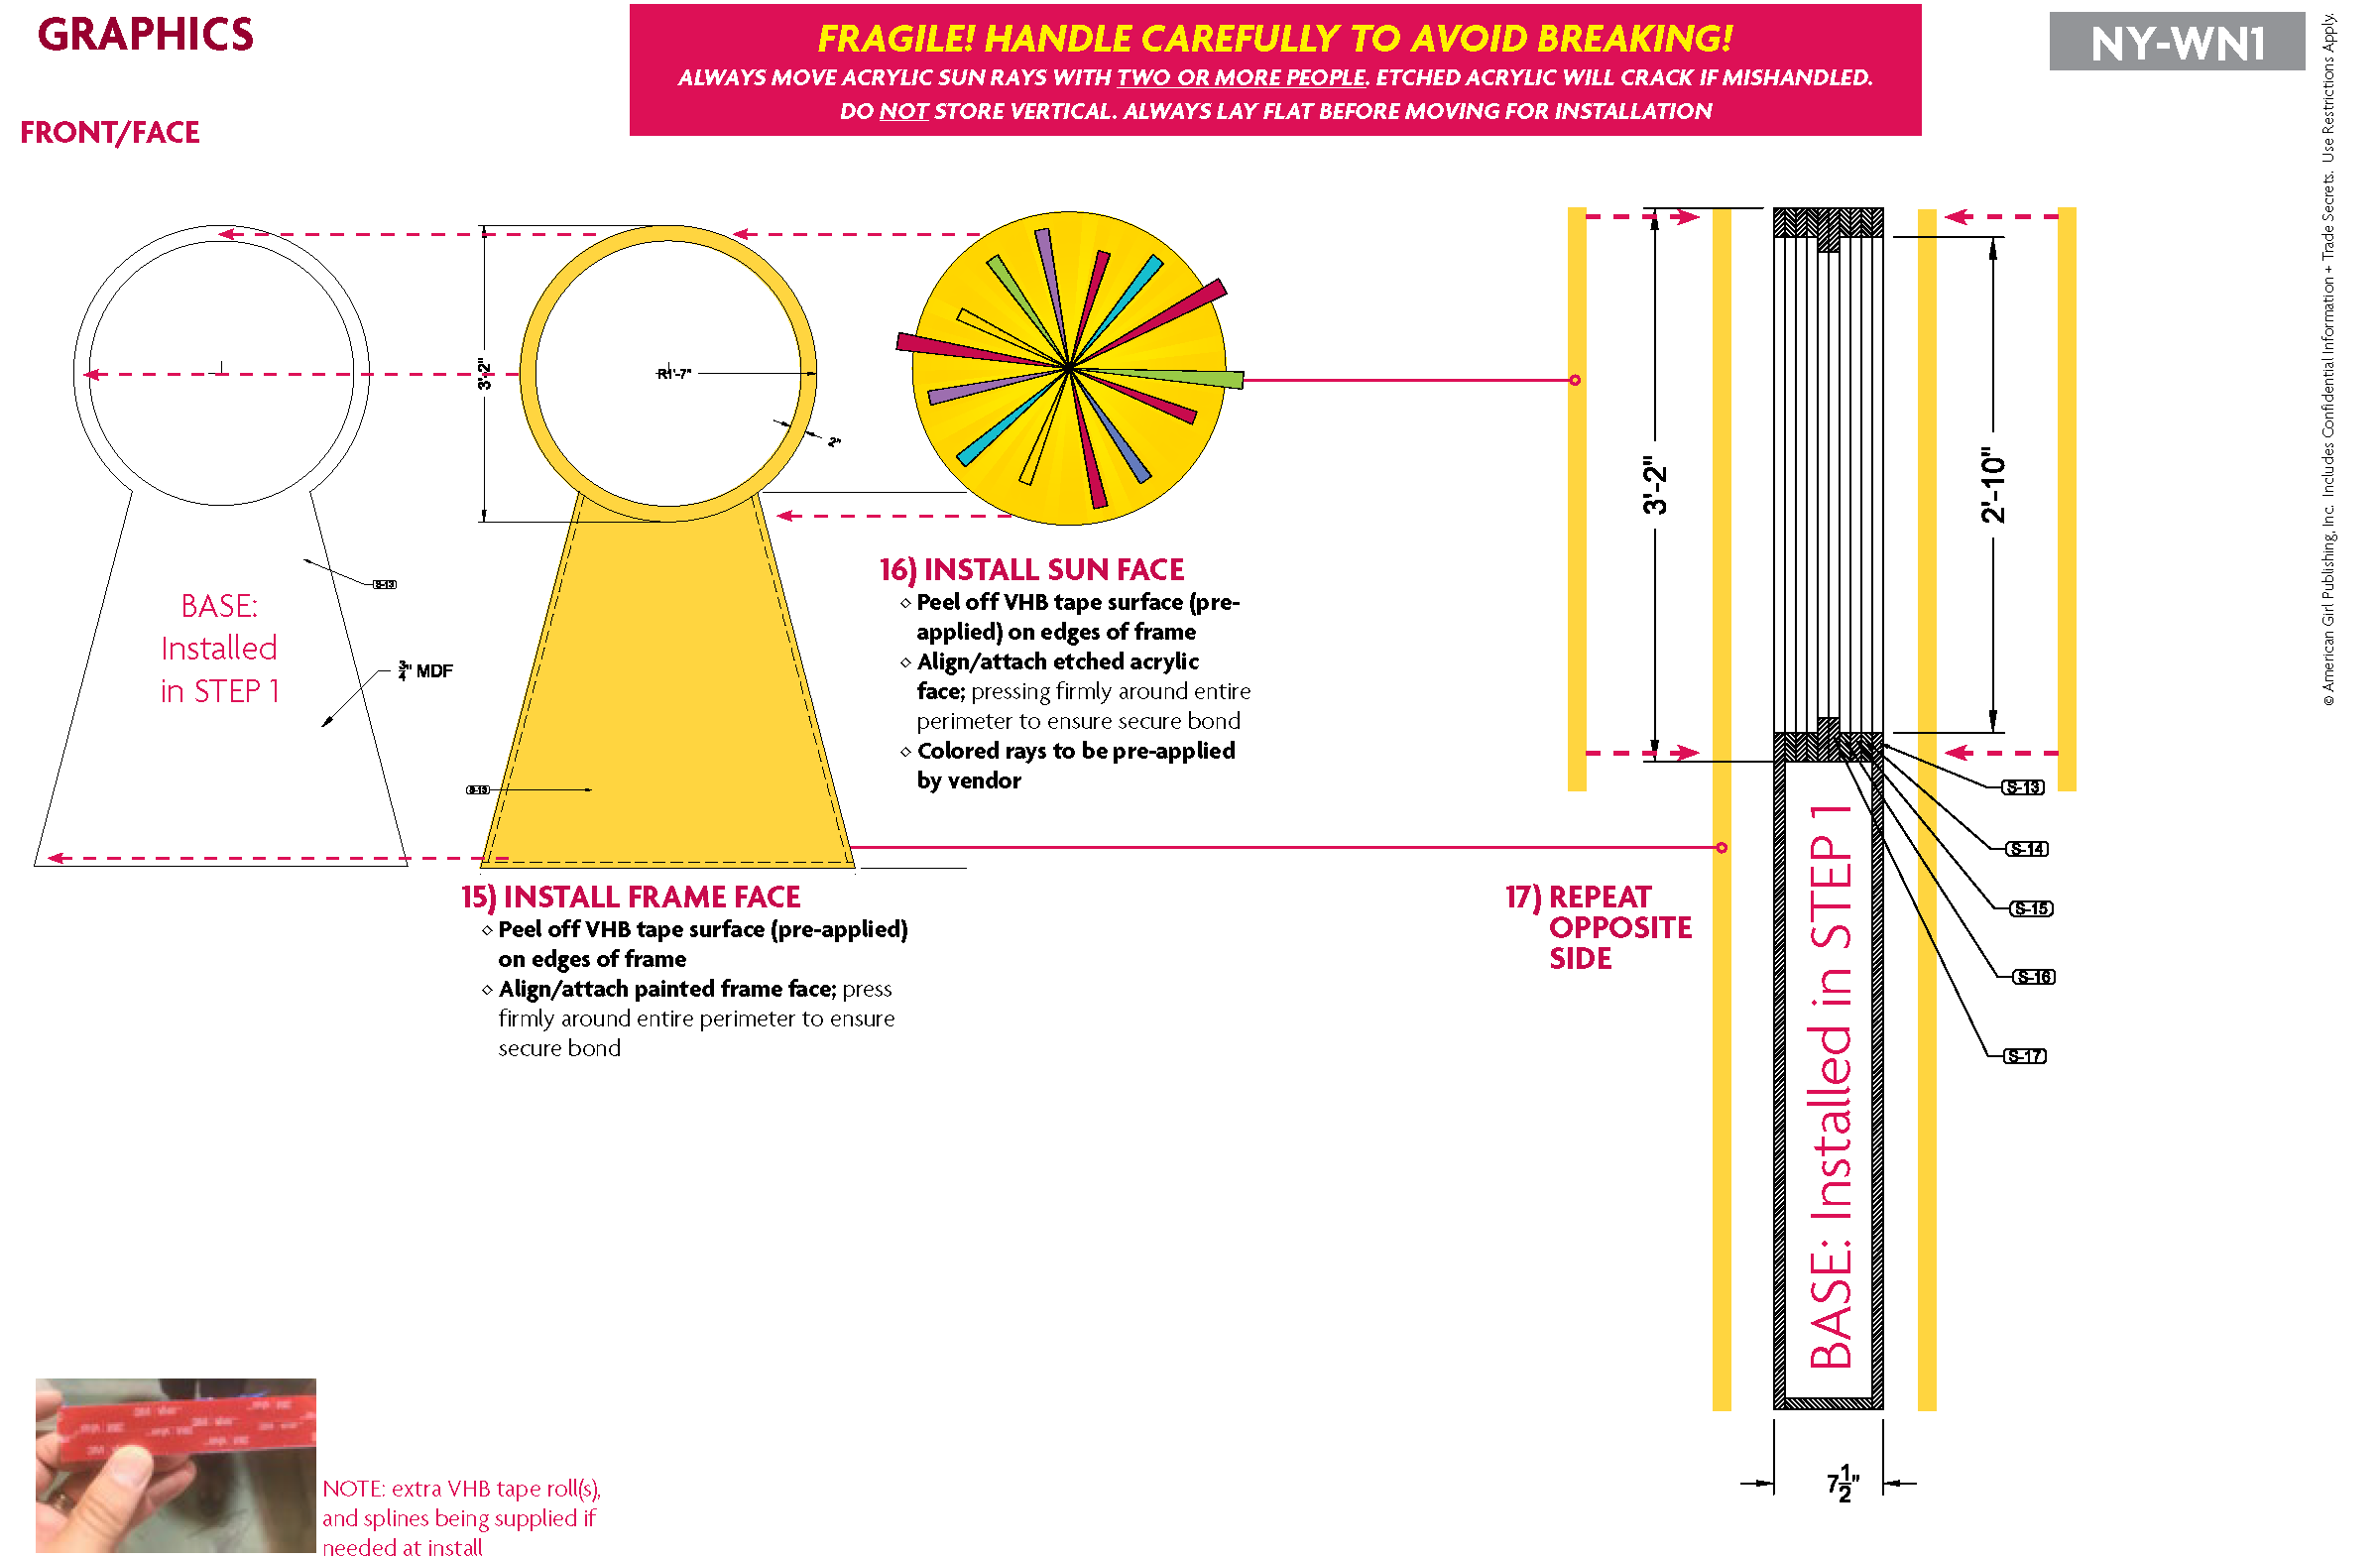
STEP 15-17: Install Guide
Instructional pages from the step-by-step window installation guide I created for our retail visual store team onsite

