American Girl Holiday 2018 Product Launch
This is one of my other favorite projects, during my time with AG!
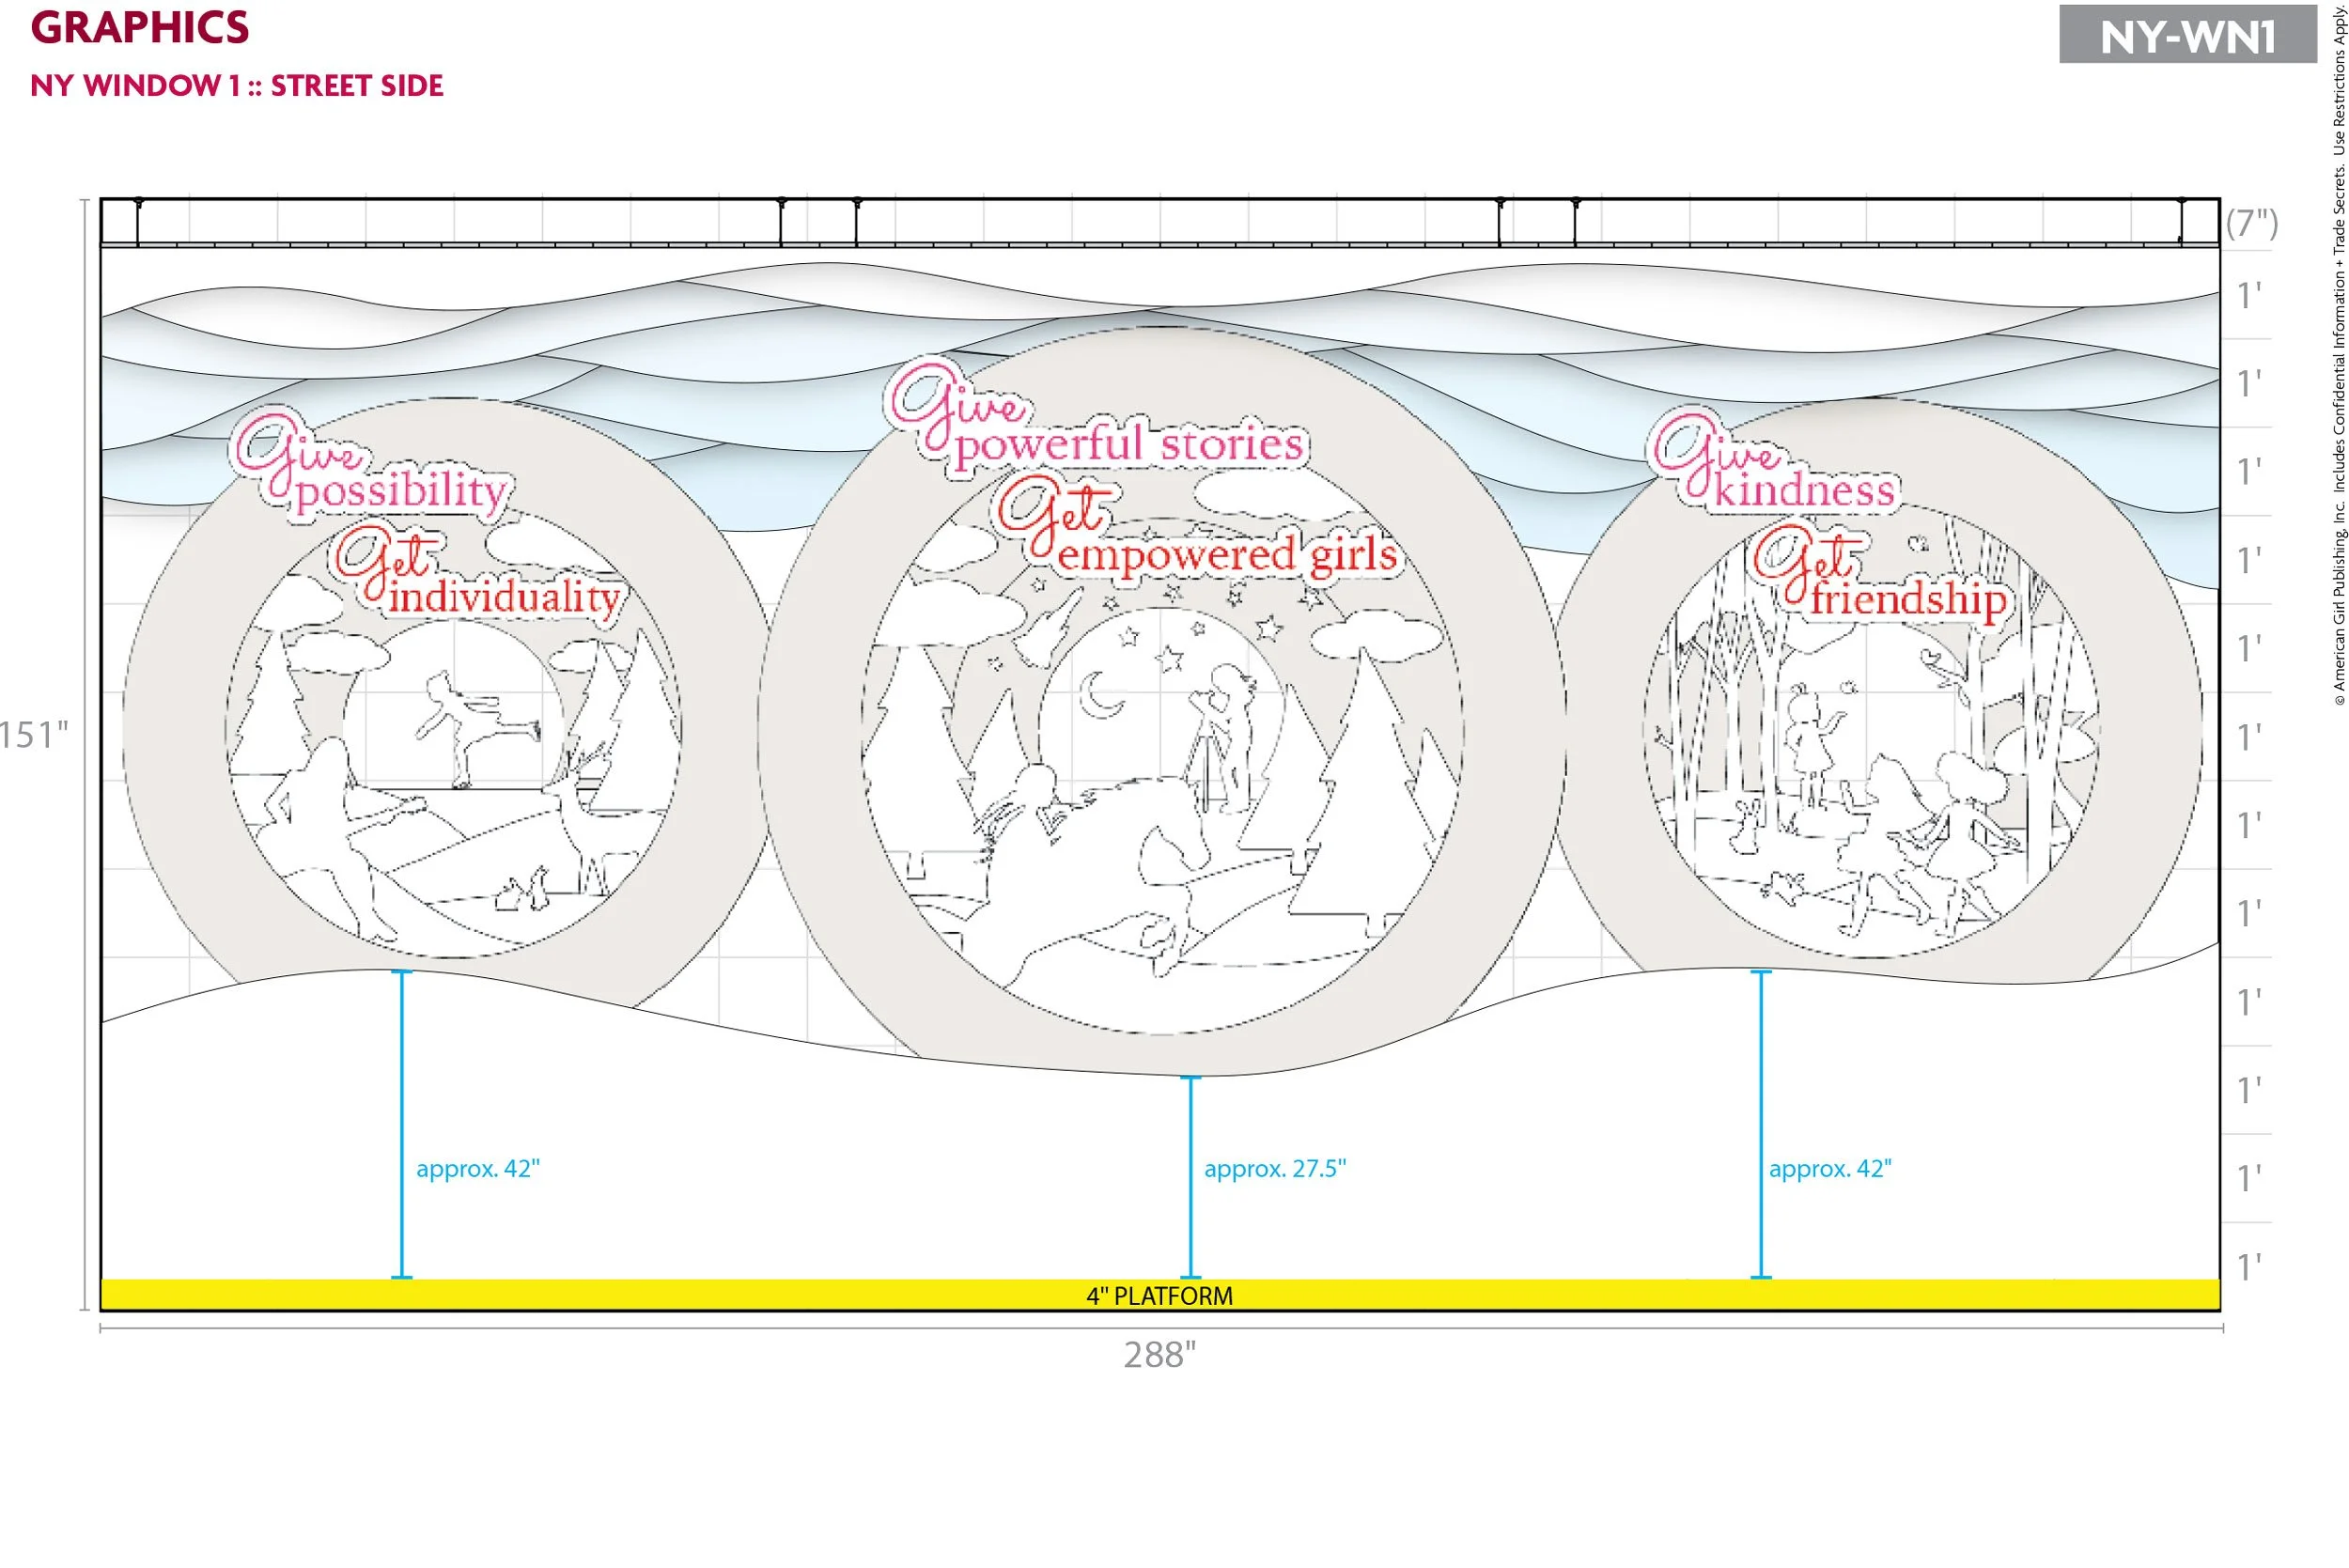
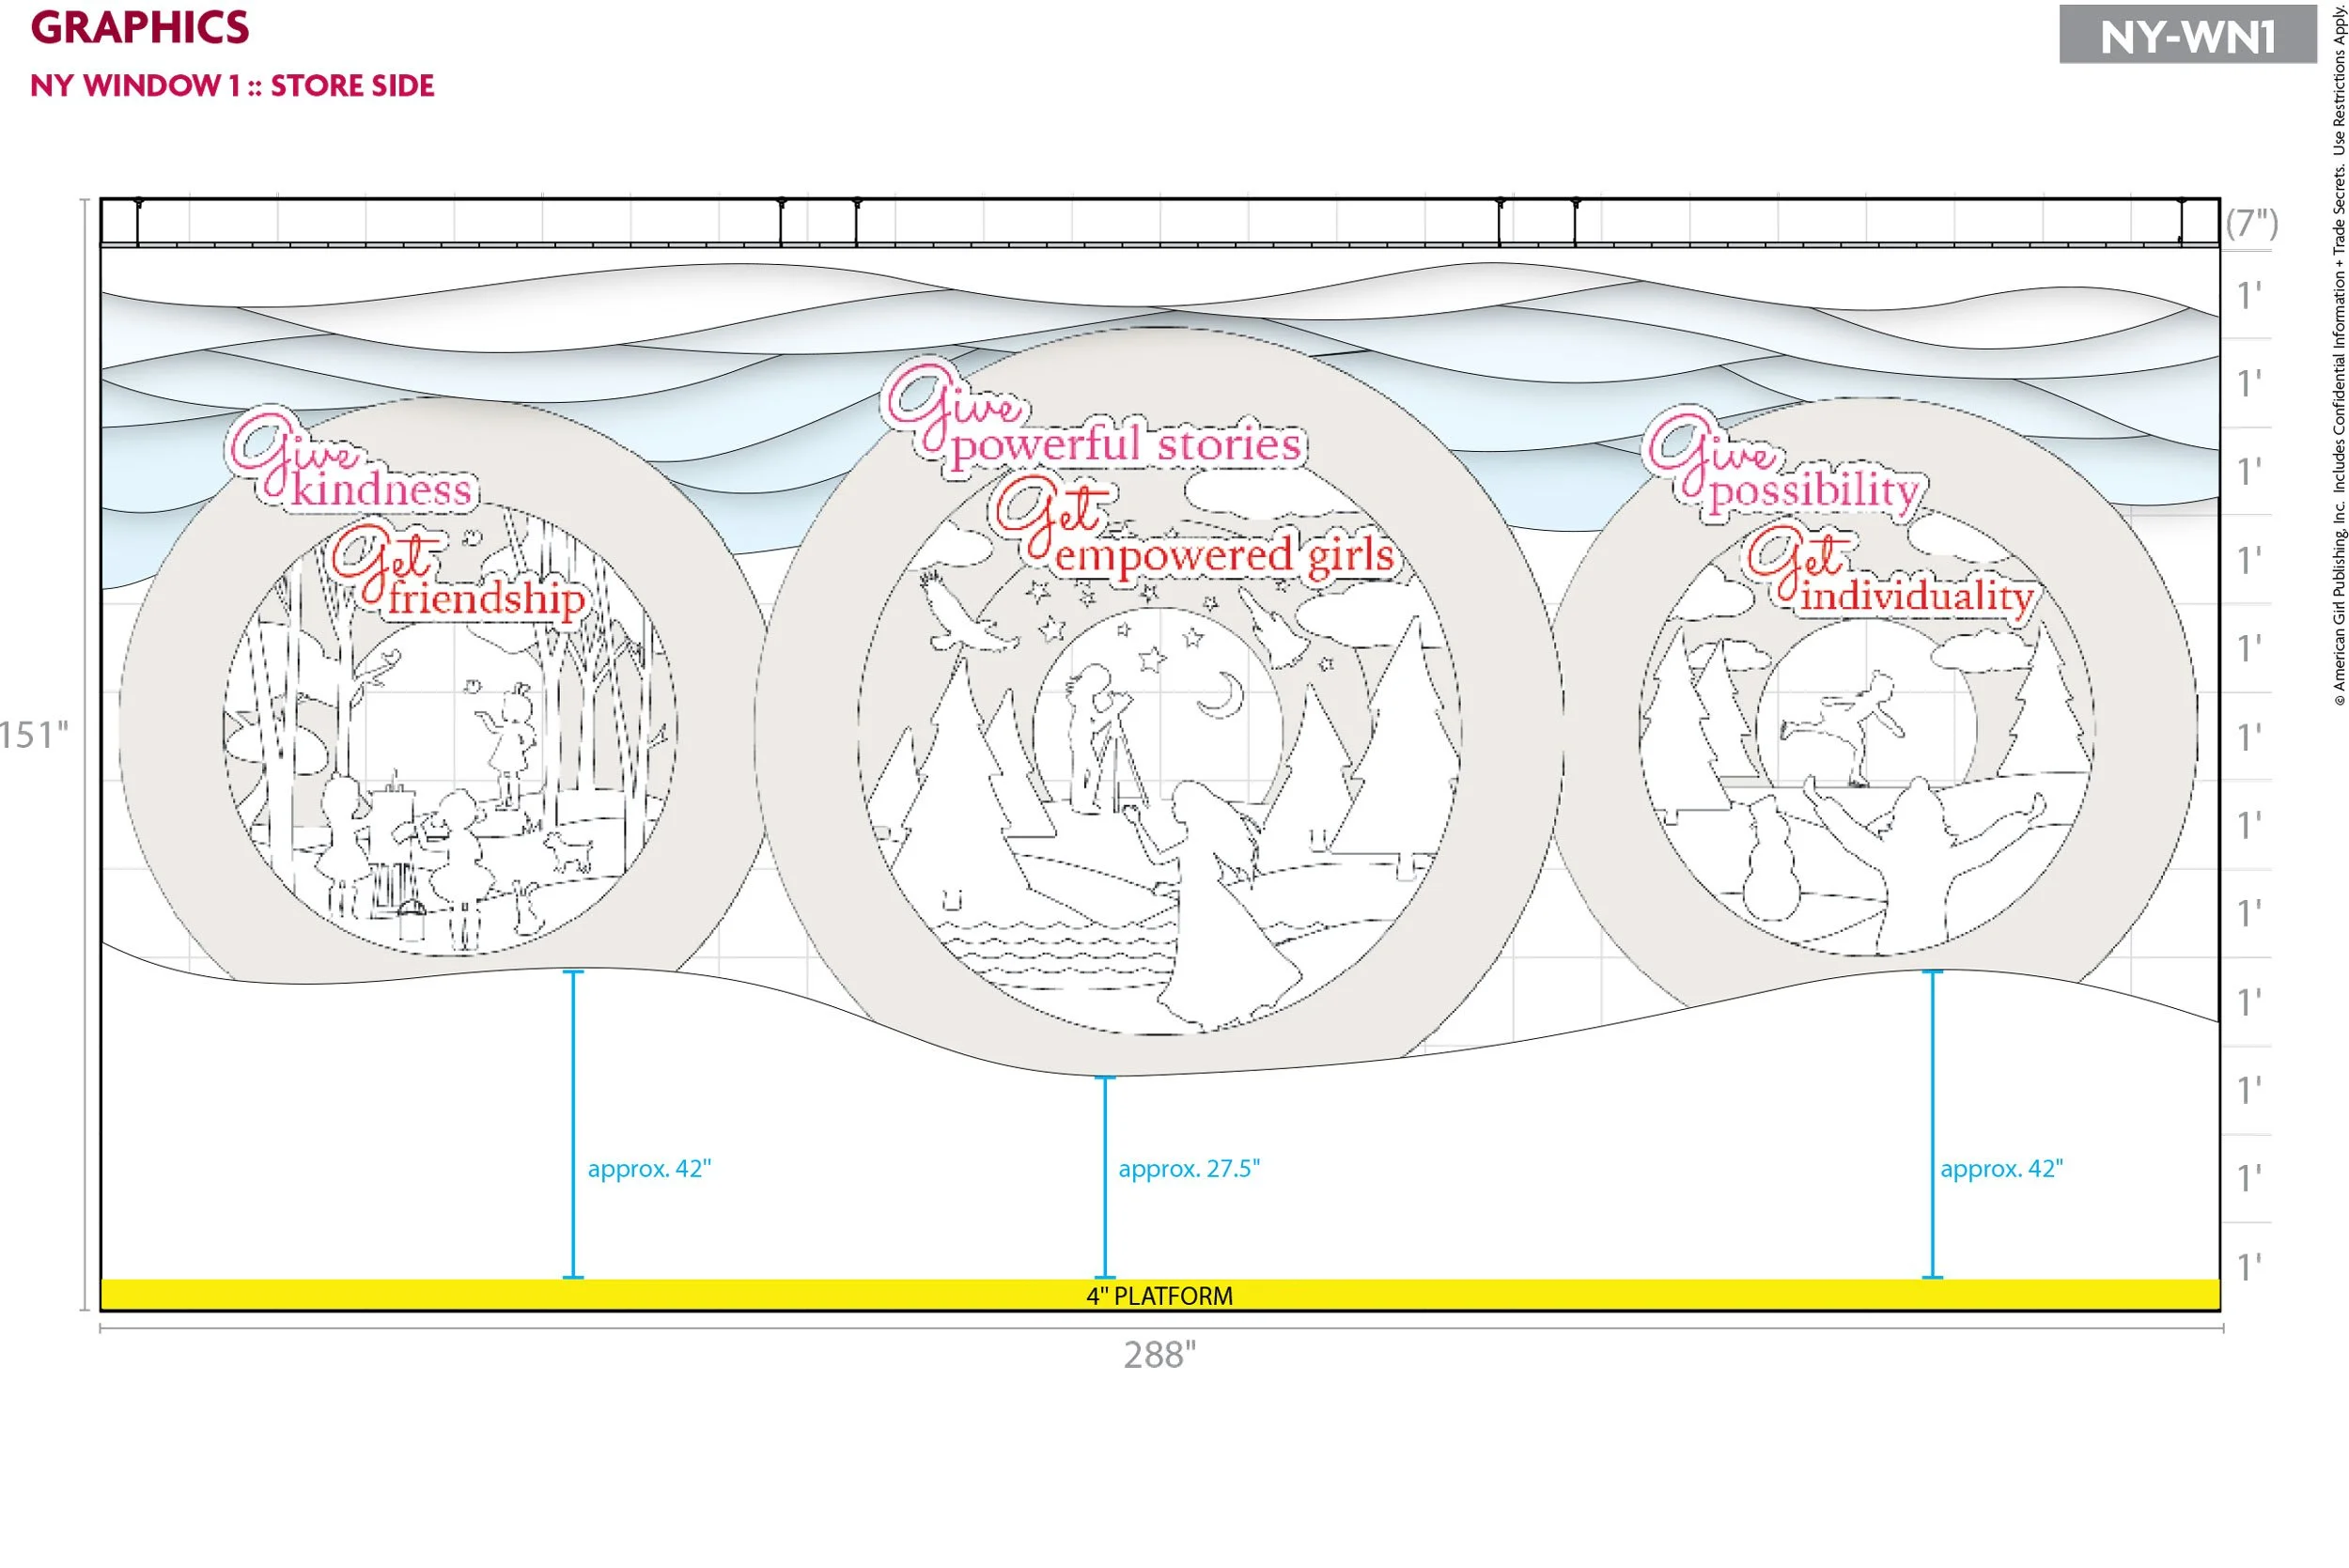
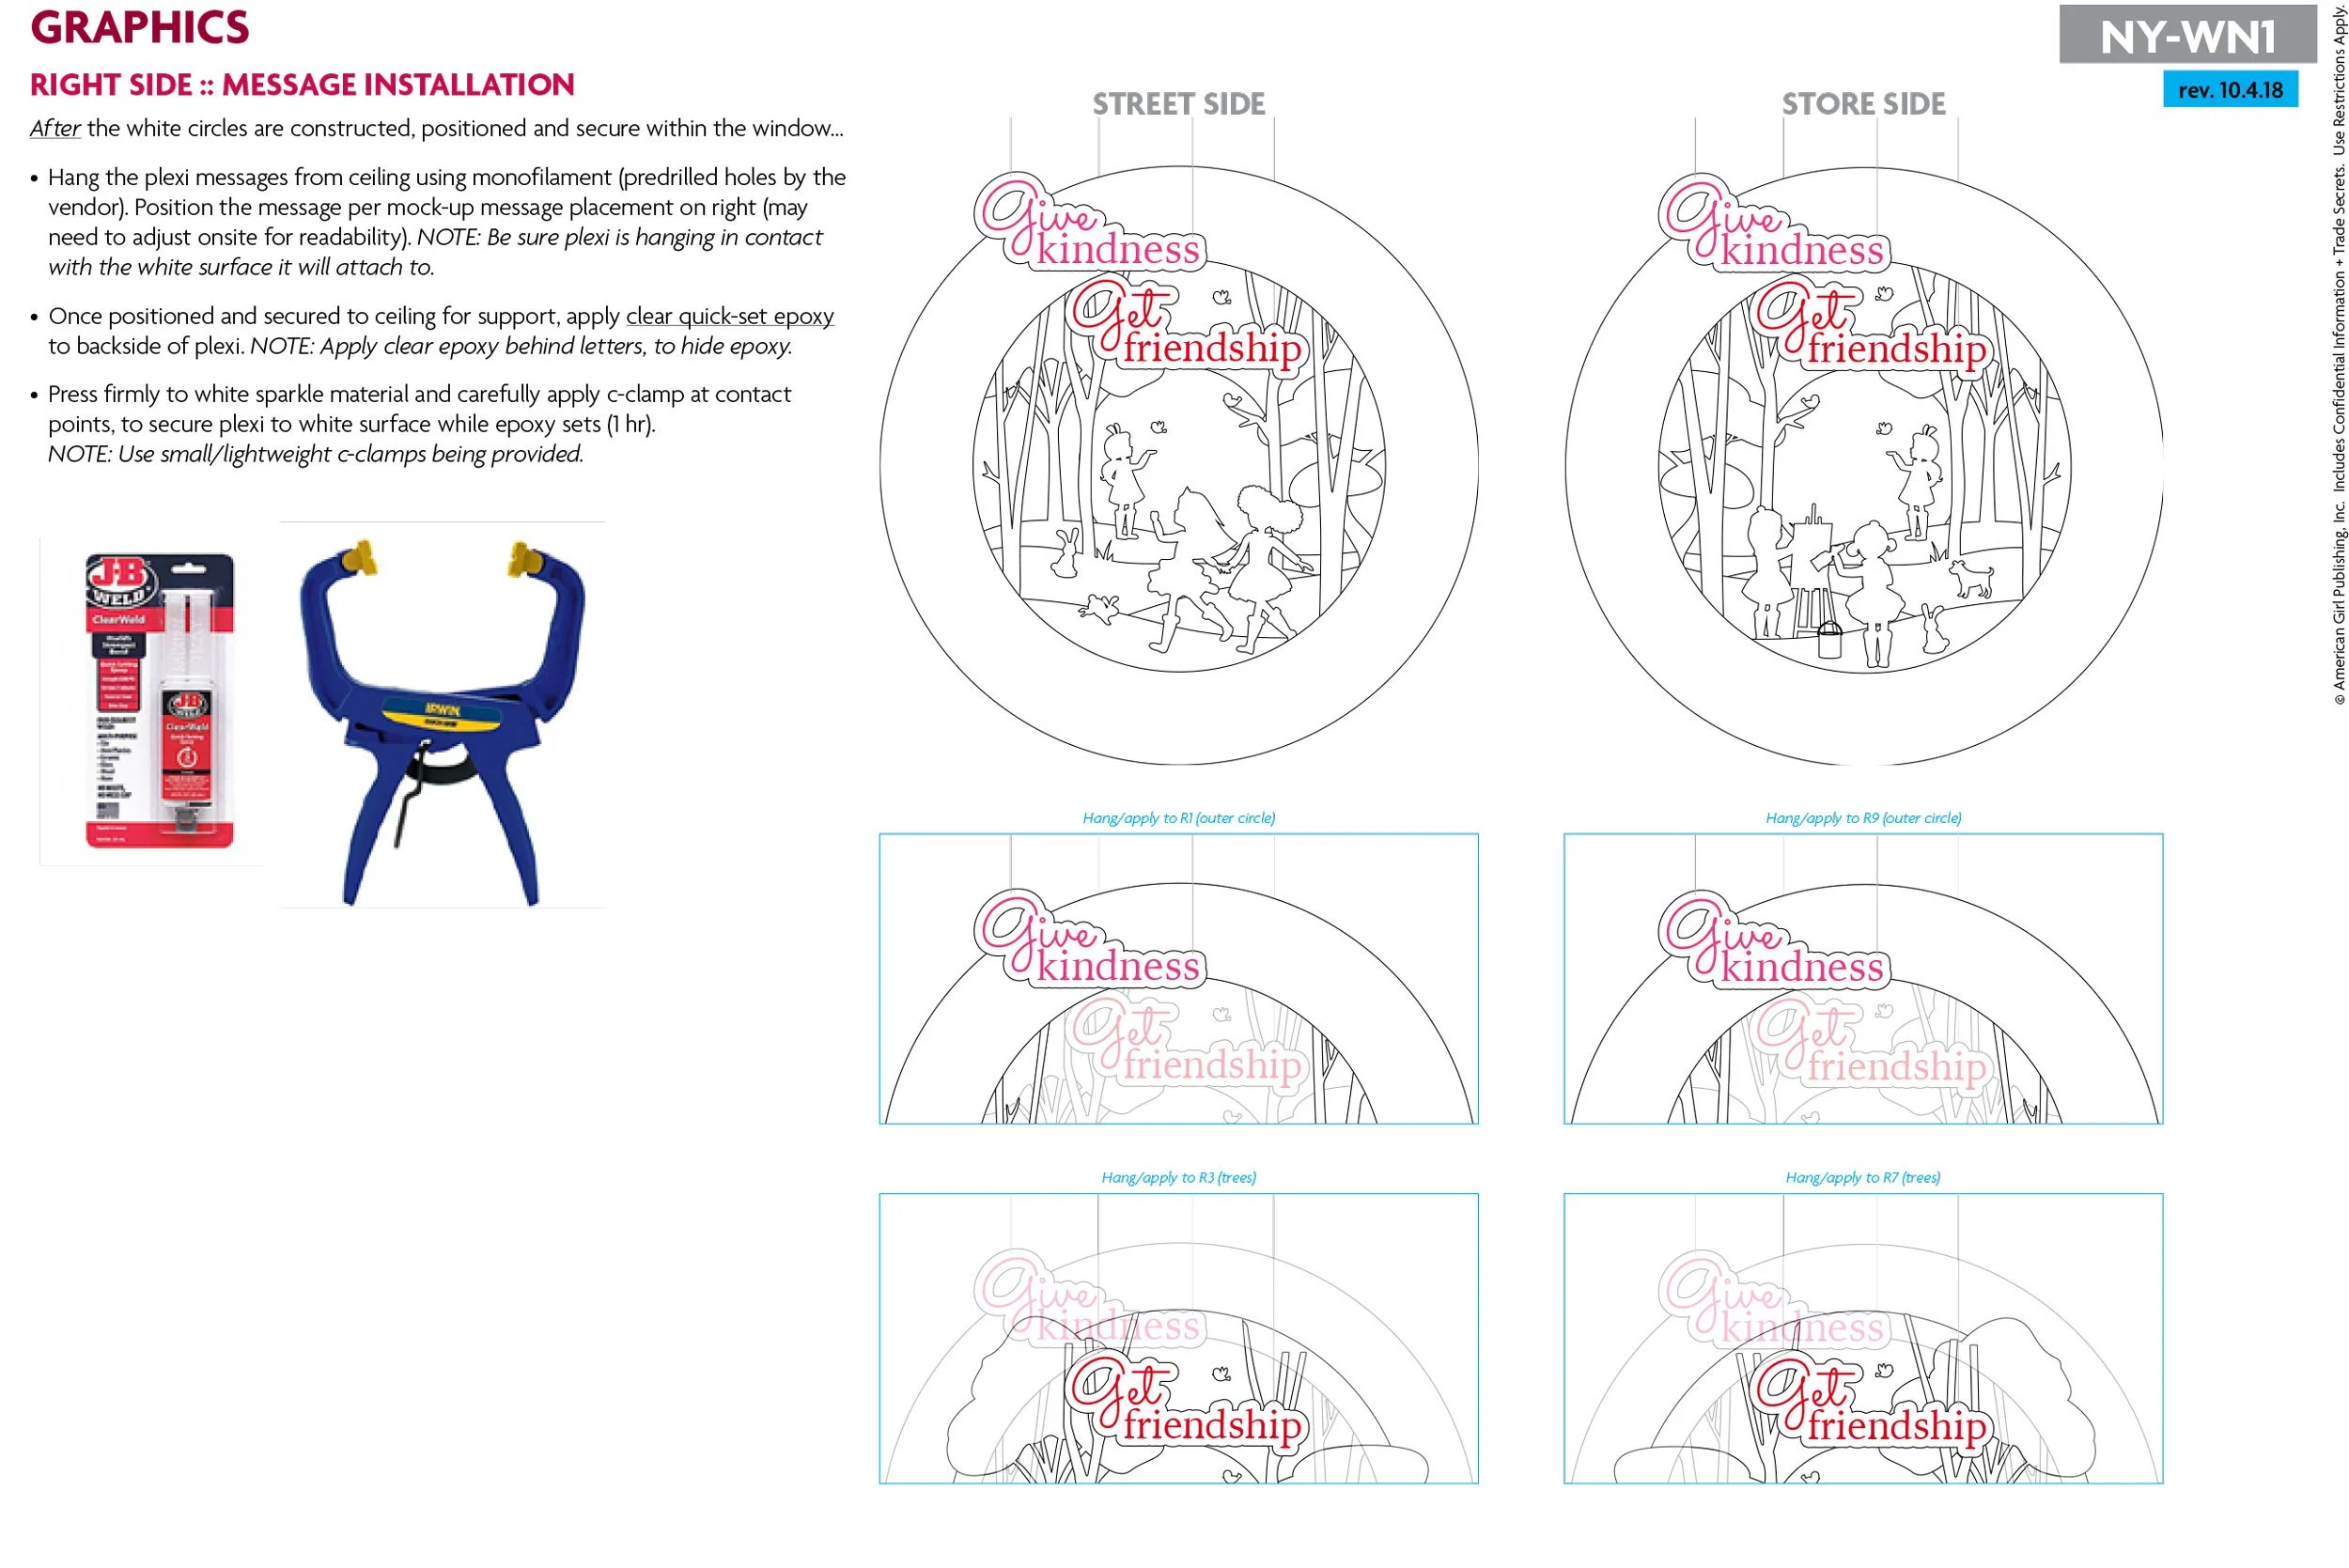
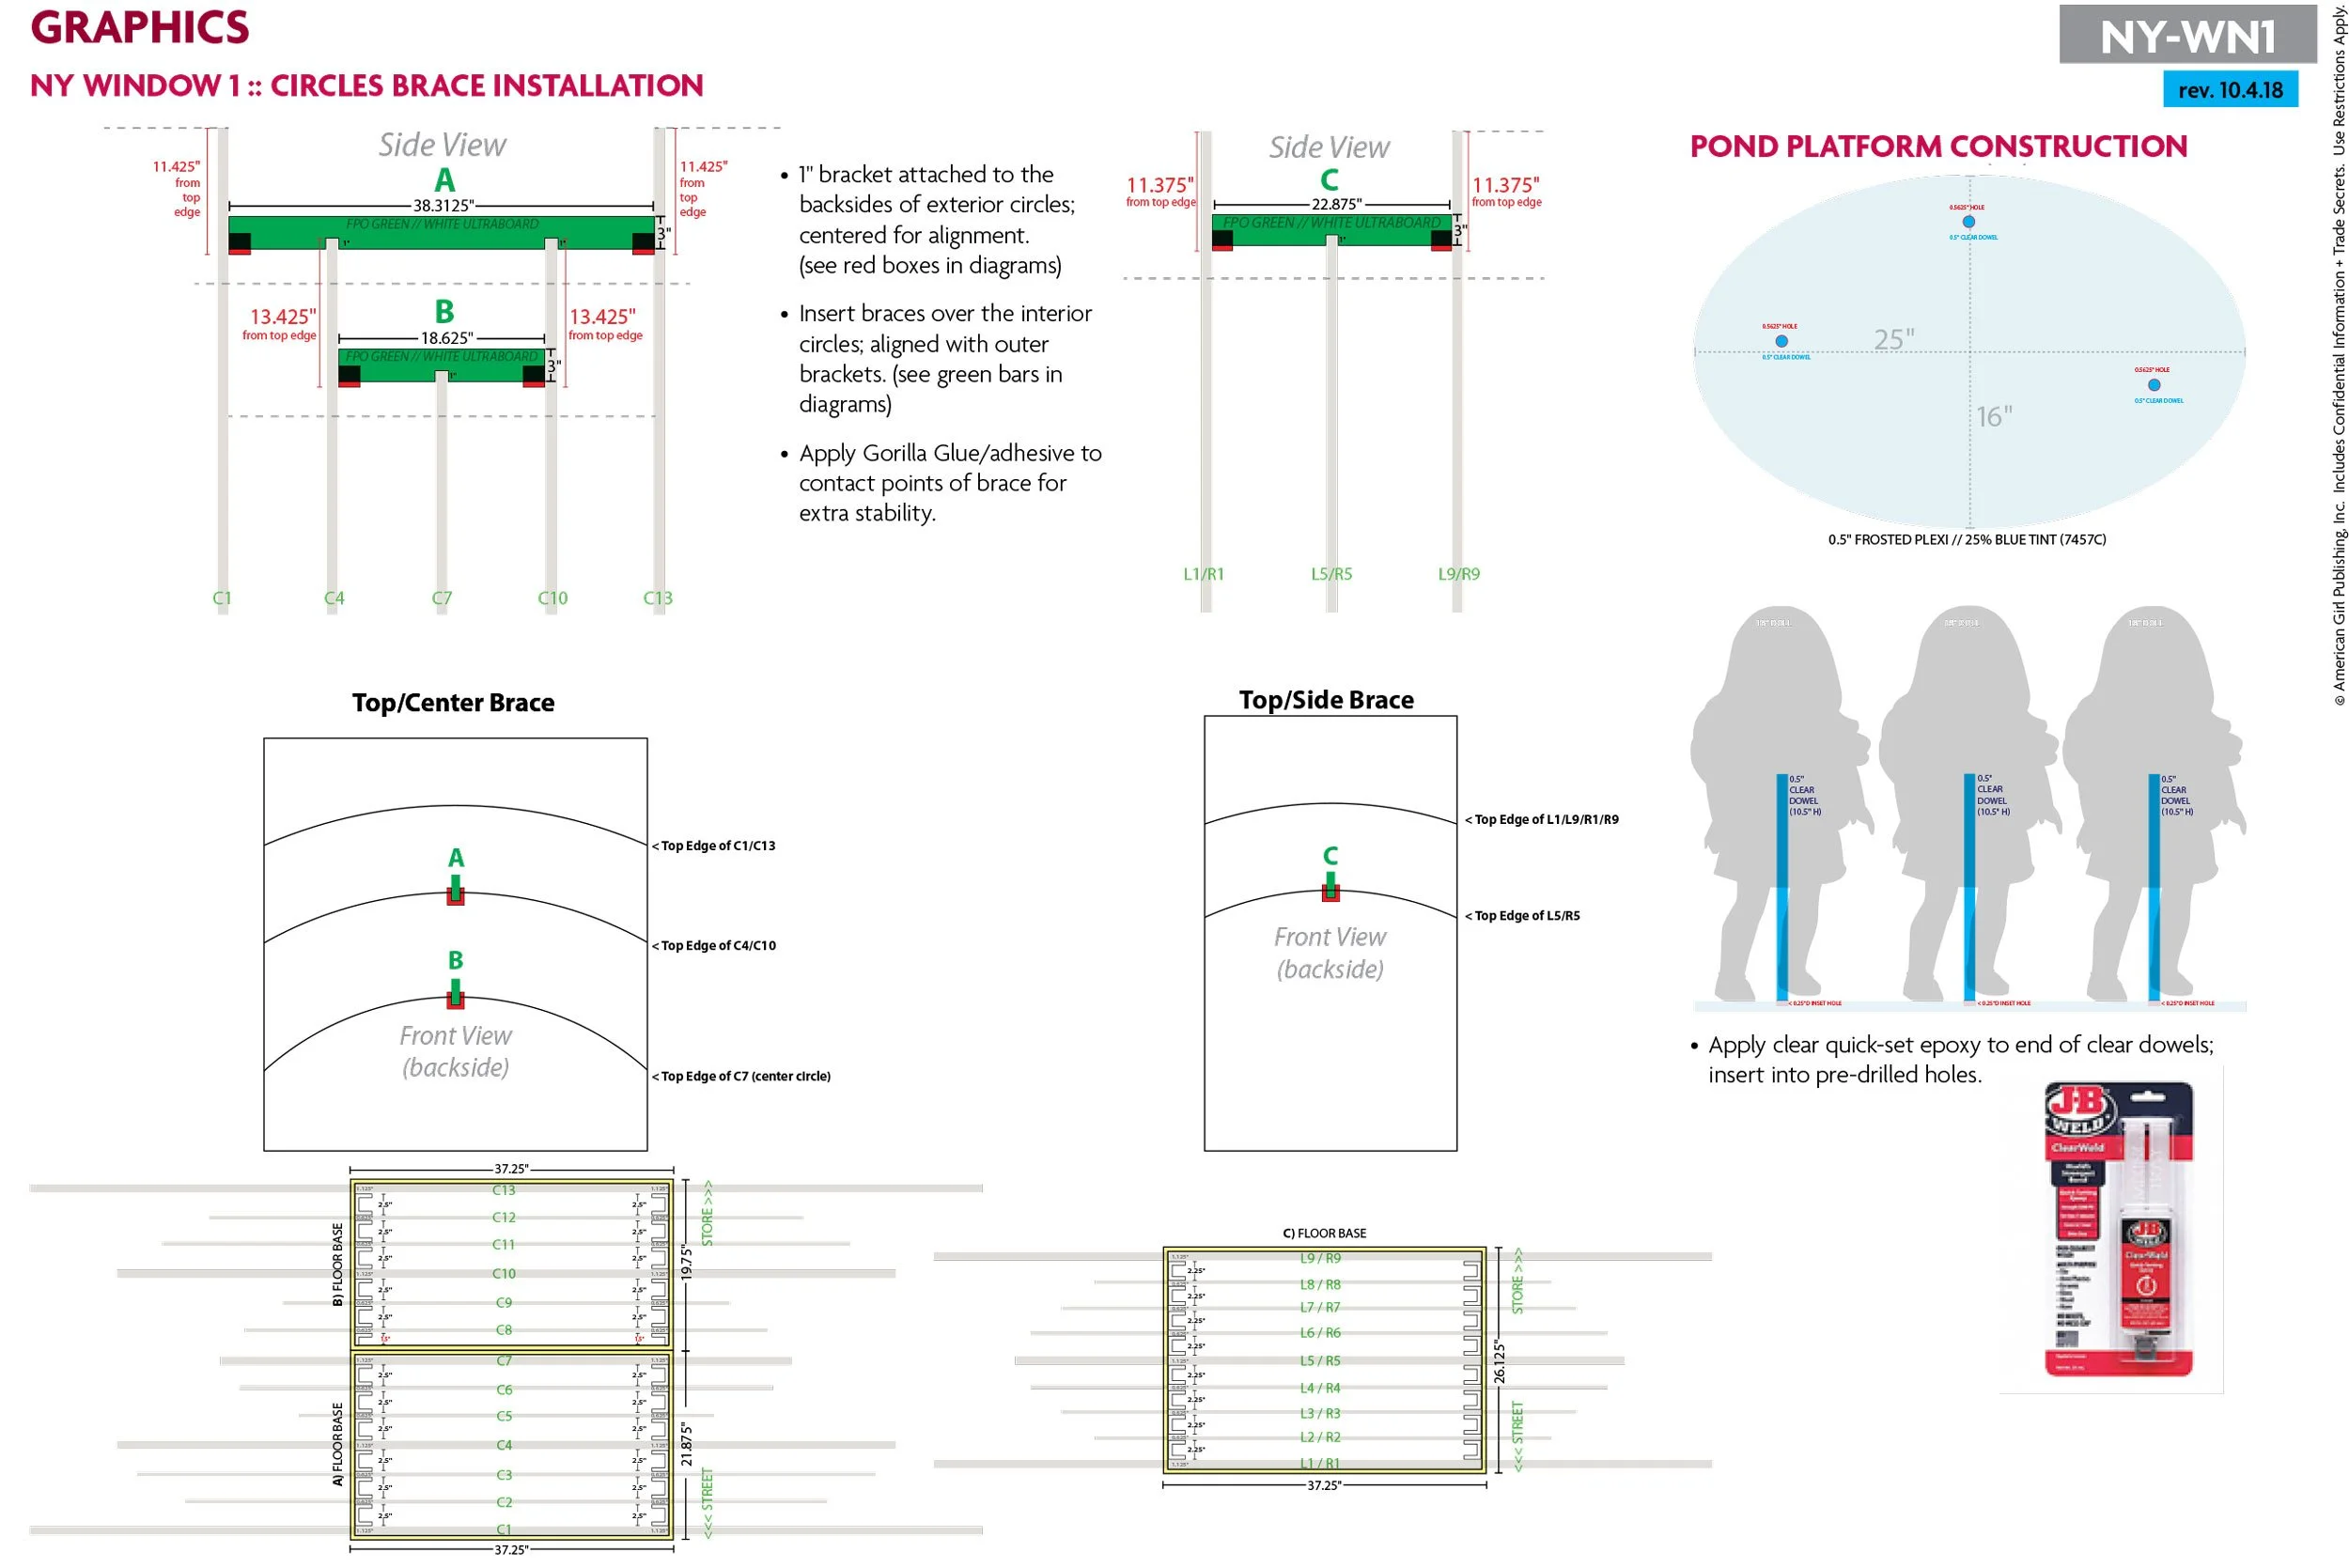
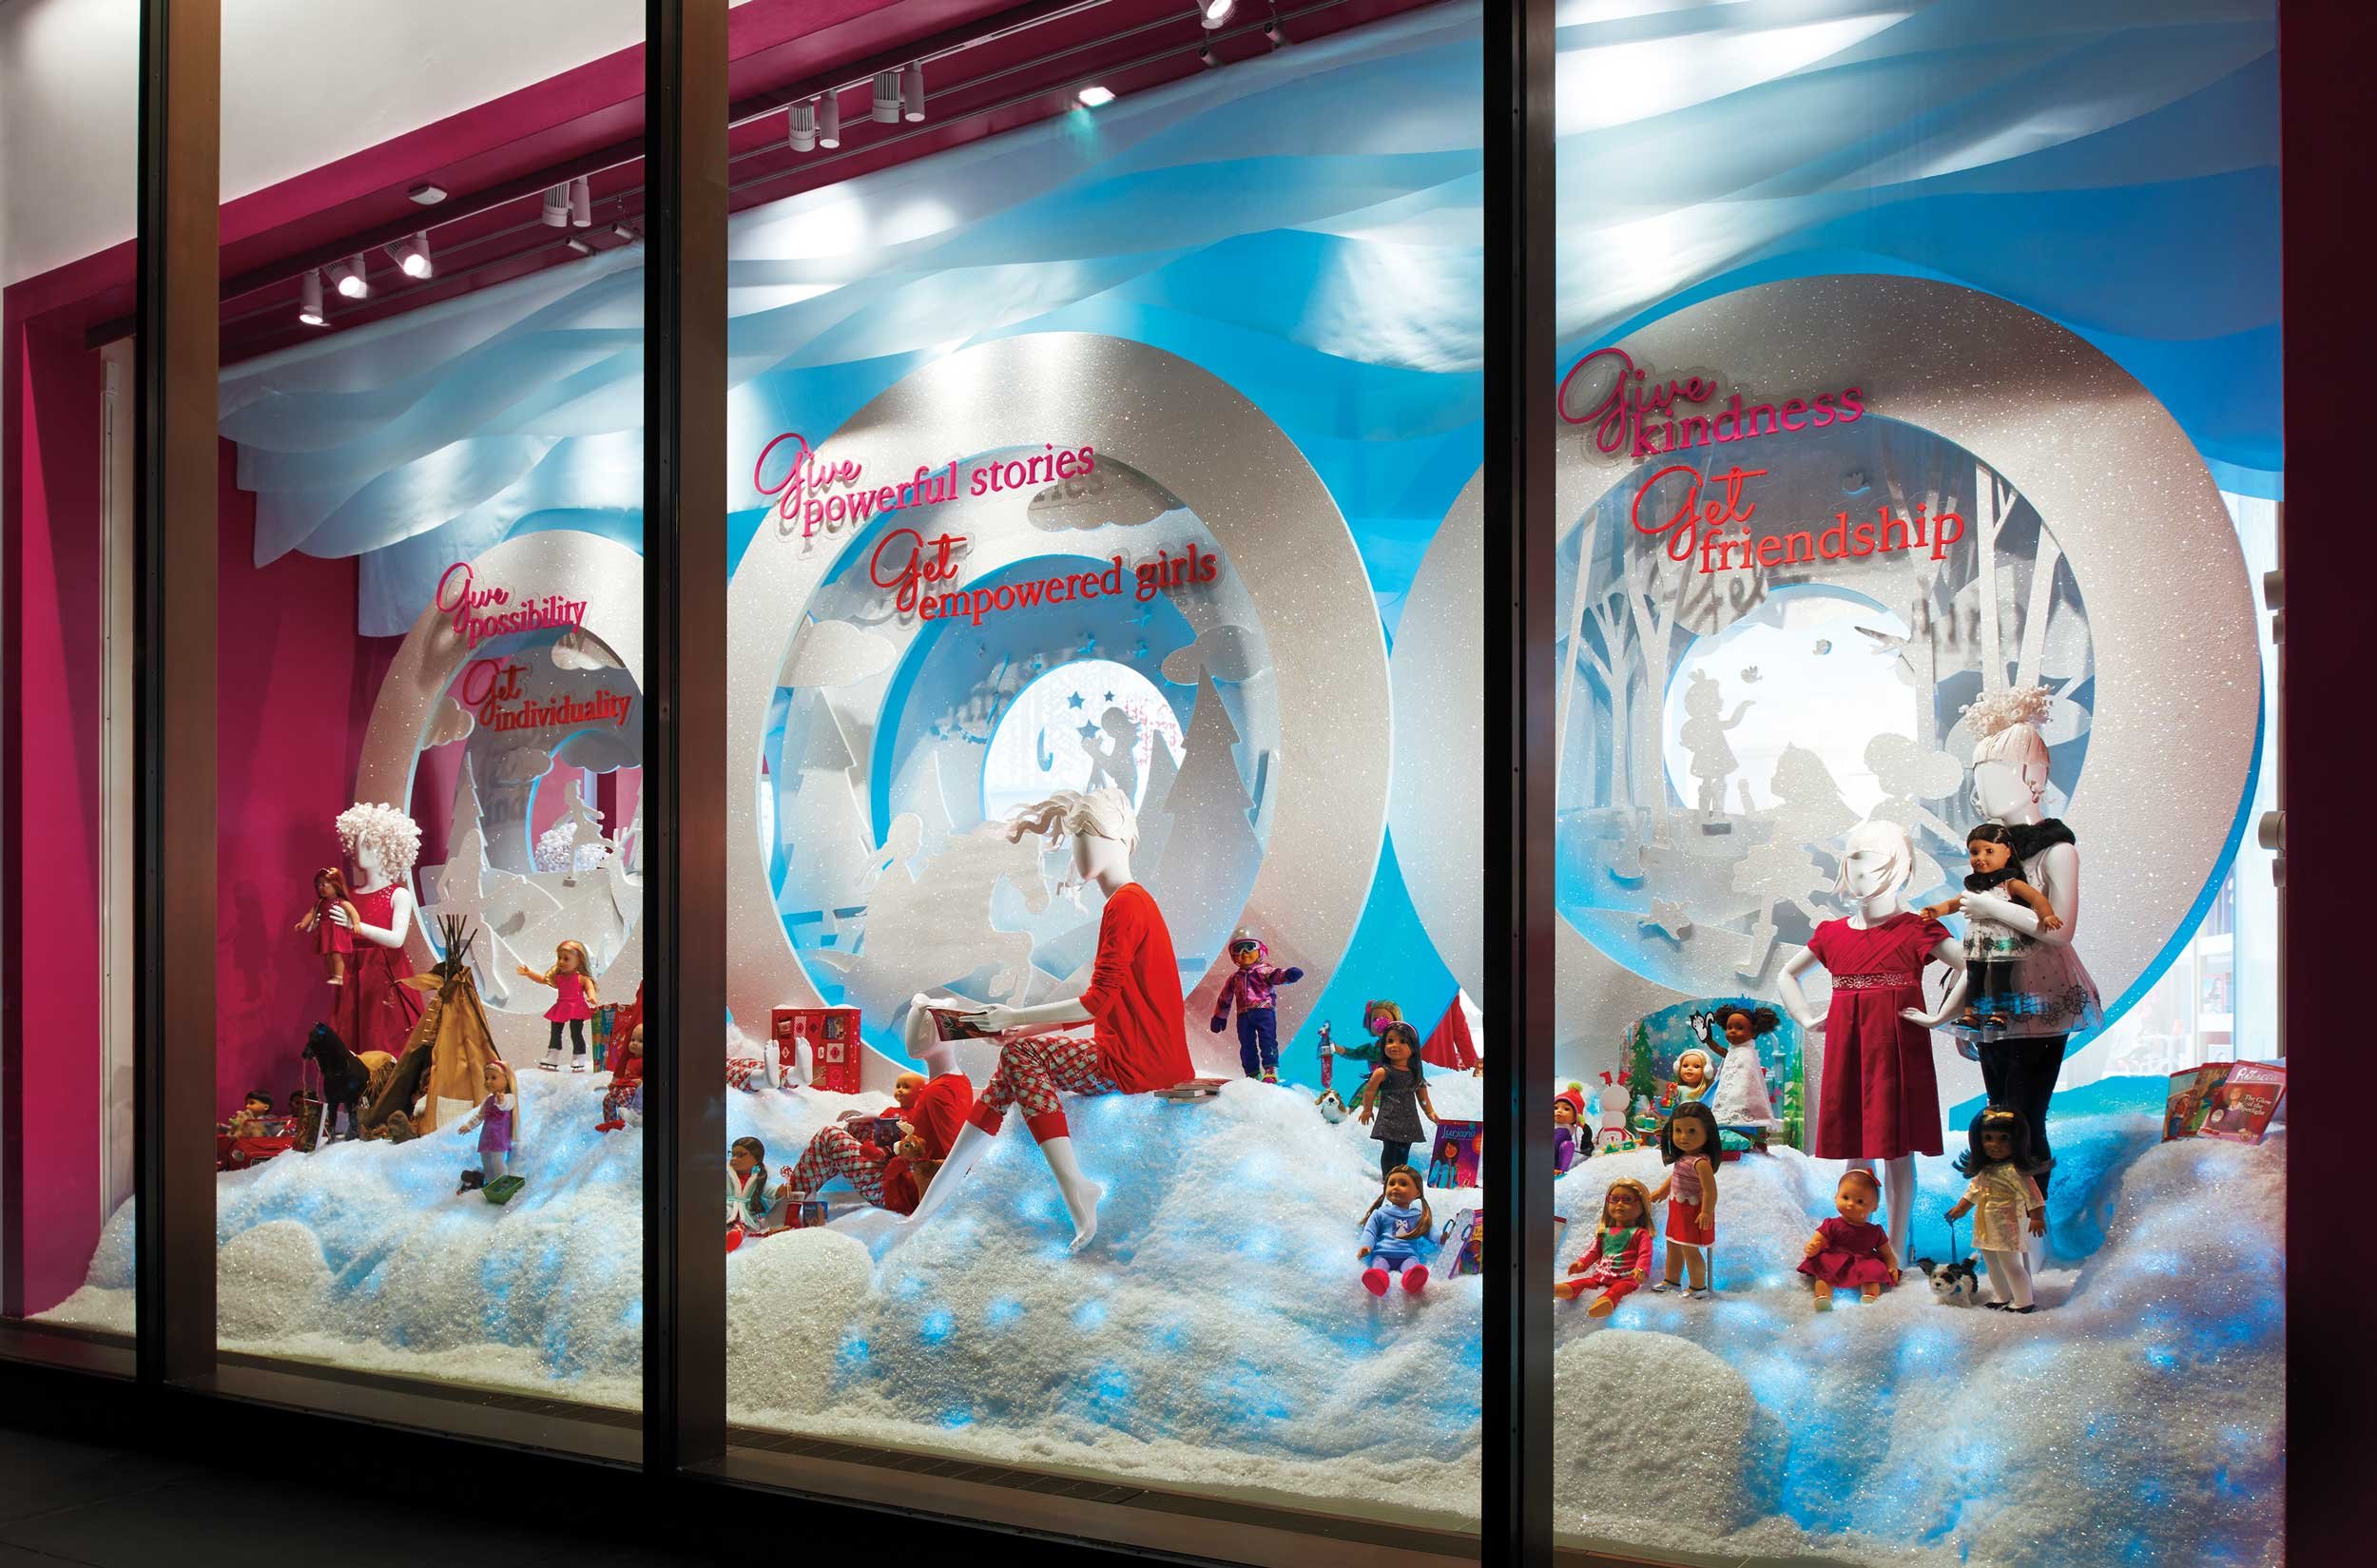
From concept to creation—brainstorm to installation—I collaborated with my fellow coworkers (Retail Store Design Creative team), copywriting partners, our talented NY Visual Merchandising Retail Team, and third party vendors to create a fun winter-wonderland product window to launch our Holiday 2018 product line. As lead designer on this project, I took the initial concept and made it an executable success. From creating meticulously layered Illustrator files for the vendor, to developing intricate matrices for the individual parts/pieces required, troubleshooting install solutions—I was invested in creating an American Girl miracle on 51st St.
Fun Fact: This window design made its way into the 2018 Holiday Window issue of Design:Retail (publication).
The Design Process
-
![]()
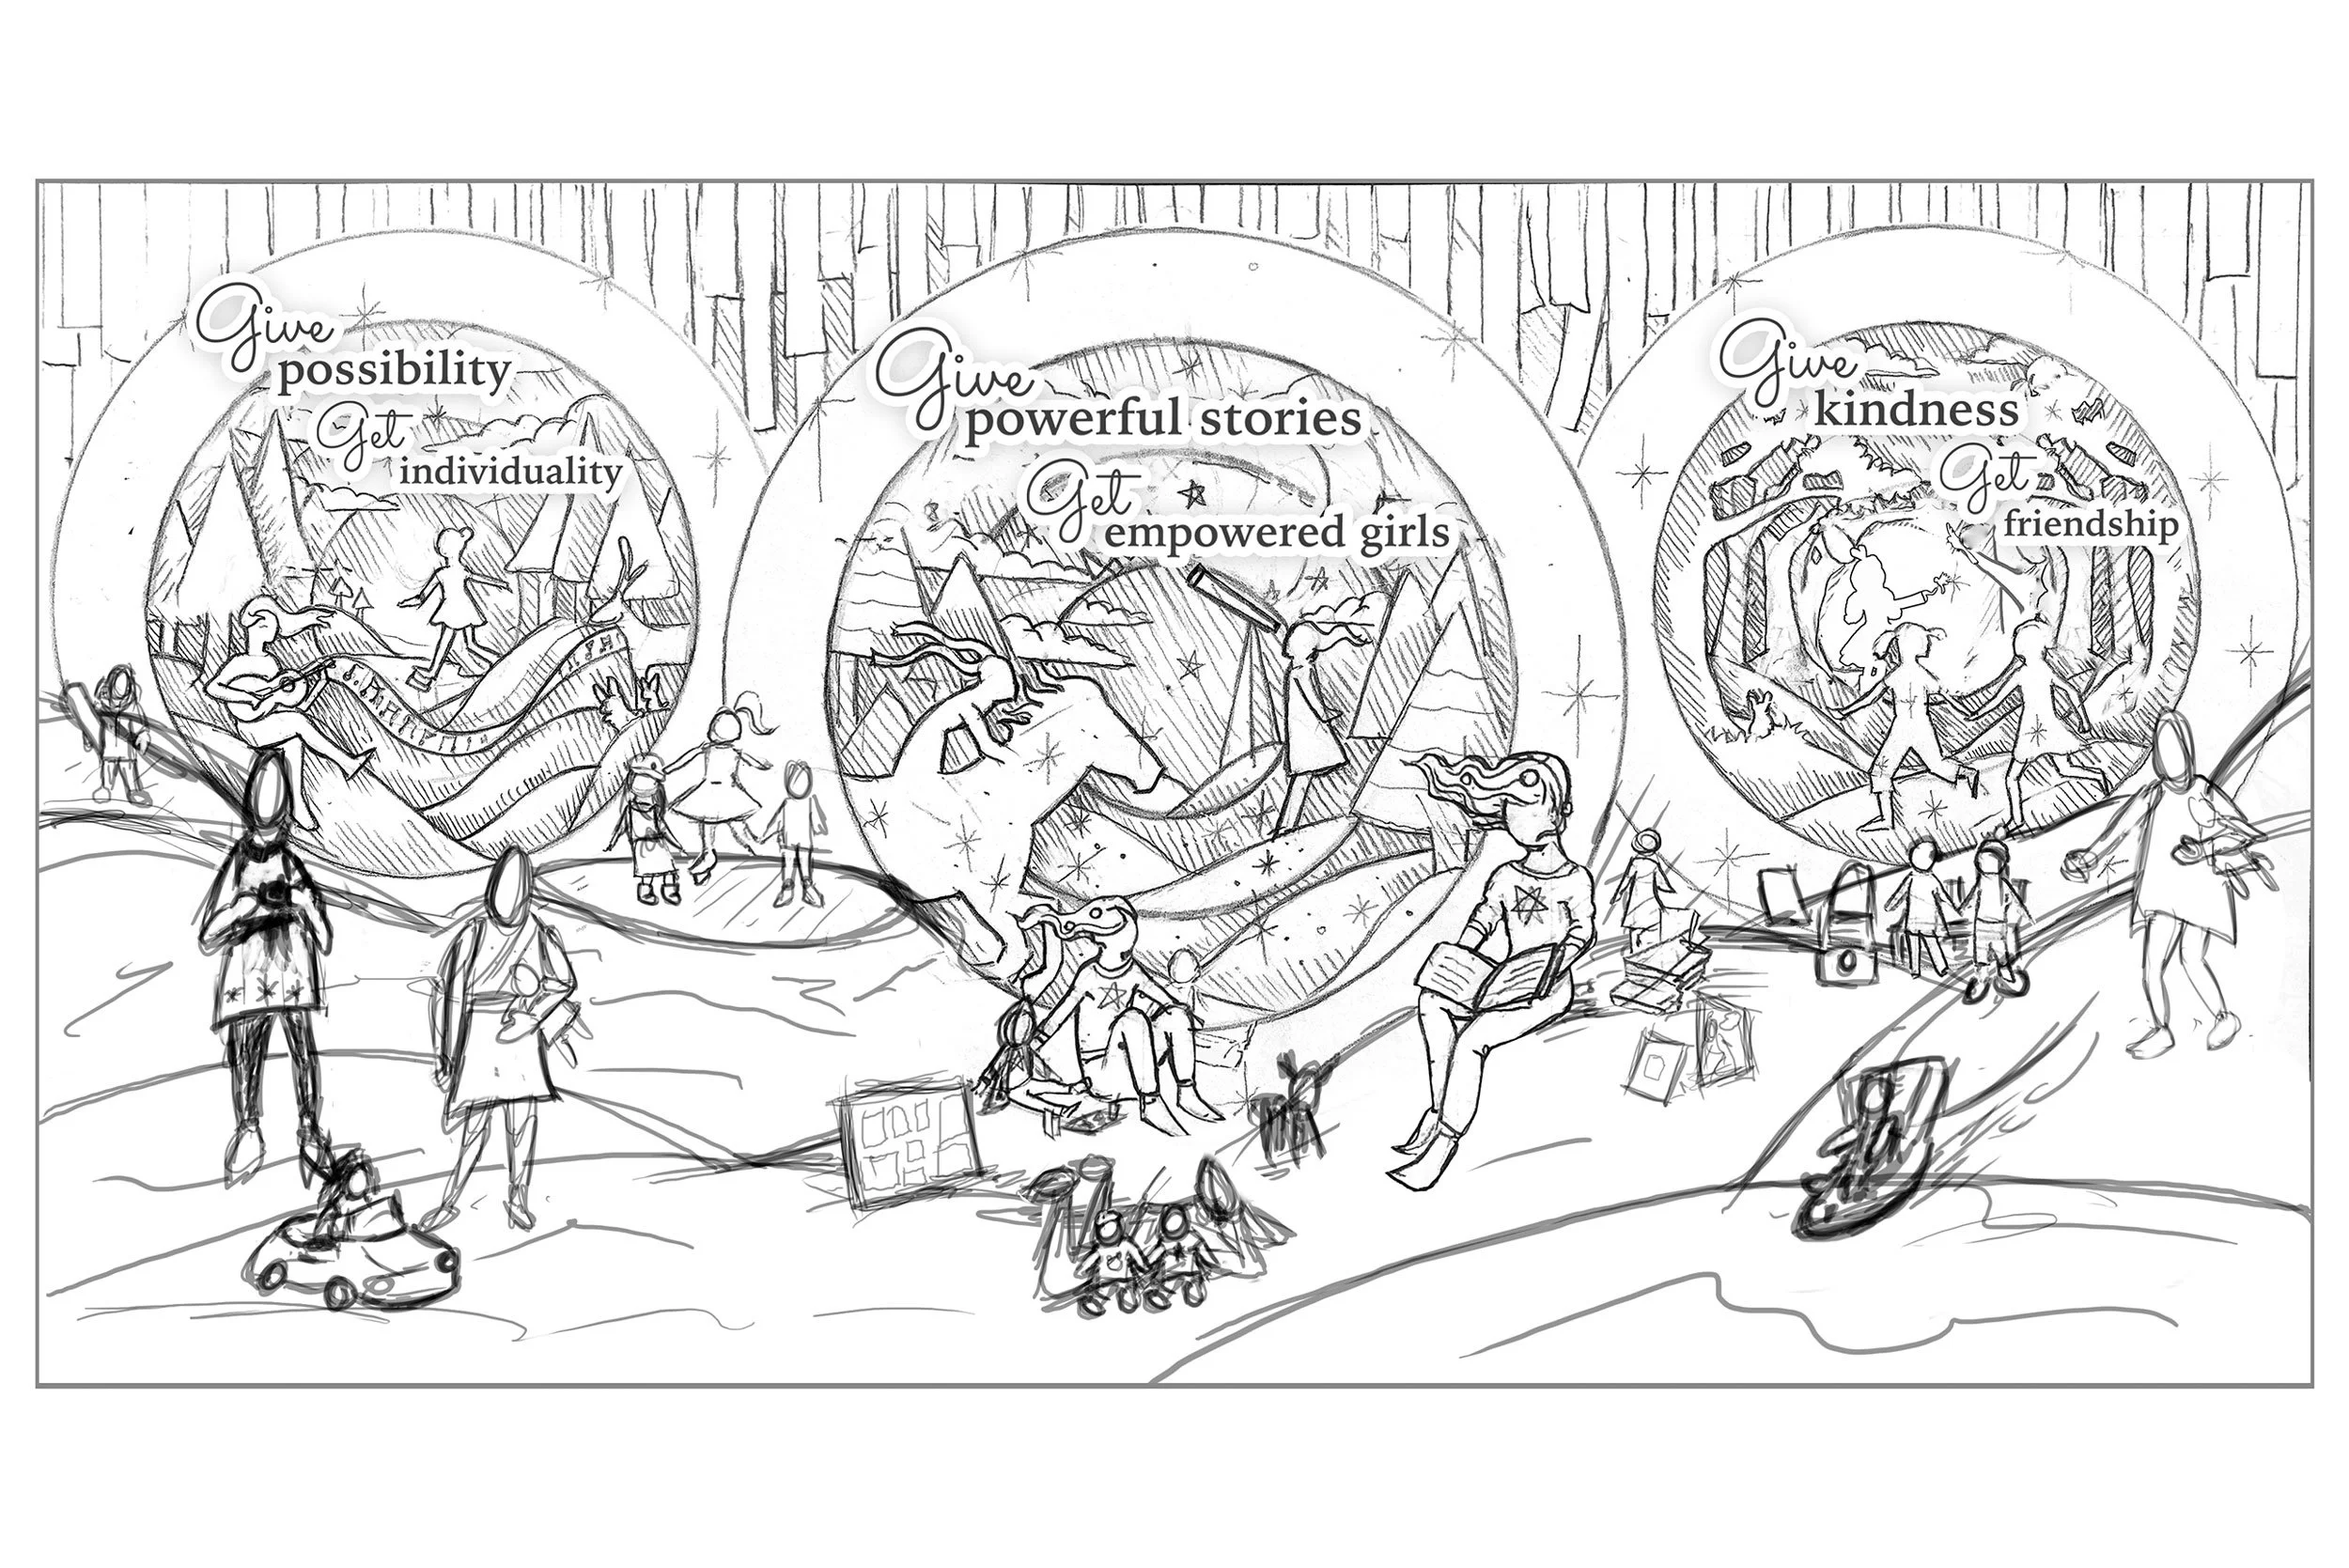
Overall Window Concept (Side 1)
**Original sketch by Chris Miraglia/Visual Merchandising Manager @ American Girl NY-Rockefeller
-
![]()
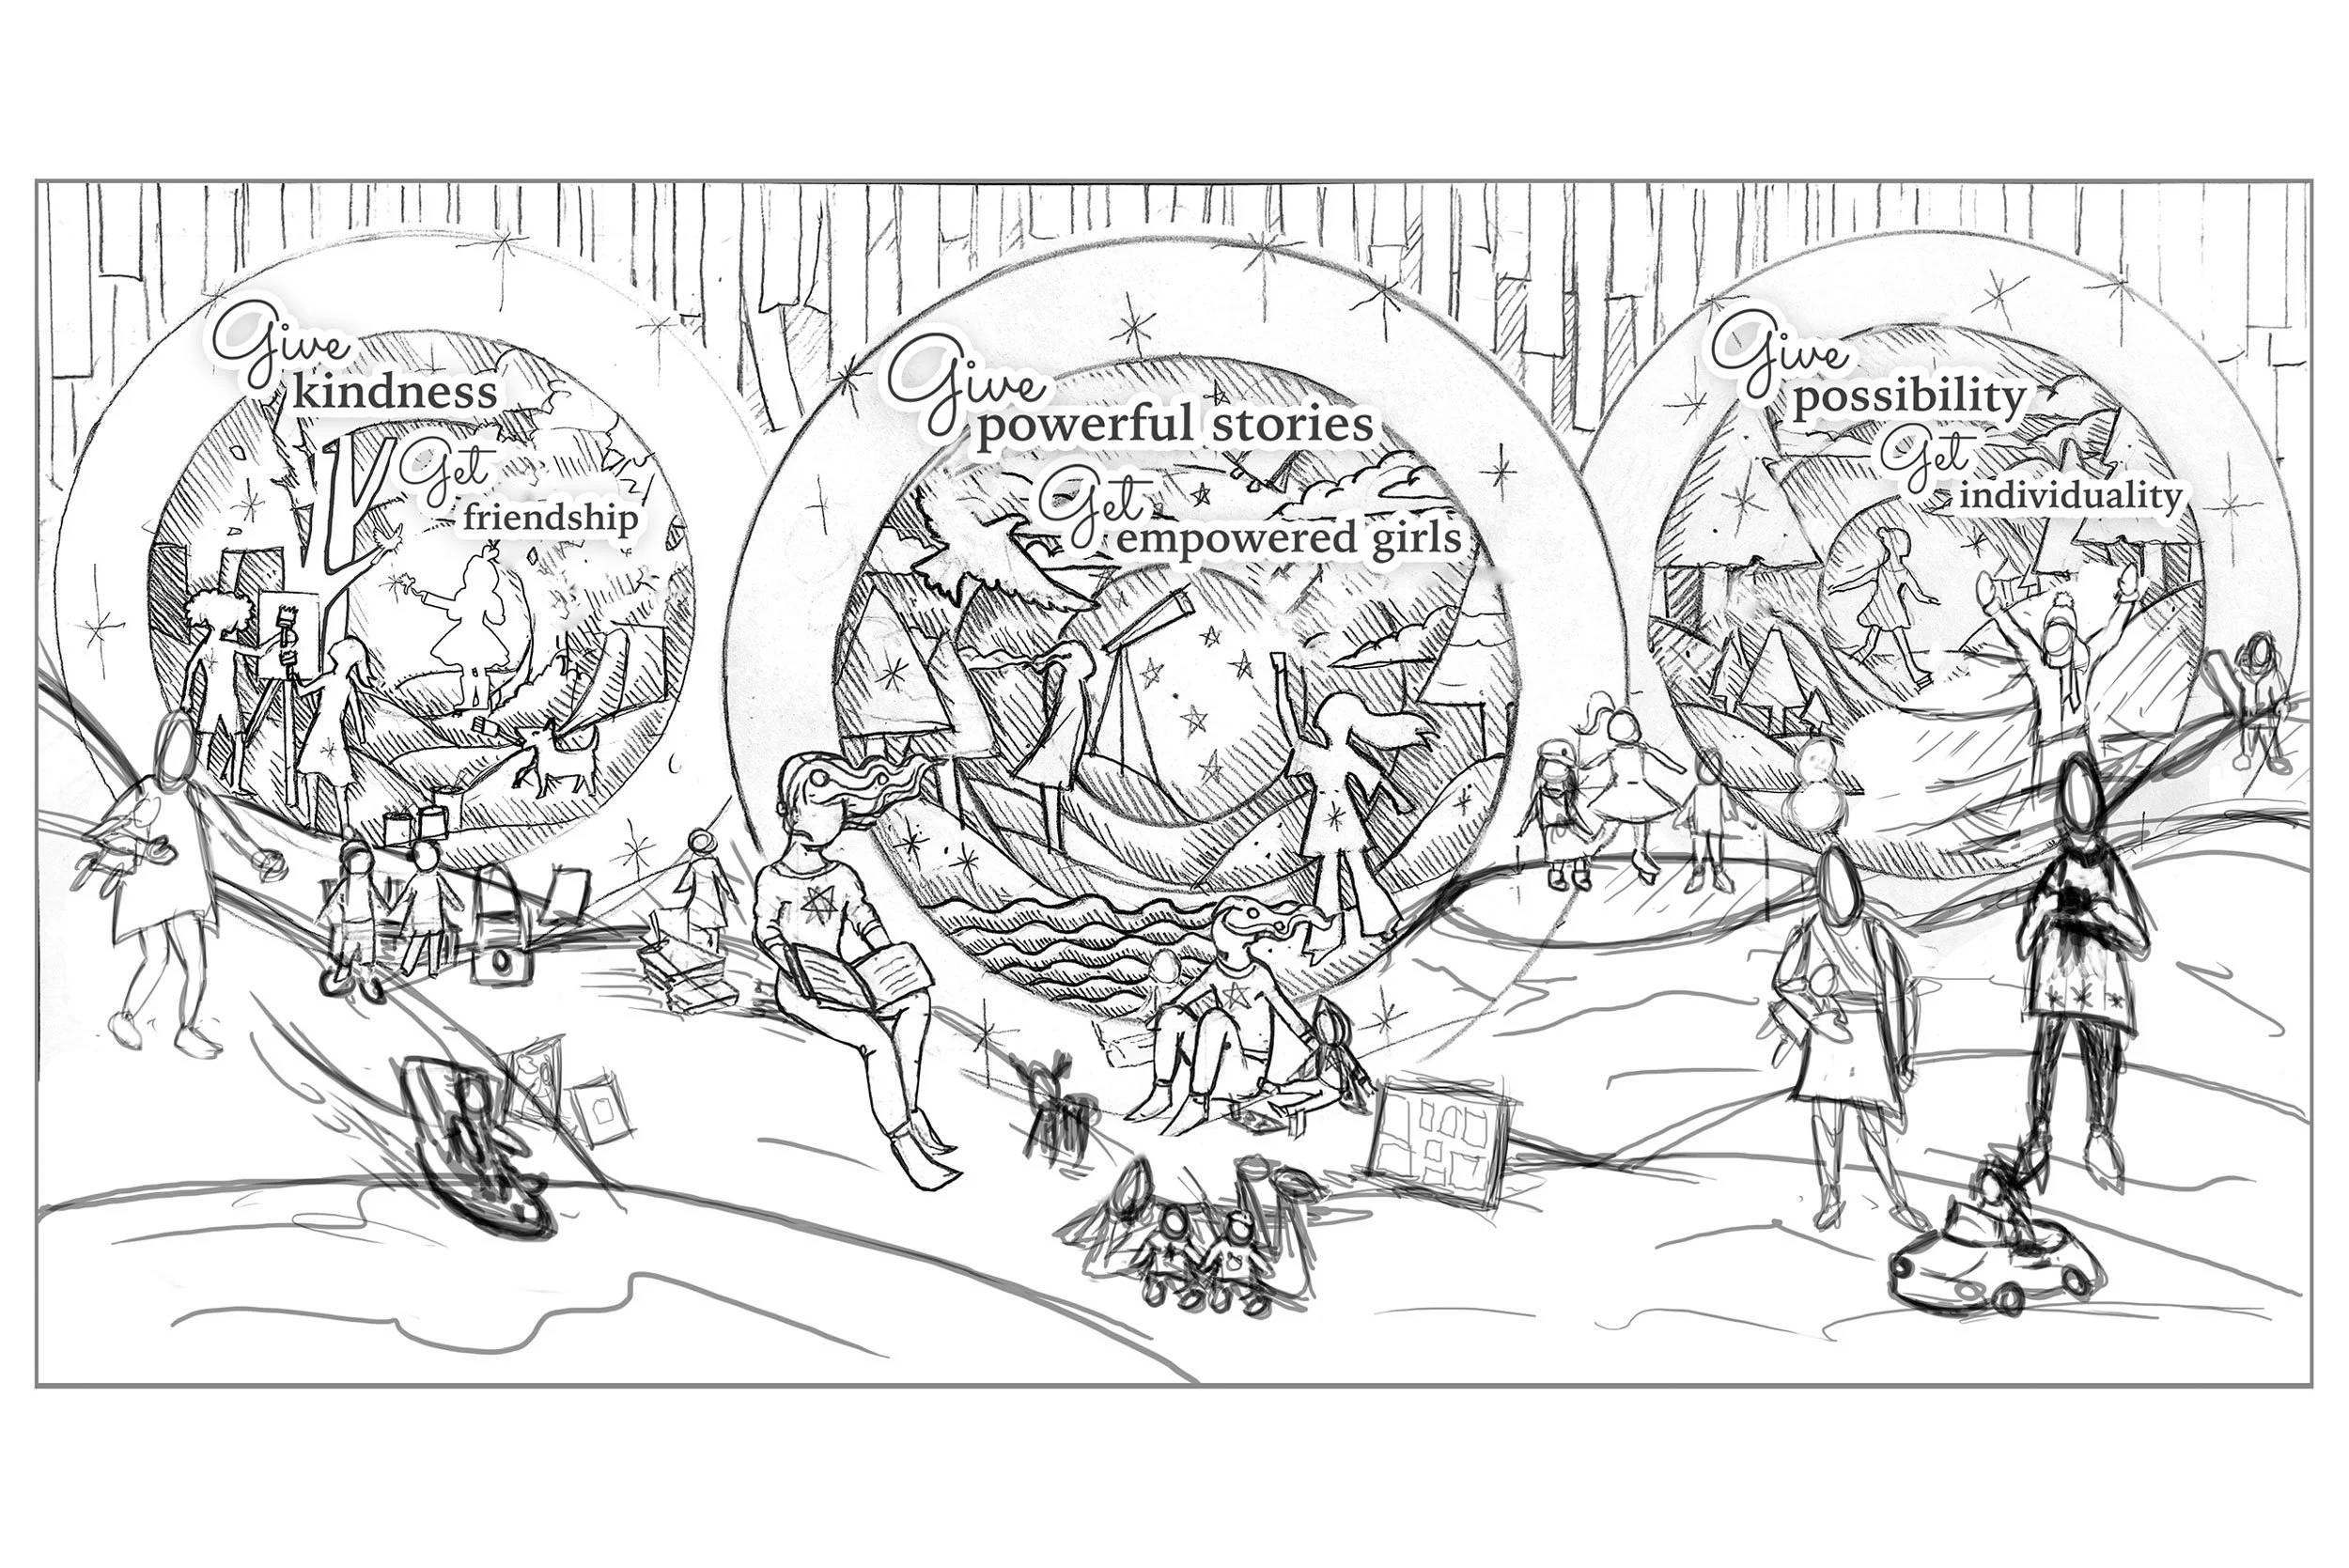
Overall Window Concept (side 2)
**Original sketch by Chris Miraglia/Visual Merchandising Manager @ American Girl NY-Rockefeller
-
![]()
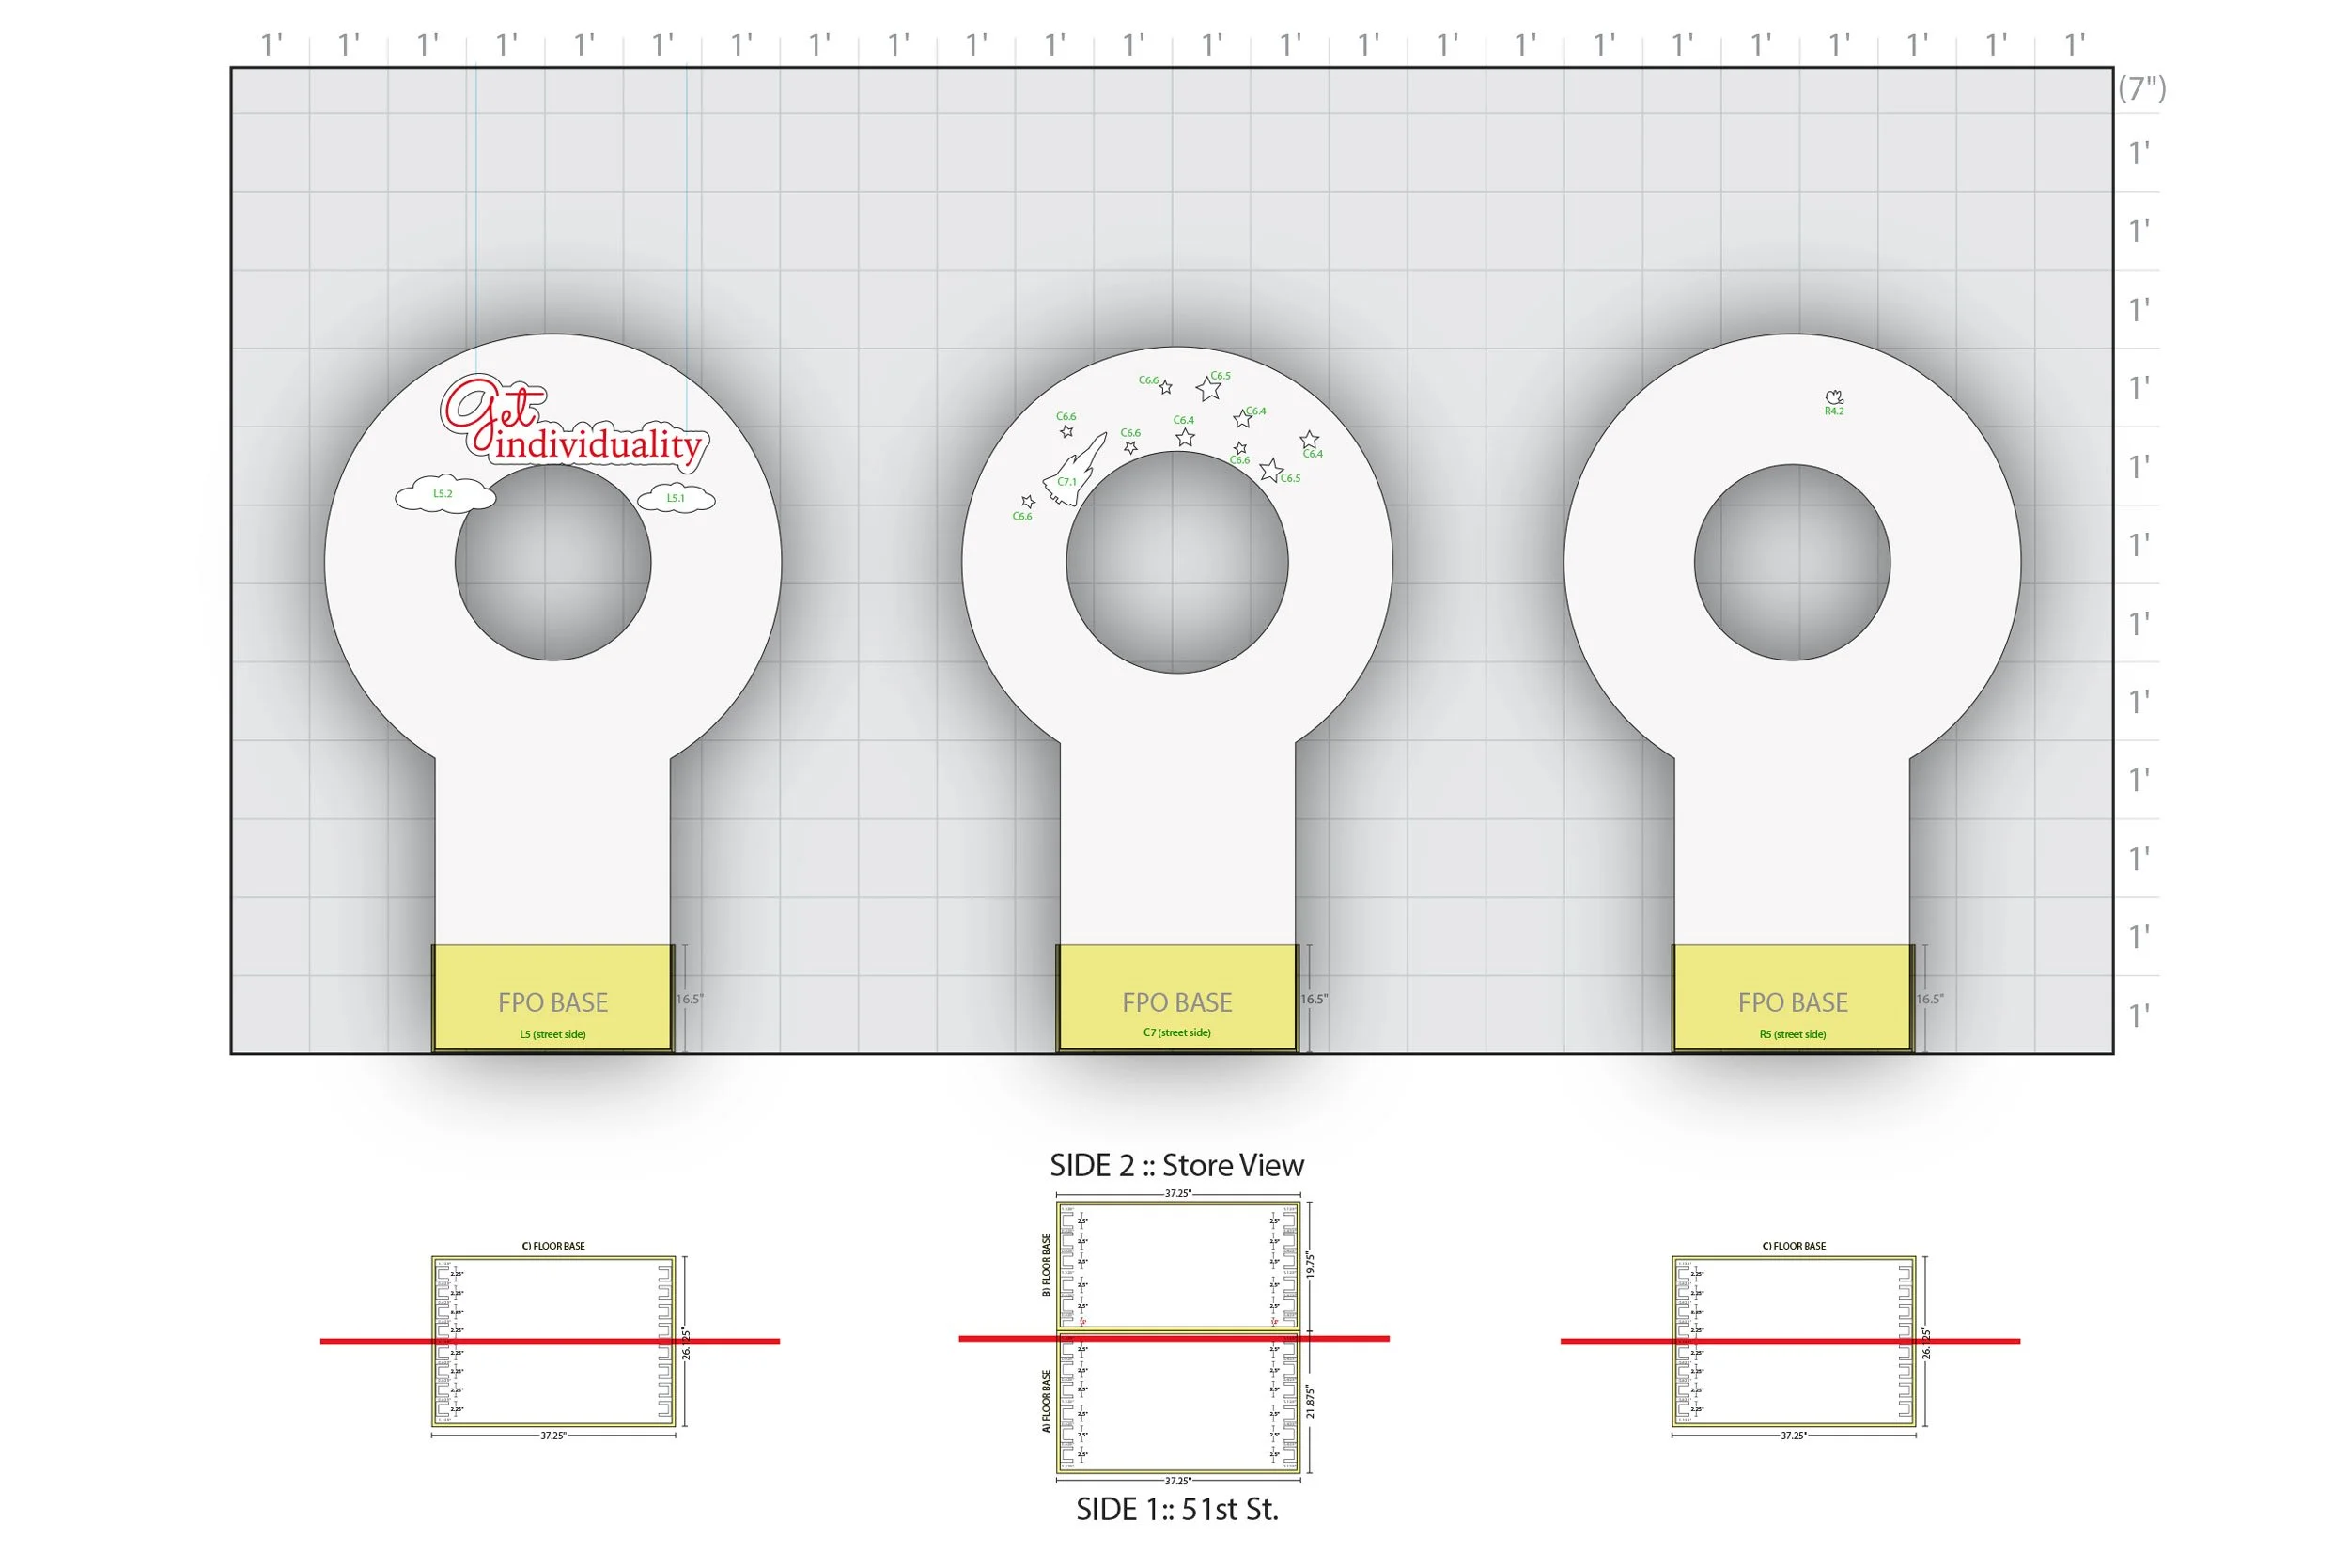
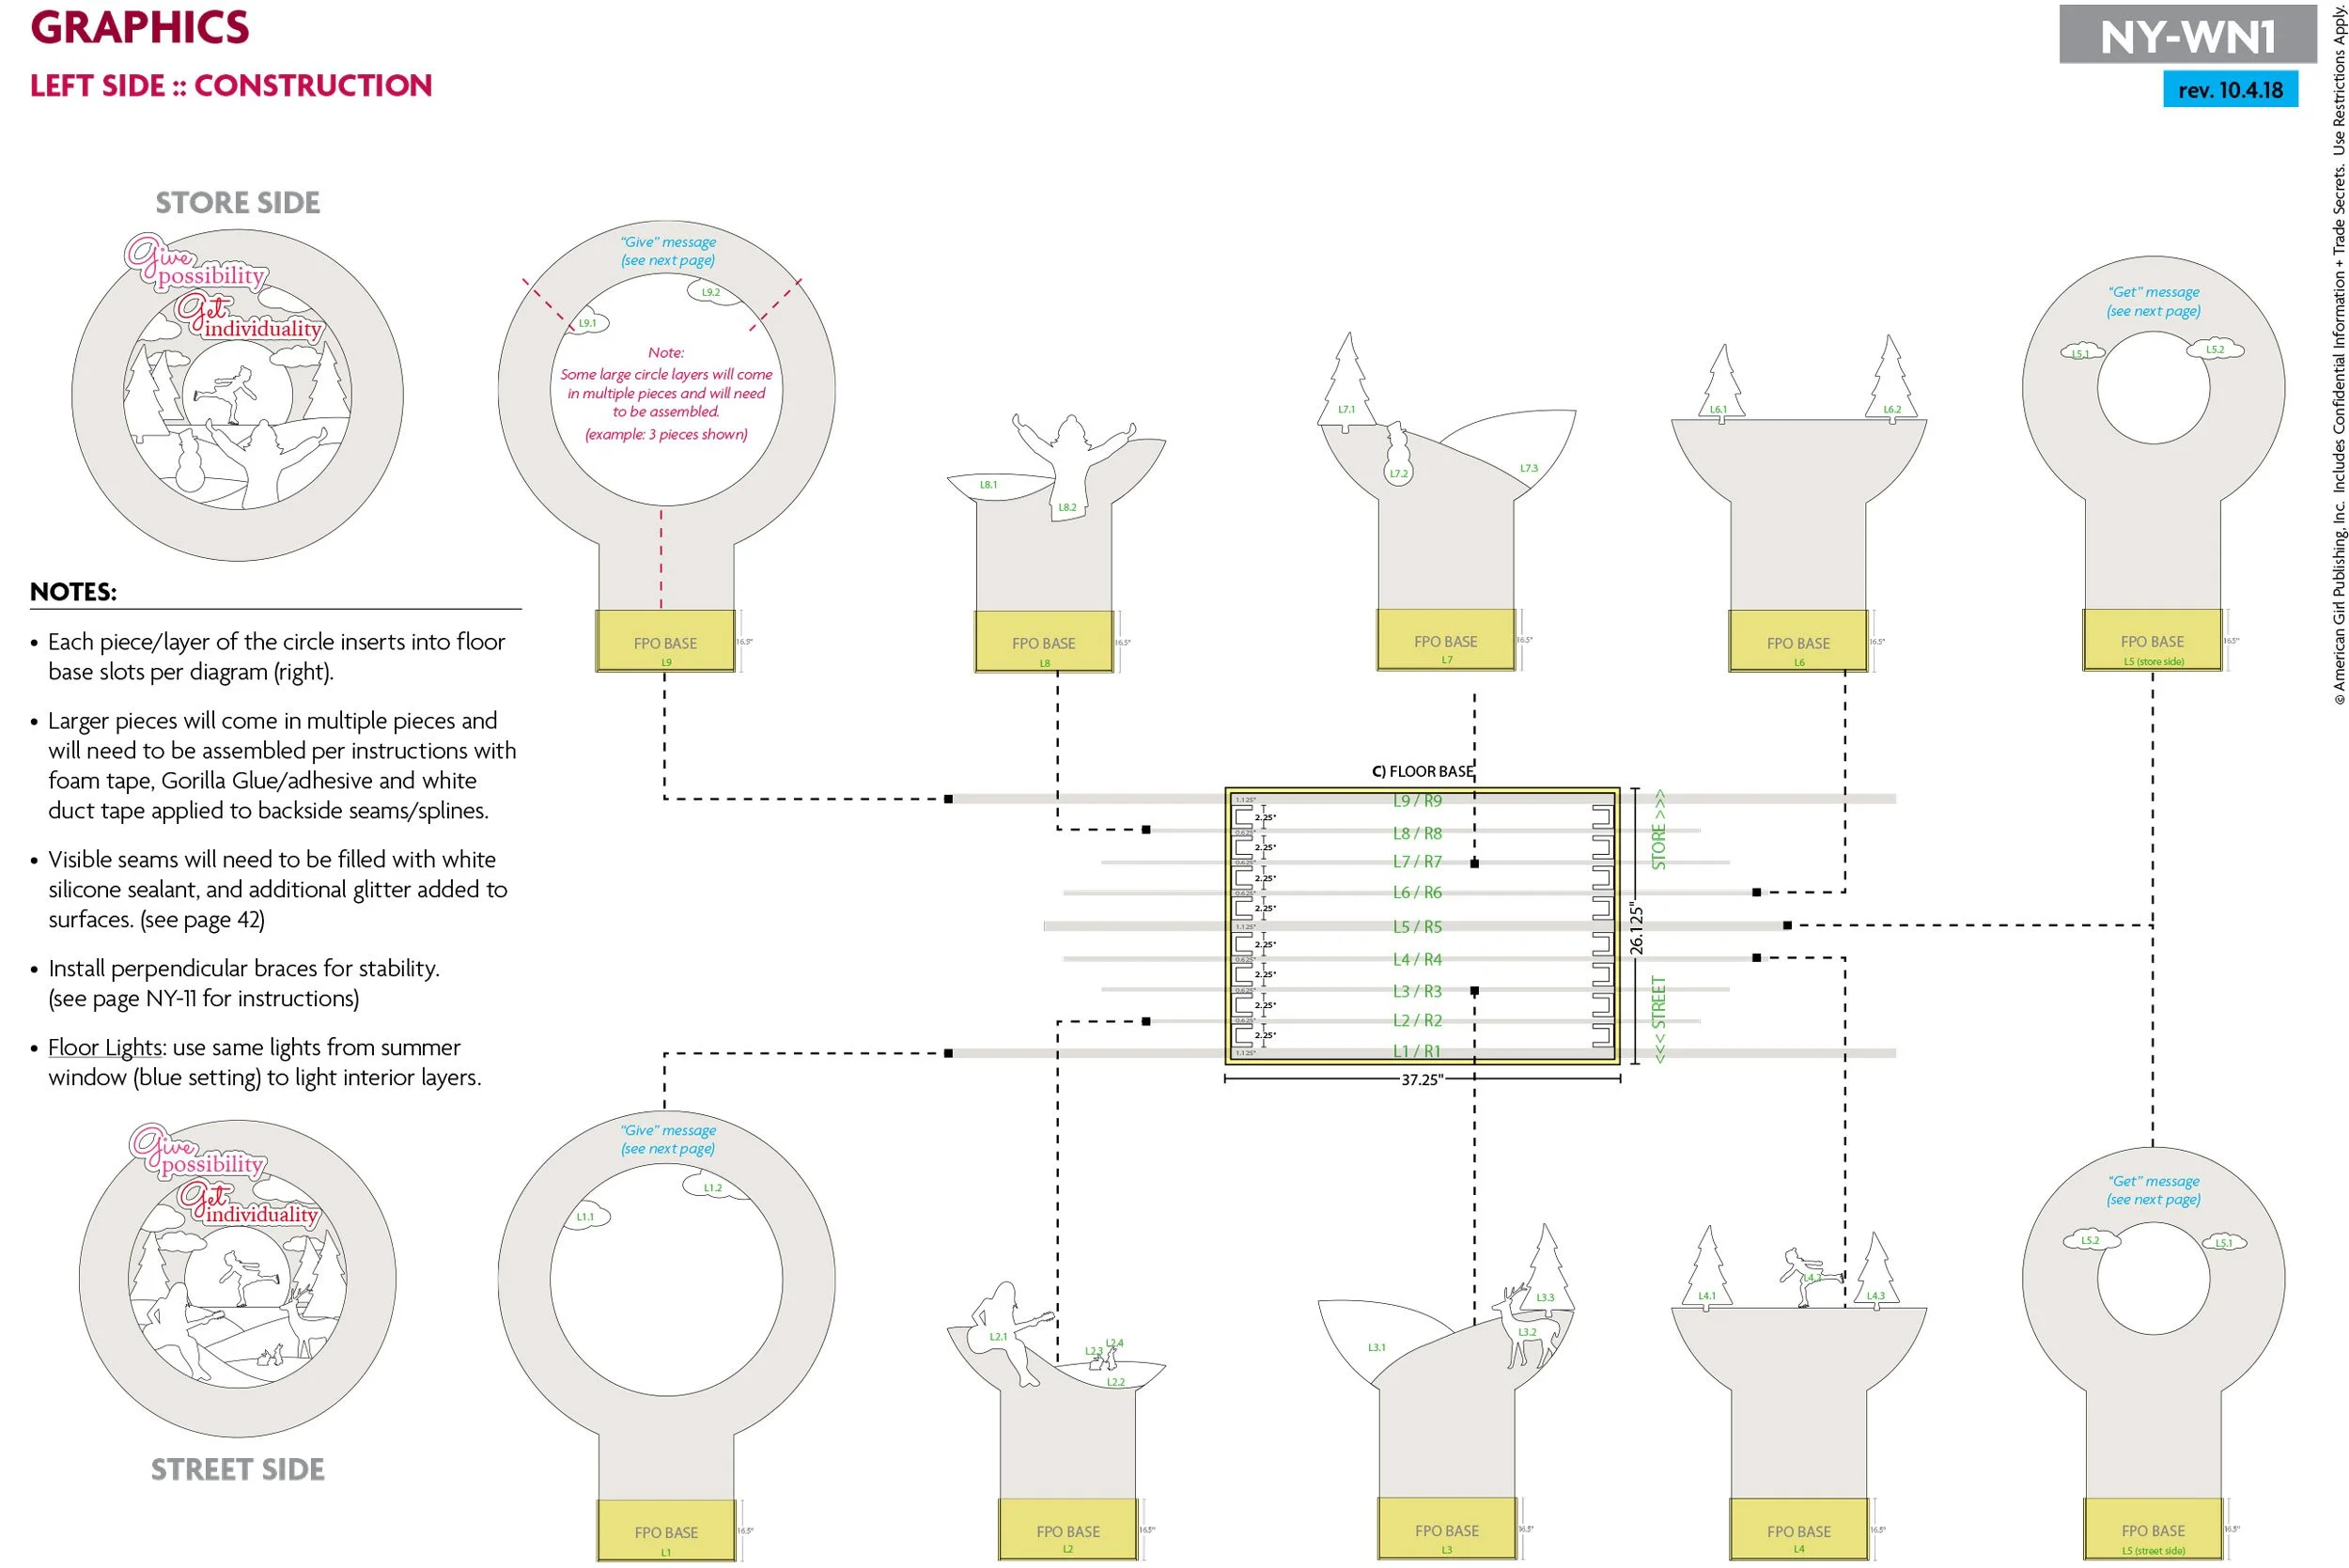
Floor Base
Construct a strong/sturdy base, with slots for each ultraboard layer of each individual shadowbox.
-
![]()
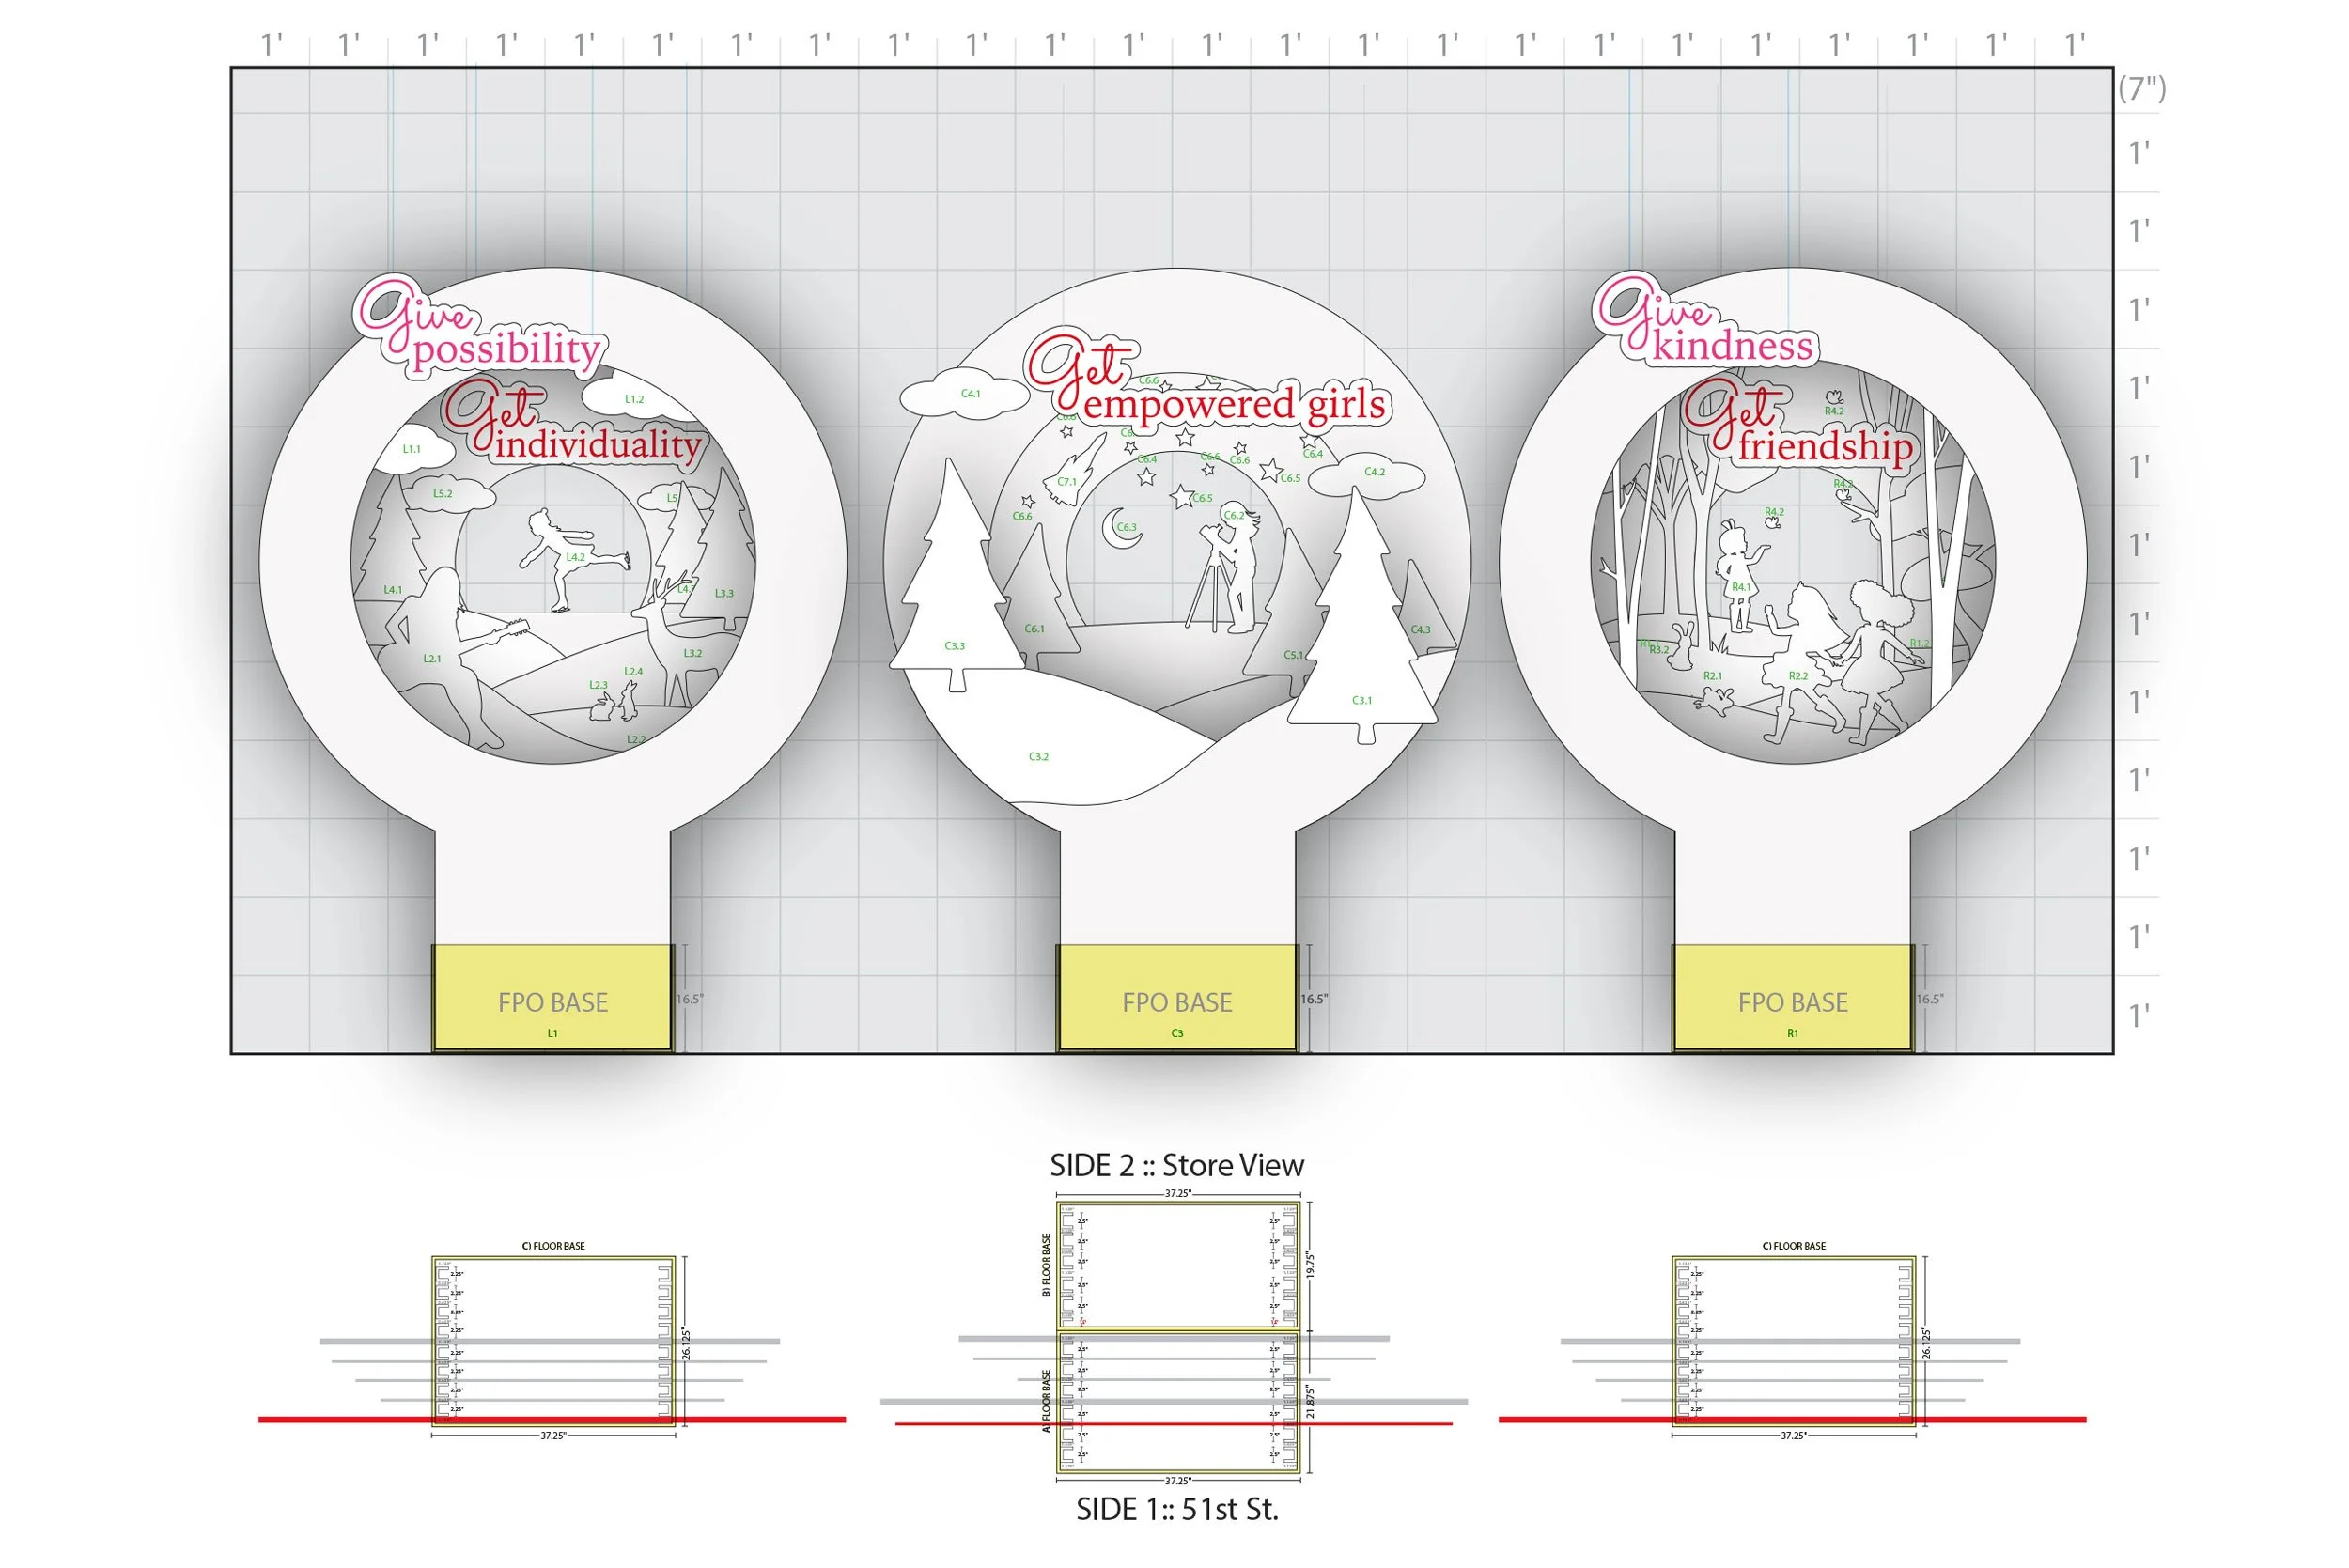
Floor Base + Braces
Detailed look at the floor base structures, and the horizontal braces to be installed on the interior of the shadowbox layers—keep the large layers vertical and solidify the final structure.
-
![]()
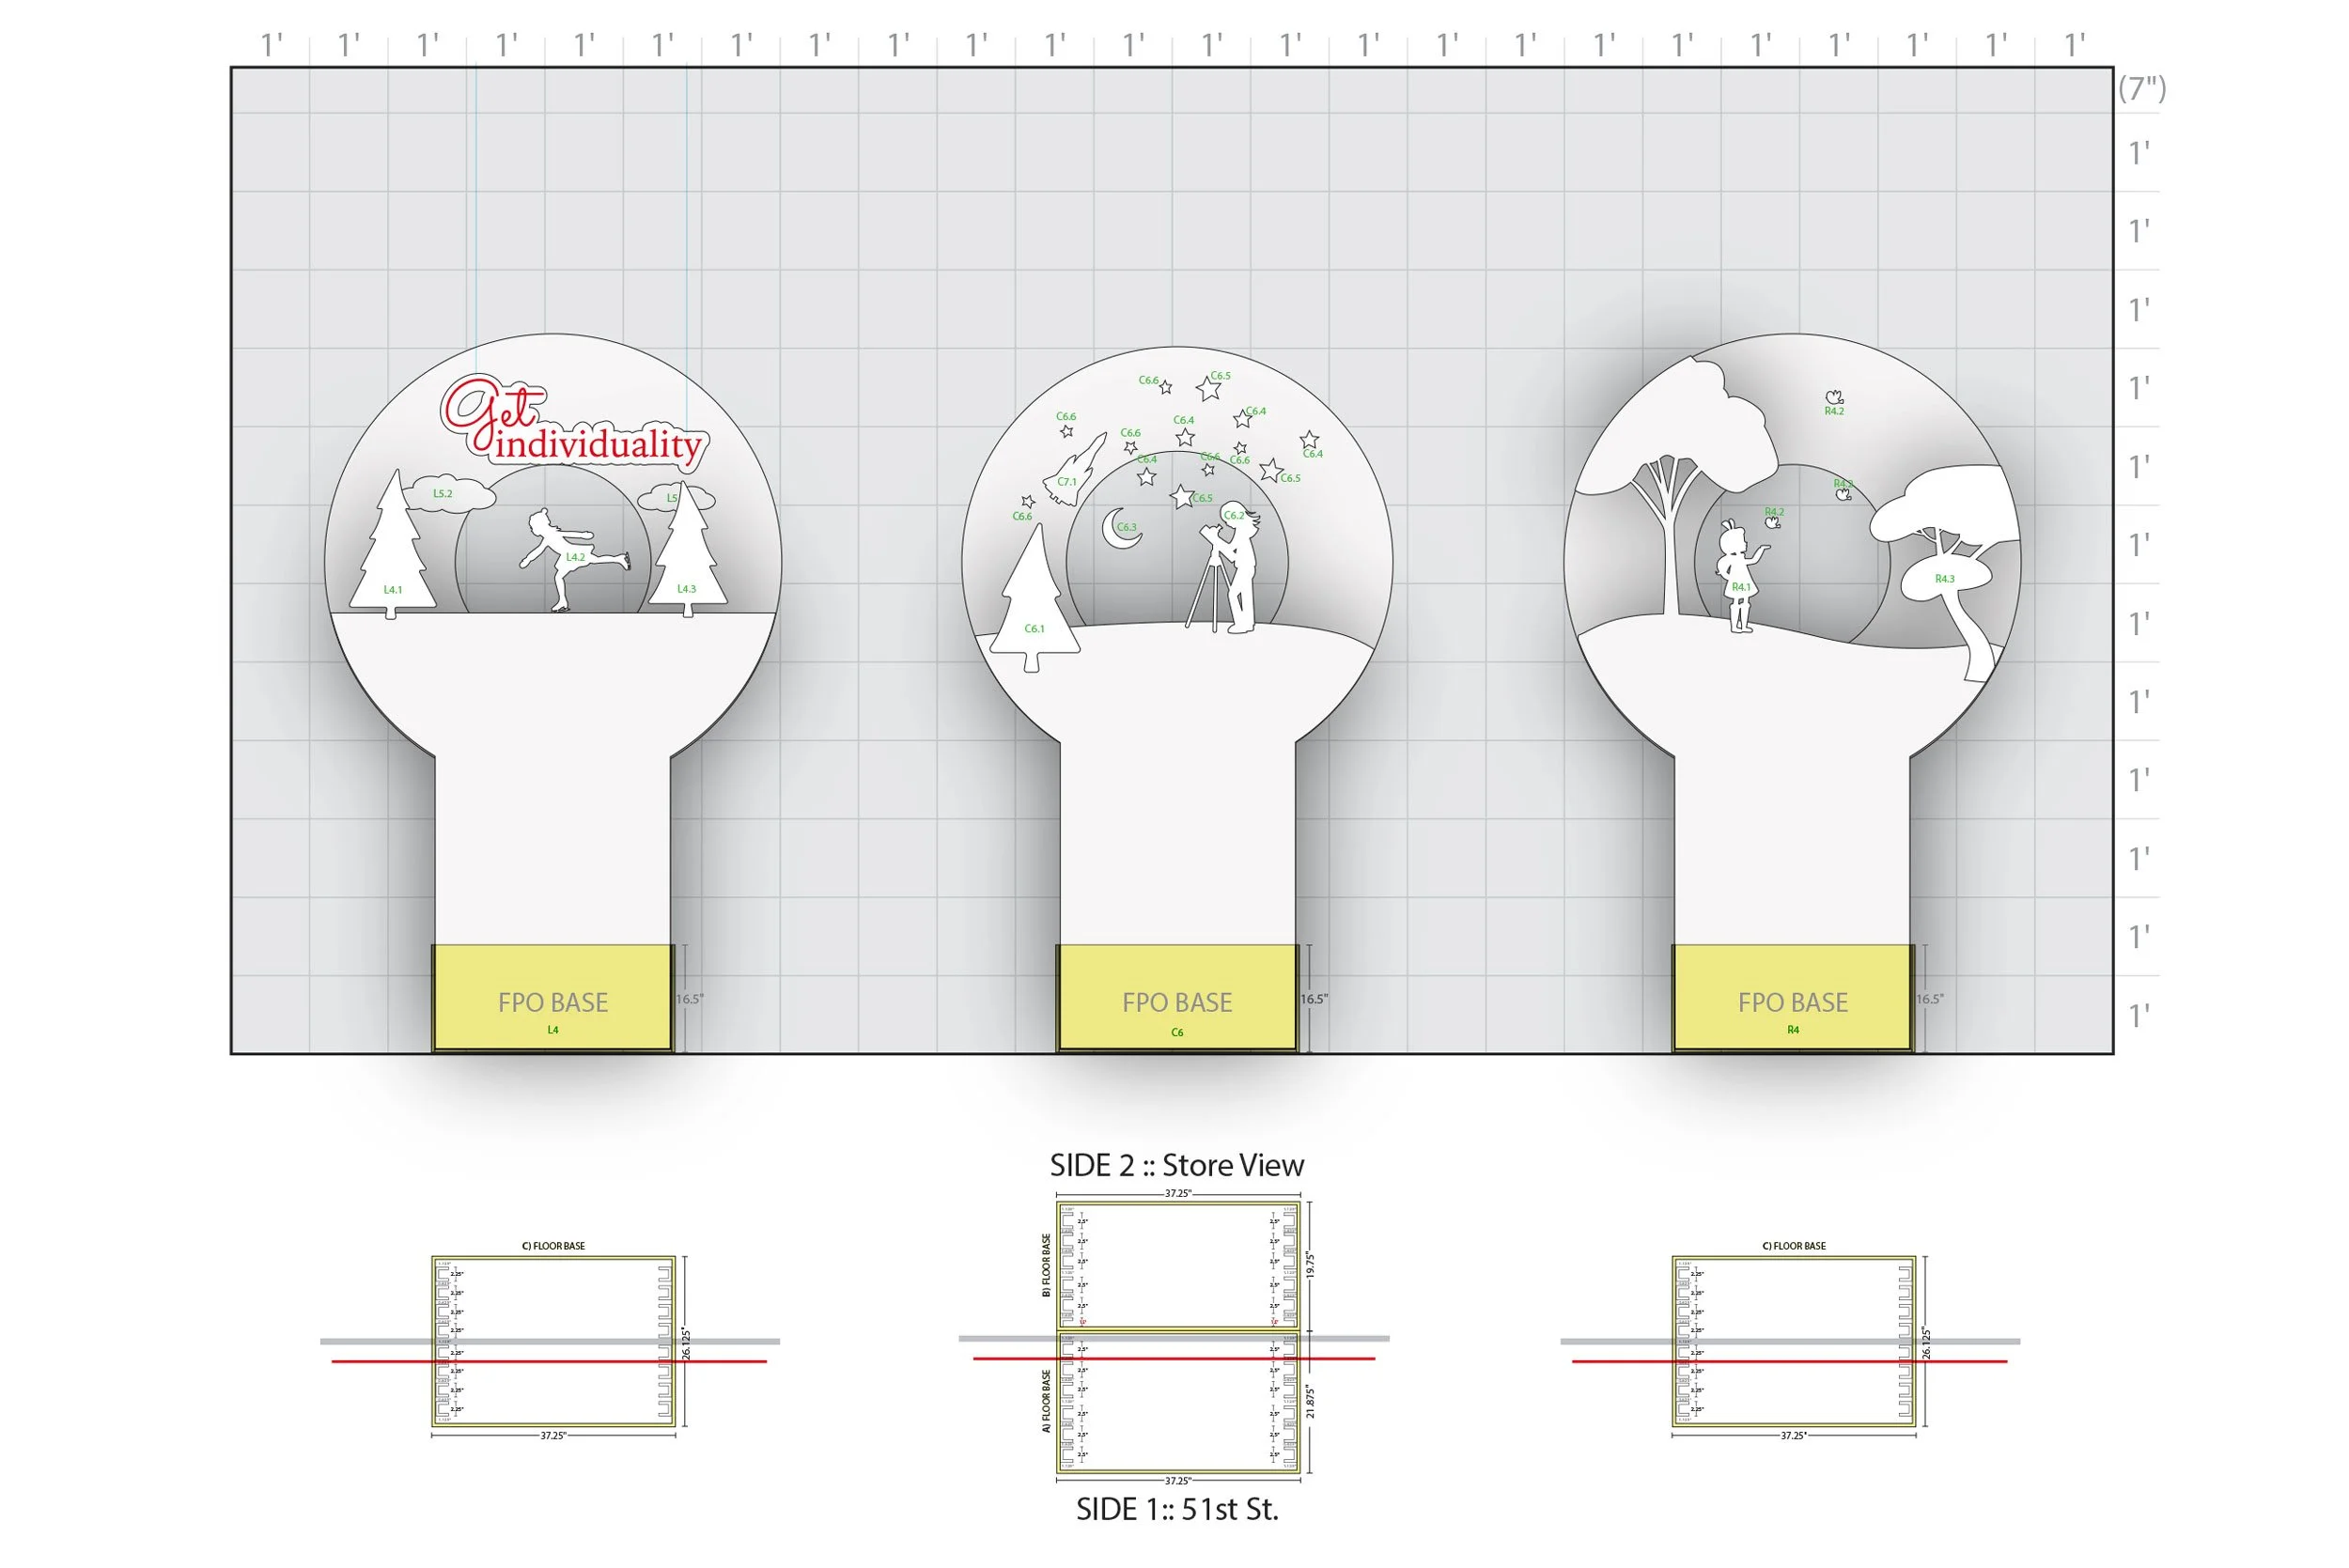
Shadow Box Construction (Street Side 1)
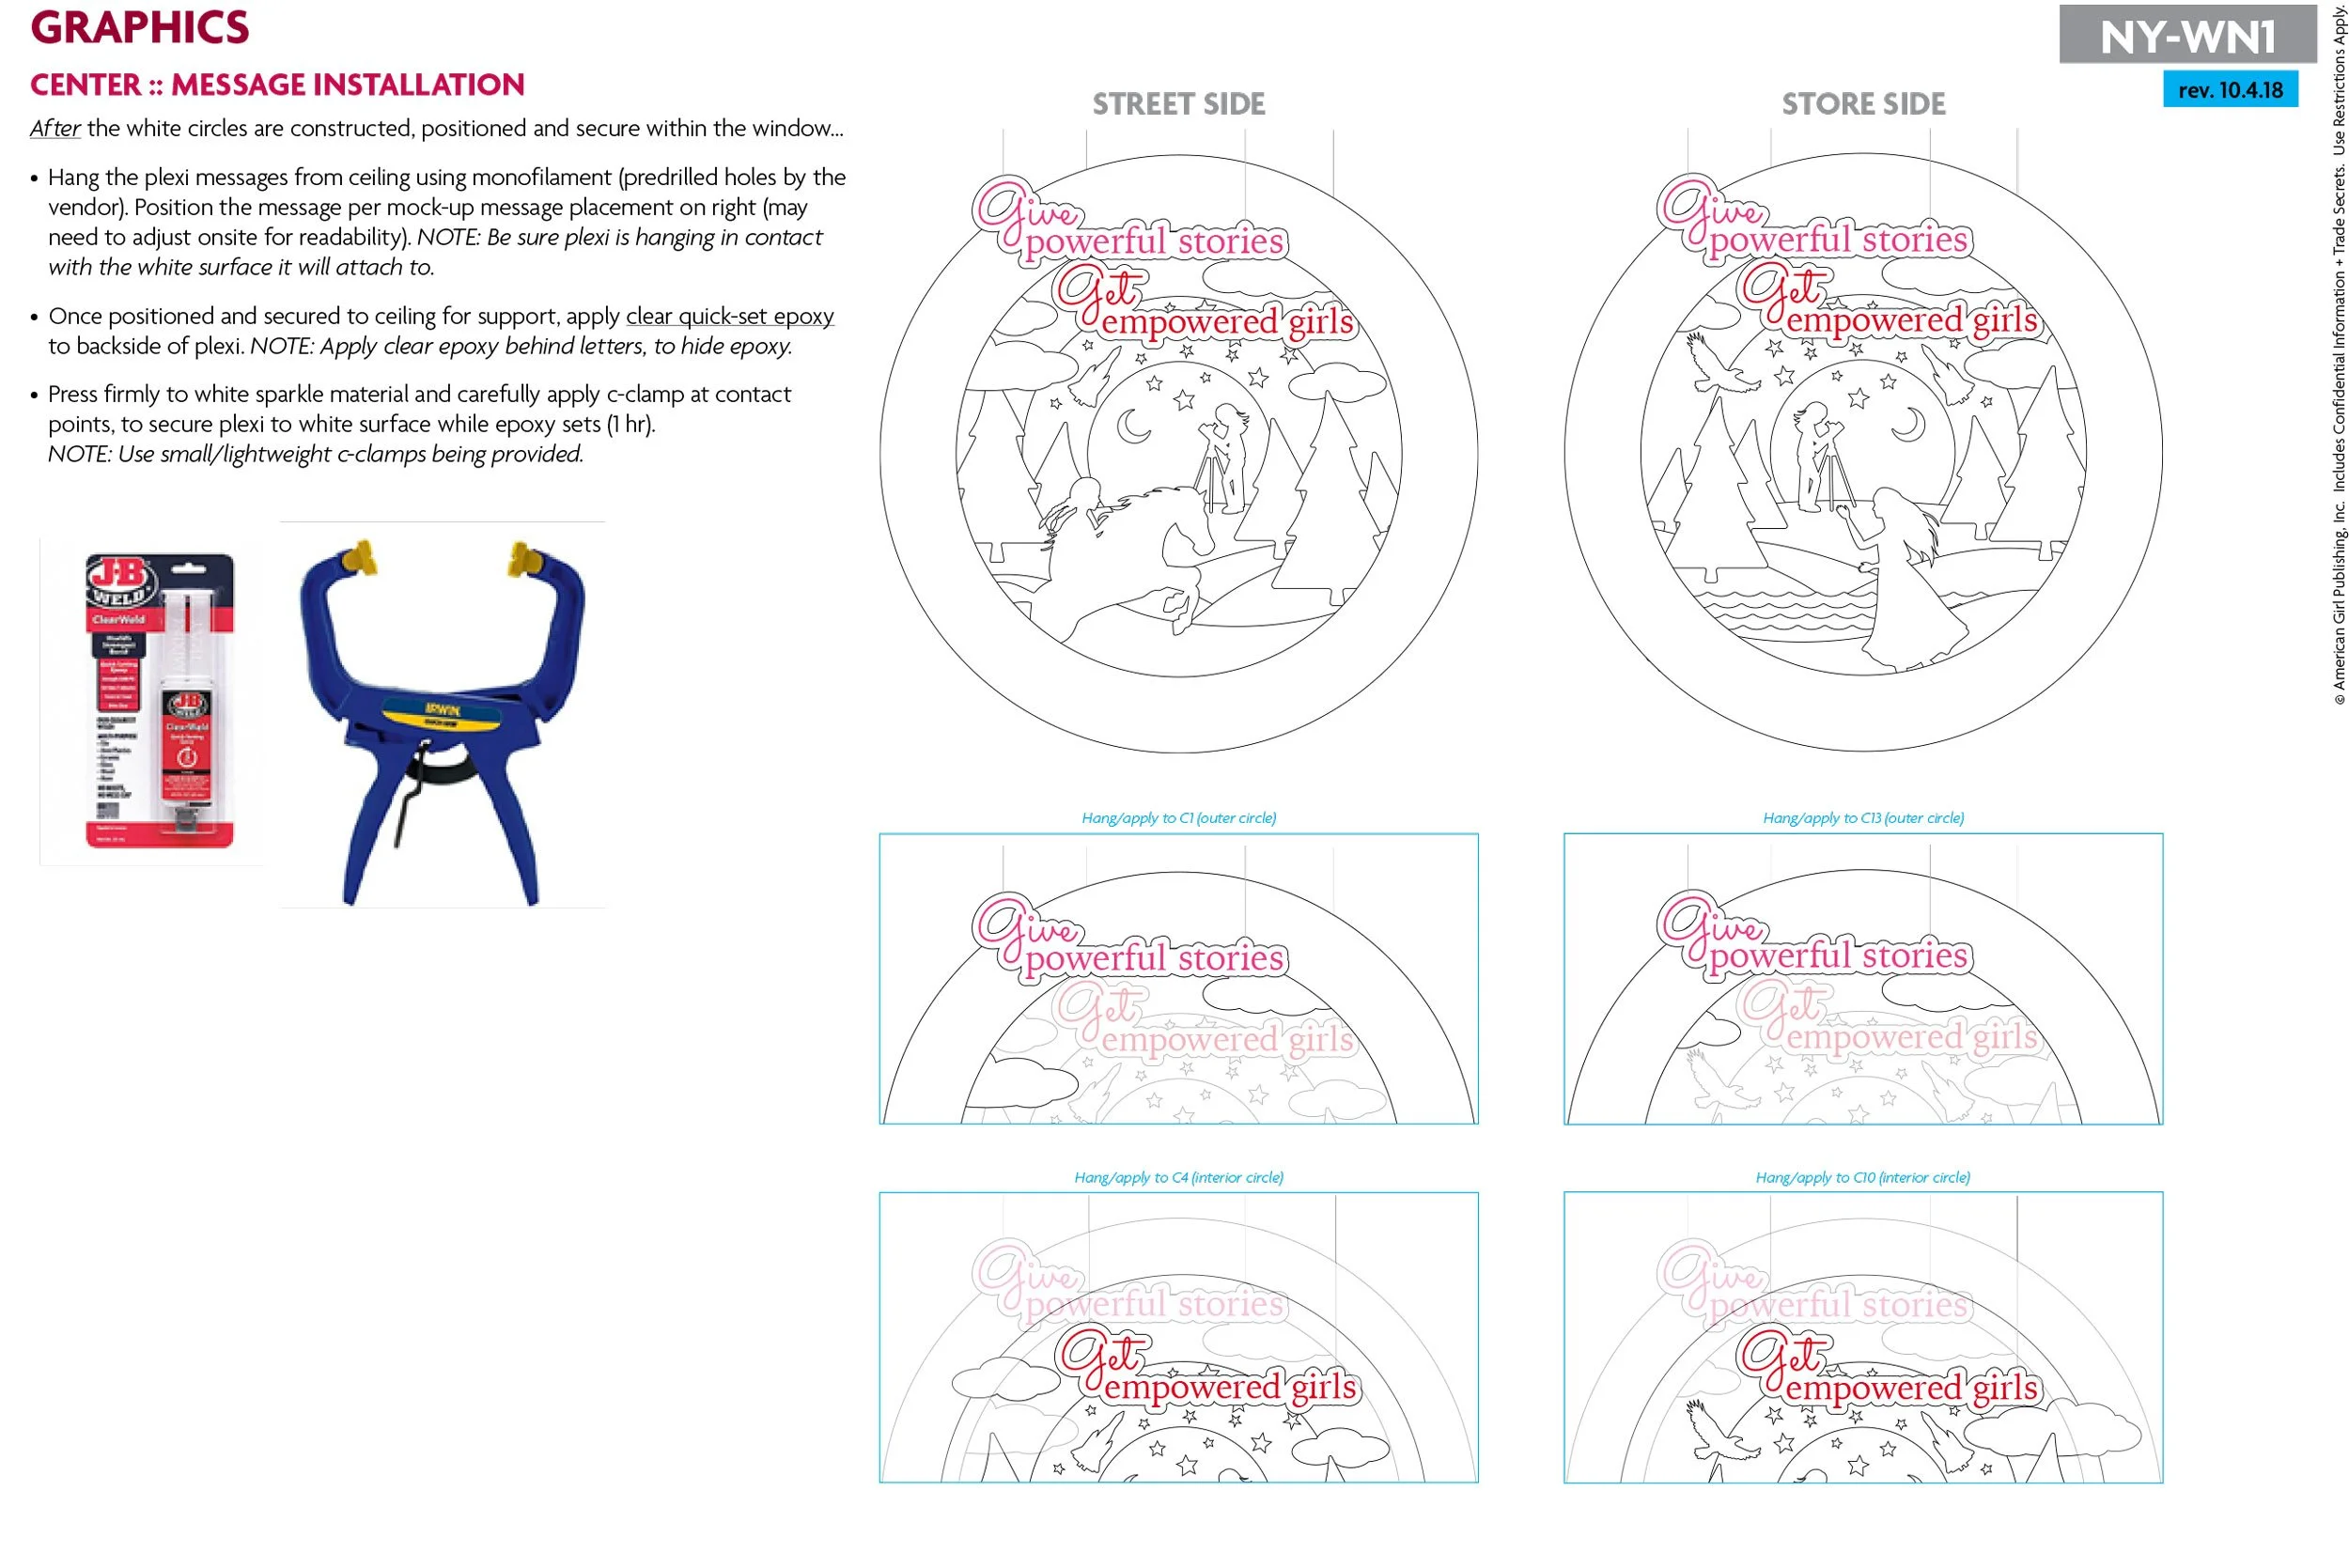
Insert each layer/lug into floor base, and hang the dimensional messaging signs from the ceiling grid, as specified in the installation guide—using pre-shipped supplies.
-
![]()
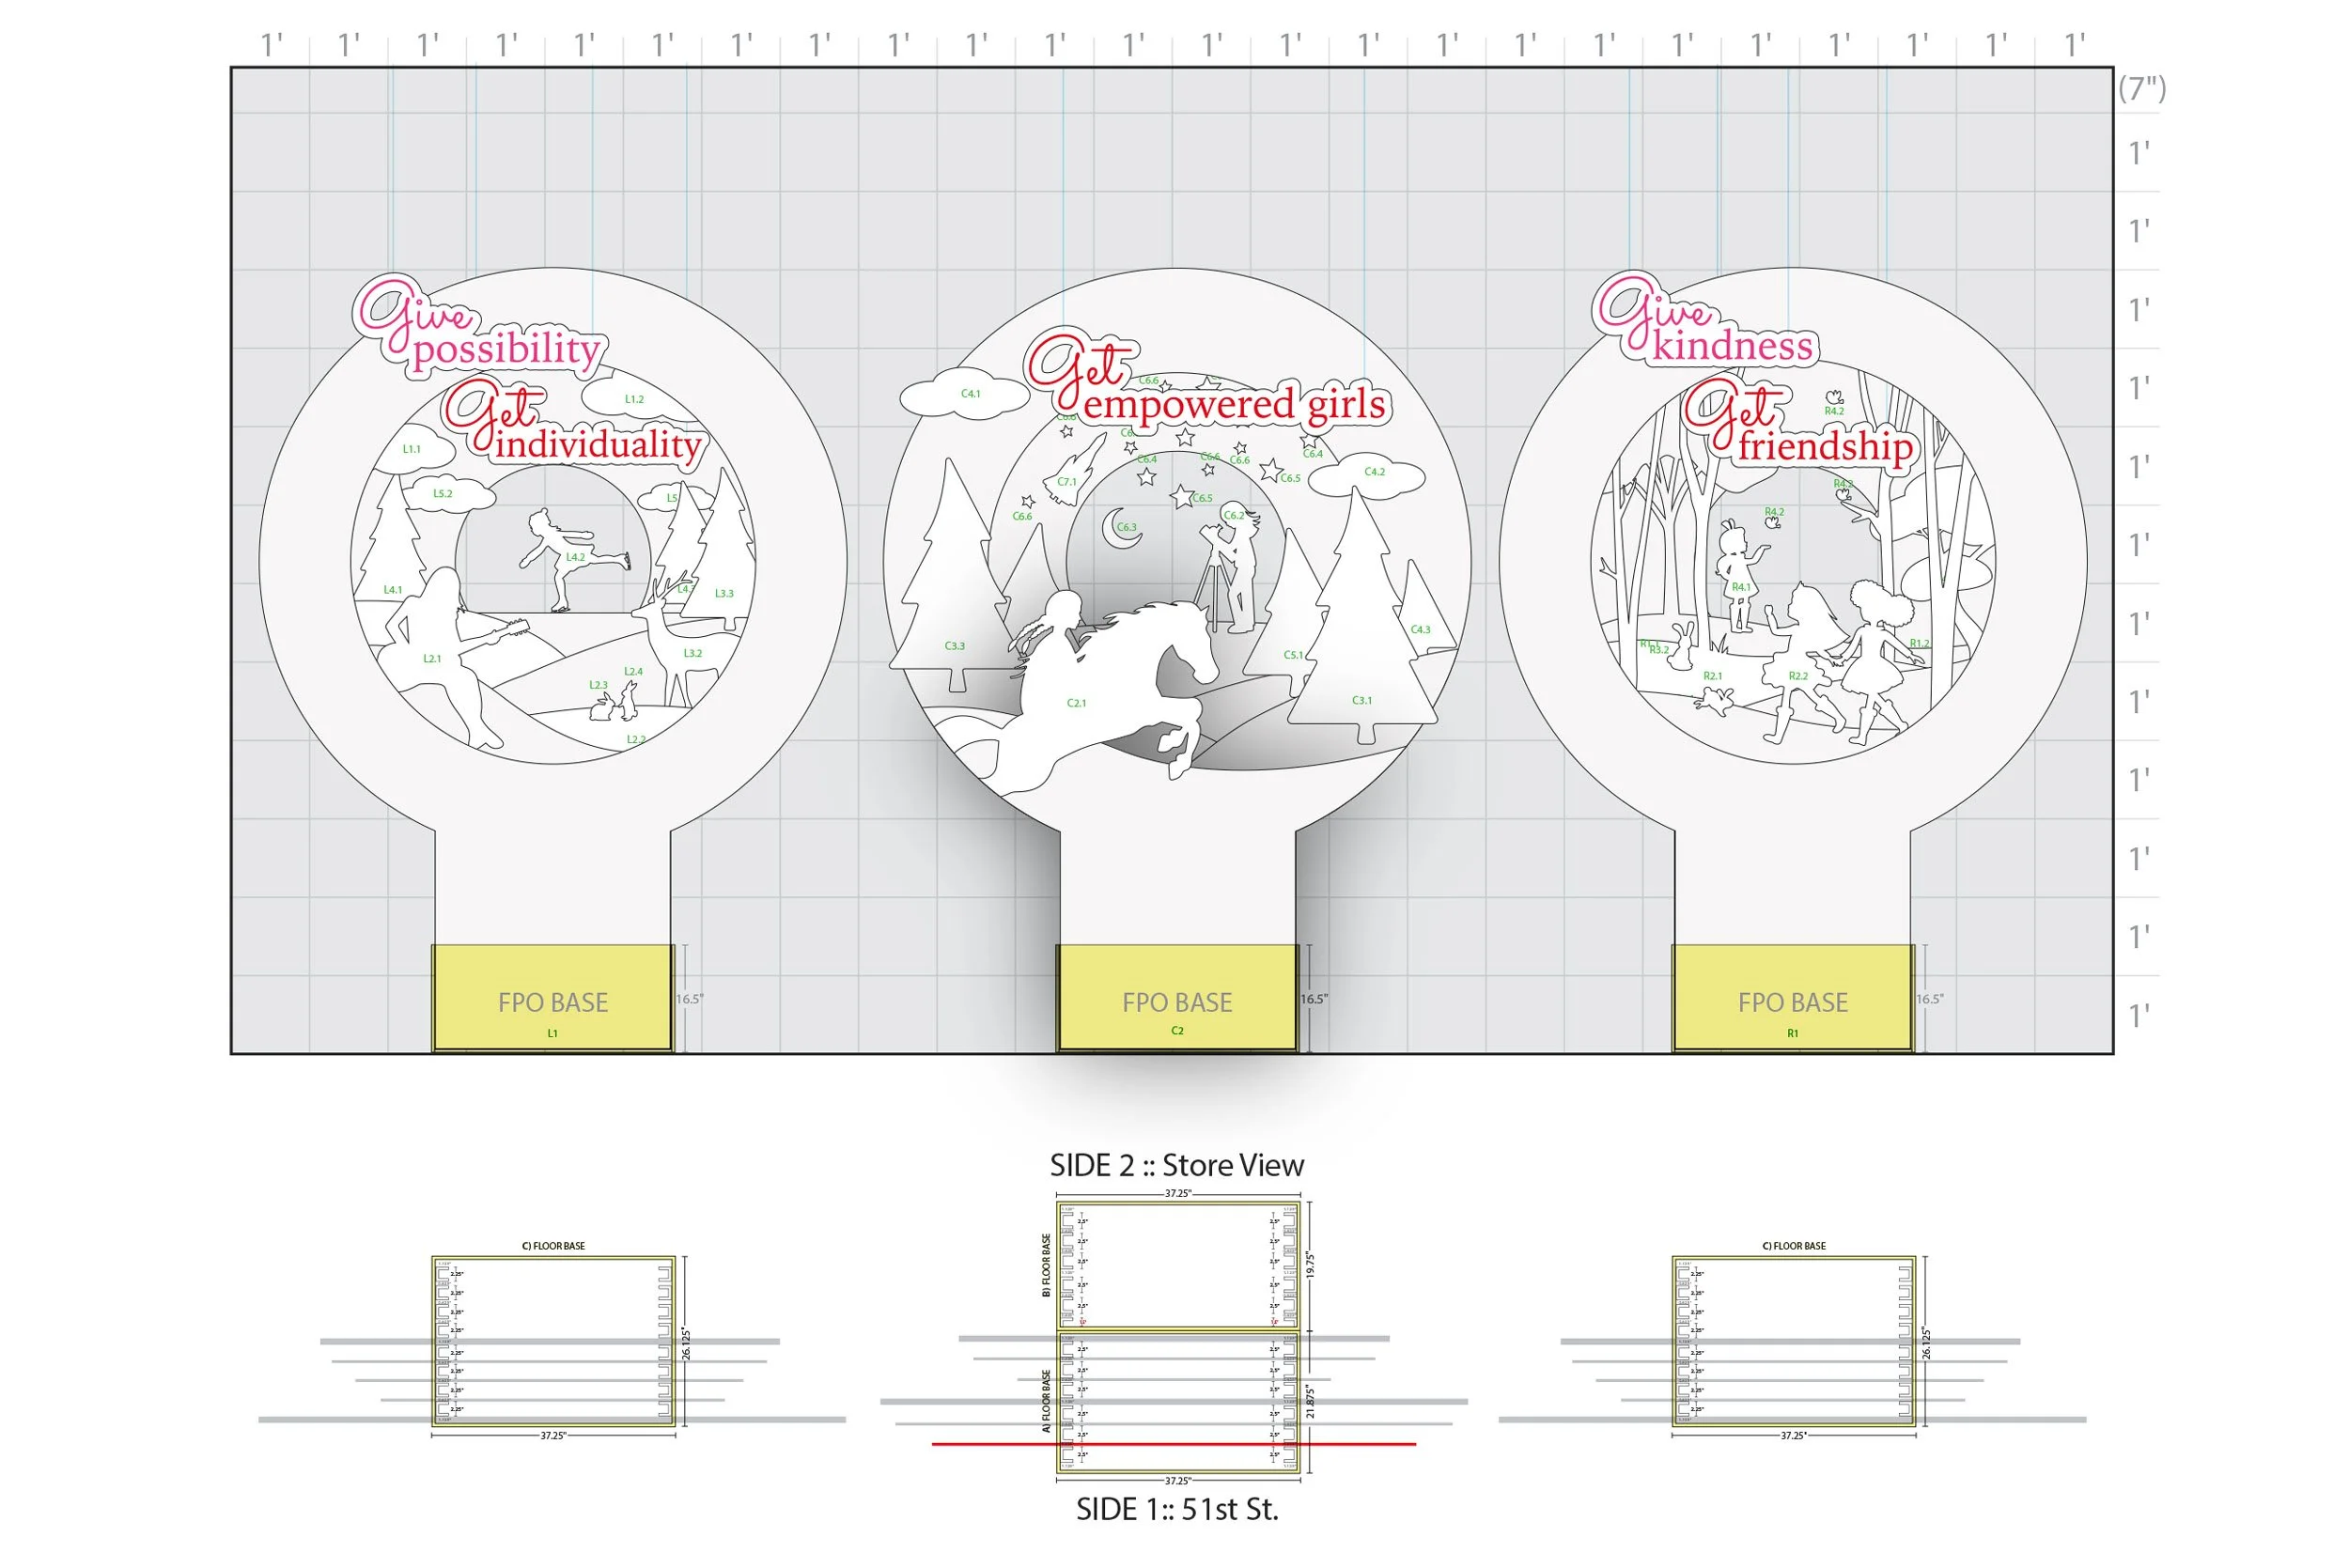
Shadow Box Construction (Street Side 1)
Insert each layer/lug into floor base, and hang the dimensional messaging signs from the ceiling grid, as specified in the installation guide—using pre-shipped supplies.
-
![]()
Shadow Box Construction (Street Side 1)
Insert each layer/lug into floor base, and hang the dimensional messaging signs from the ceiling grid, as specified in the installation guide—using pre-shipped supplies.
-
![]()
Shadow Box Construction (Street Side 1)
Insert each layer/lug into floor base, and hang the dimensional messaging signs from the ceiling grid, as specified in the installation guide—using pre-shipped supplies.
-
![]()
Shadow Box Construction (Street Side 1)
Insert each layer/lug into floor base, and hang the dimensional messaging signs from the ceiling grid, as specified in the installation guide—using pre-shipped supplies.
-
![]()
Shadow Box Construction (Street Side 1)
Insert each layer/lug into floor base, and hang the dimensional messaging signs from the ceiling grid, as specified in the installation guide—using pre-shipped supplies.
-
![]()
Shadow Box Construction (Street Side 1)
Insert each layer/lug into floor base, and hang the dimensional messaging signs from the ceiling grid, as specified in the installation guide—using pre-shipped supplies.
-
![]()
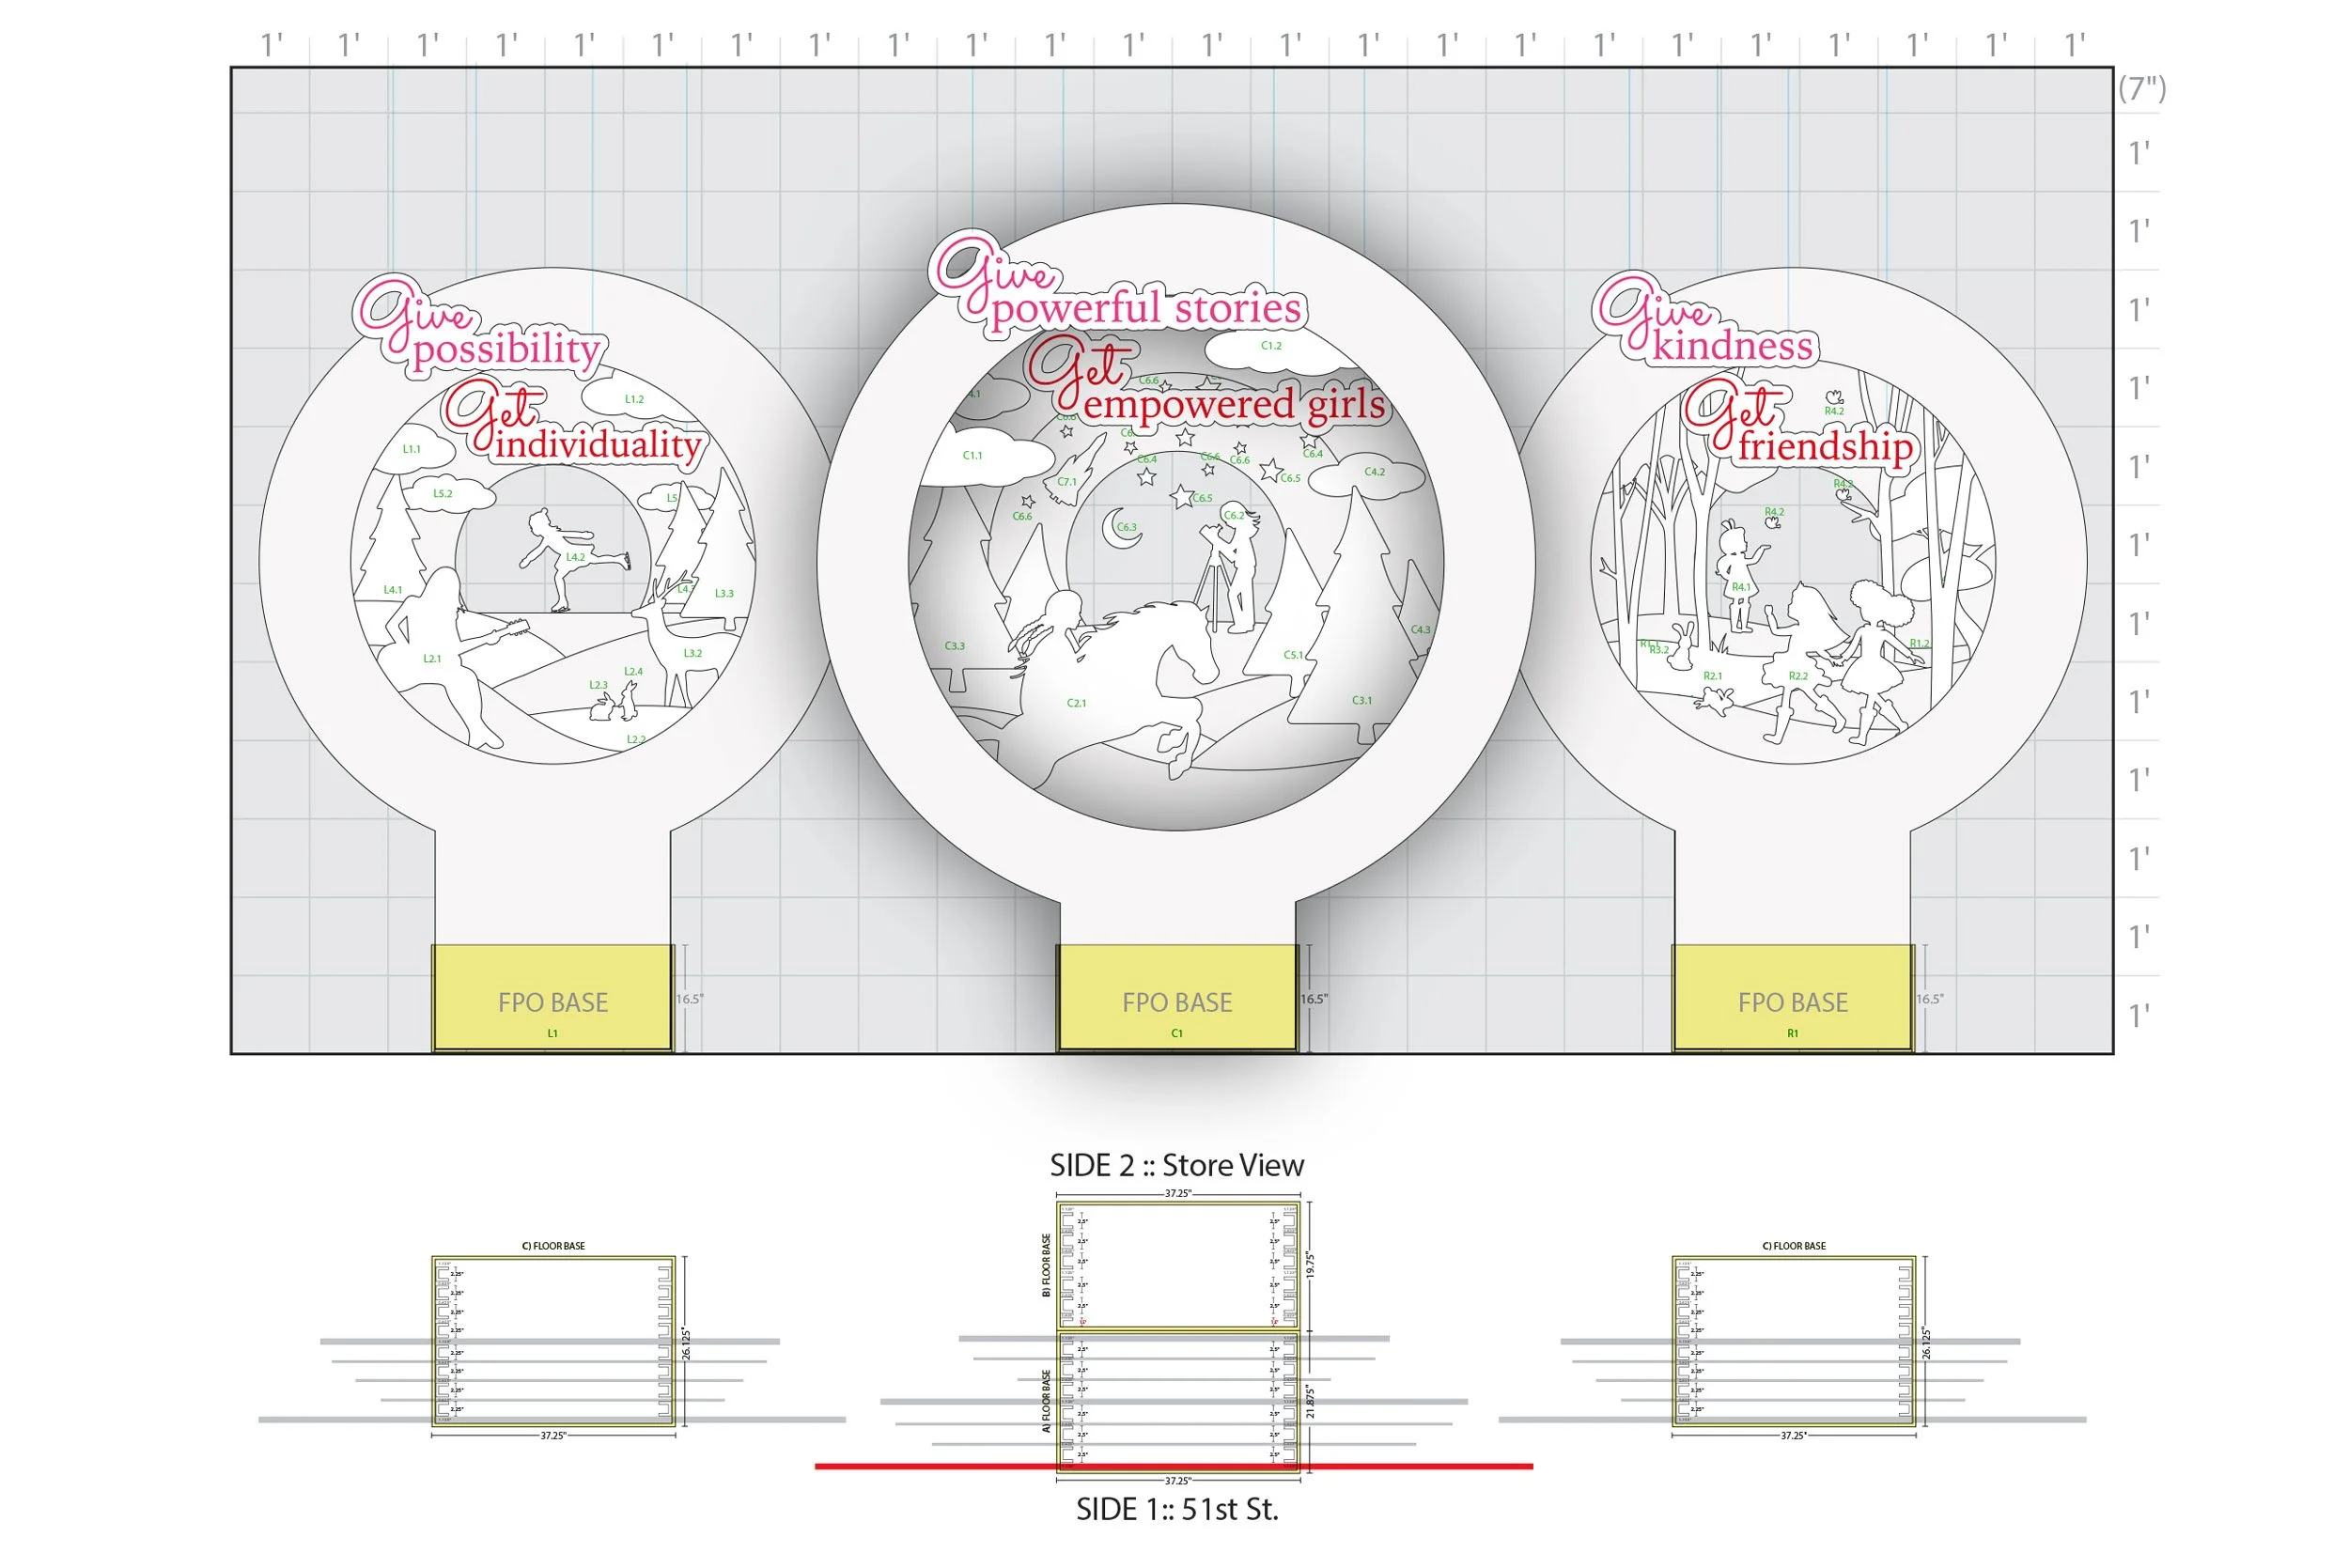
Shadow Box Construction (Street Side 1)
Final composite image
-
![]()
Shadow Box Construction (Store Side 2)
Insert each layer/lug into floor base, and hang the dimensional messaging signs from the ceiling grid, as specified in the installation guide—using pre-shipped supplies.
-
![]()
Shadow Box Construction (Store Side 2)
Insert each layer/lug into floor base, and hang the dimensional messaging signs from the ceiling grid, as specified in the installation guide—using pre-shipped supplies.
-
![]()
Shadow Box Construction (Store Side 2)
Insert each layer/lug into floor base, and hang the dimensional messaging signs from the ceiling grid, as specified in the installation guide—using pre-shipped supplies.
-
![]()
Shadow Box Construction (Store Side 2)
Insert each layer/lug into floor base, and hang the dimensional messaging signs from the ceiling grid, as specified in the installation guide—using pre-shipped supplies.
-
![]()
Shadow Box Construction (Store Side 2)
Insert each layer/lug into floor base, and hang the dimensional messaging signs from the ceiling grid, as specified in the installation guide—using pre-shipped supplies.
-
![]()
Shadow Box Construction (Store Side 2)
Insert each layer/lug into floor base, and hang the dimensional messaging signs from the ceiling grid, as specified in the installation guide—using pre-shipped supplies.
-
![]()
Shadow Box Construction (Store Side 2)
Insert each layer/lug into floor base, and hang the dimensional messaging signs from the ceiling grid, as specified in the installation guide—using pre-shipped supplies.
-
![]()
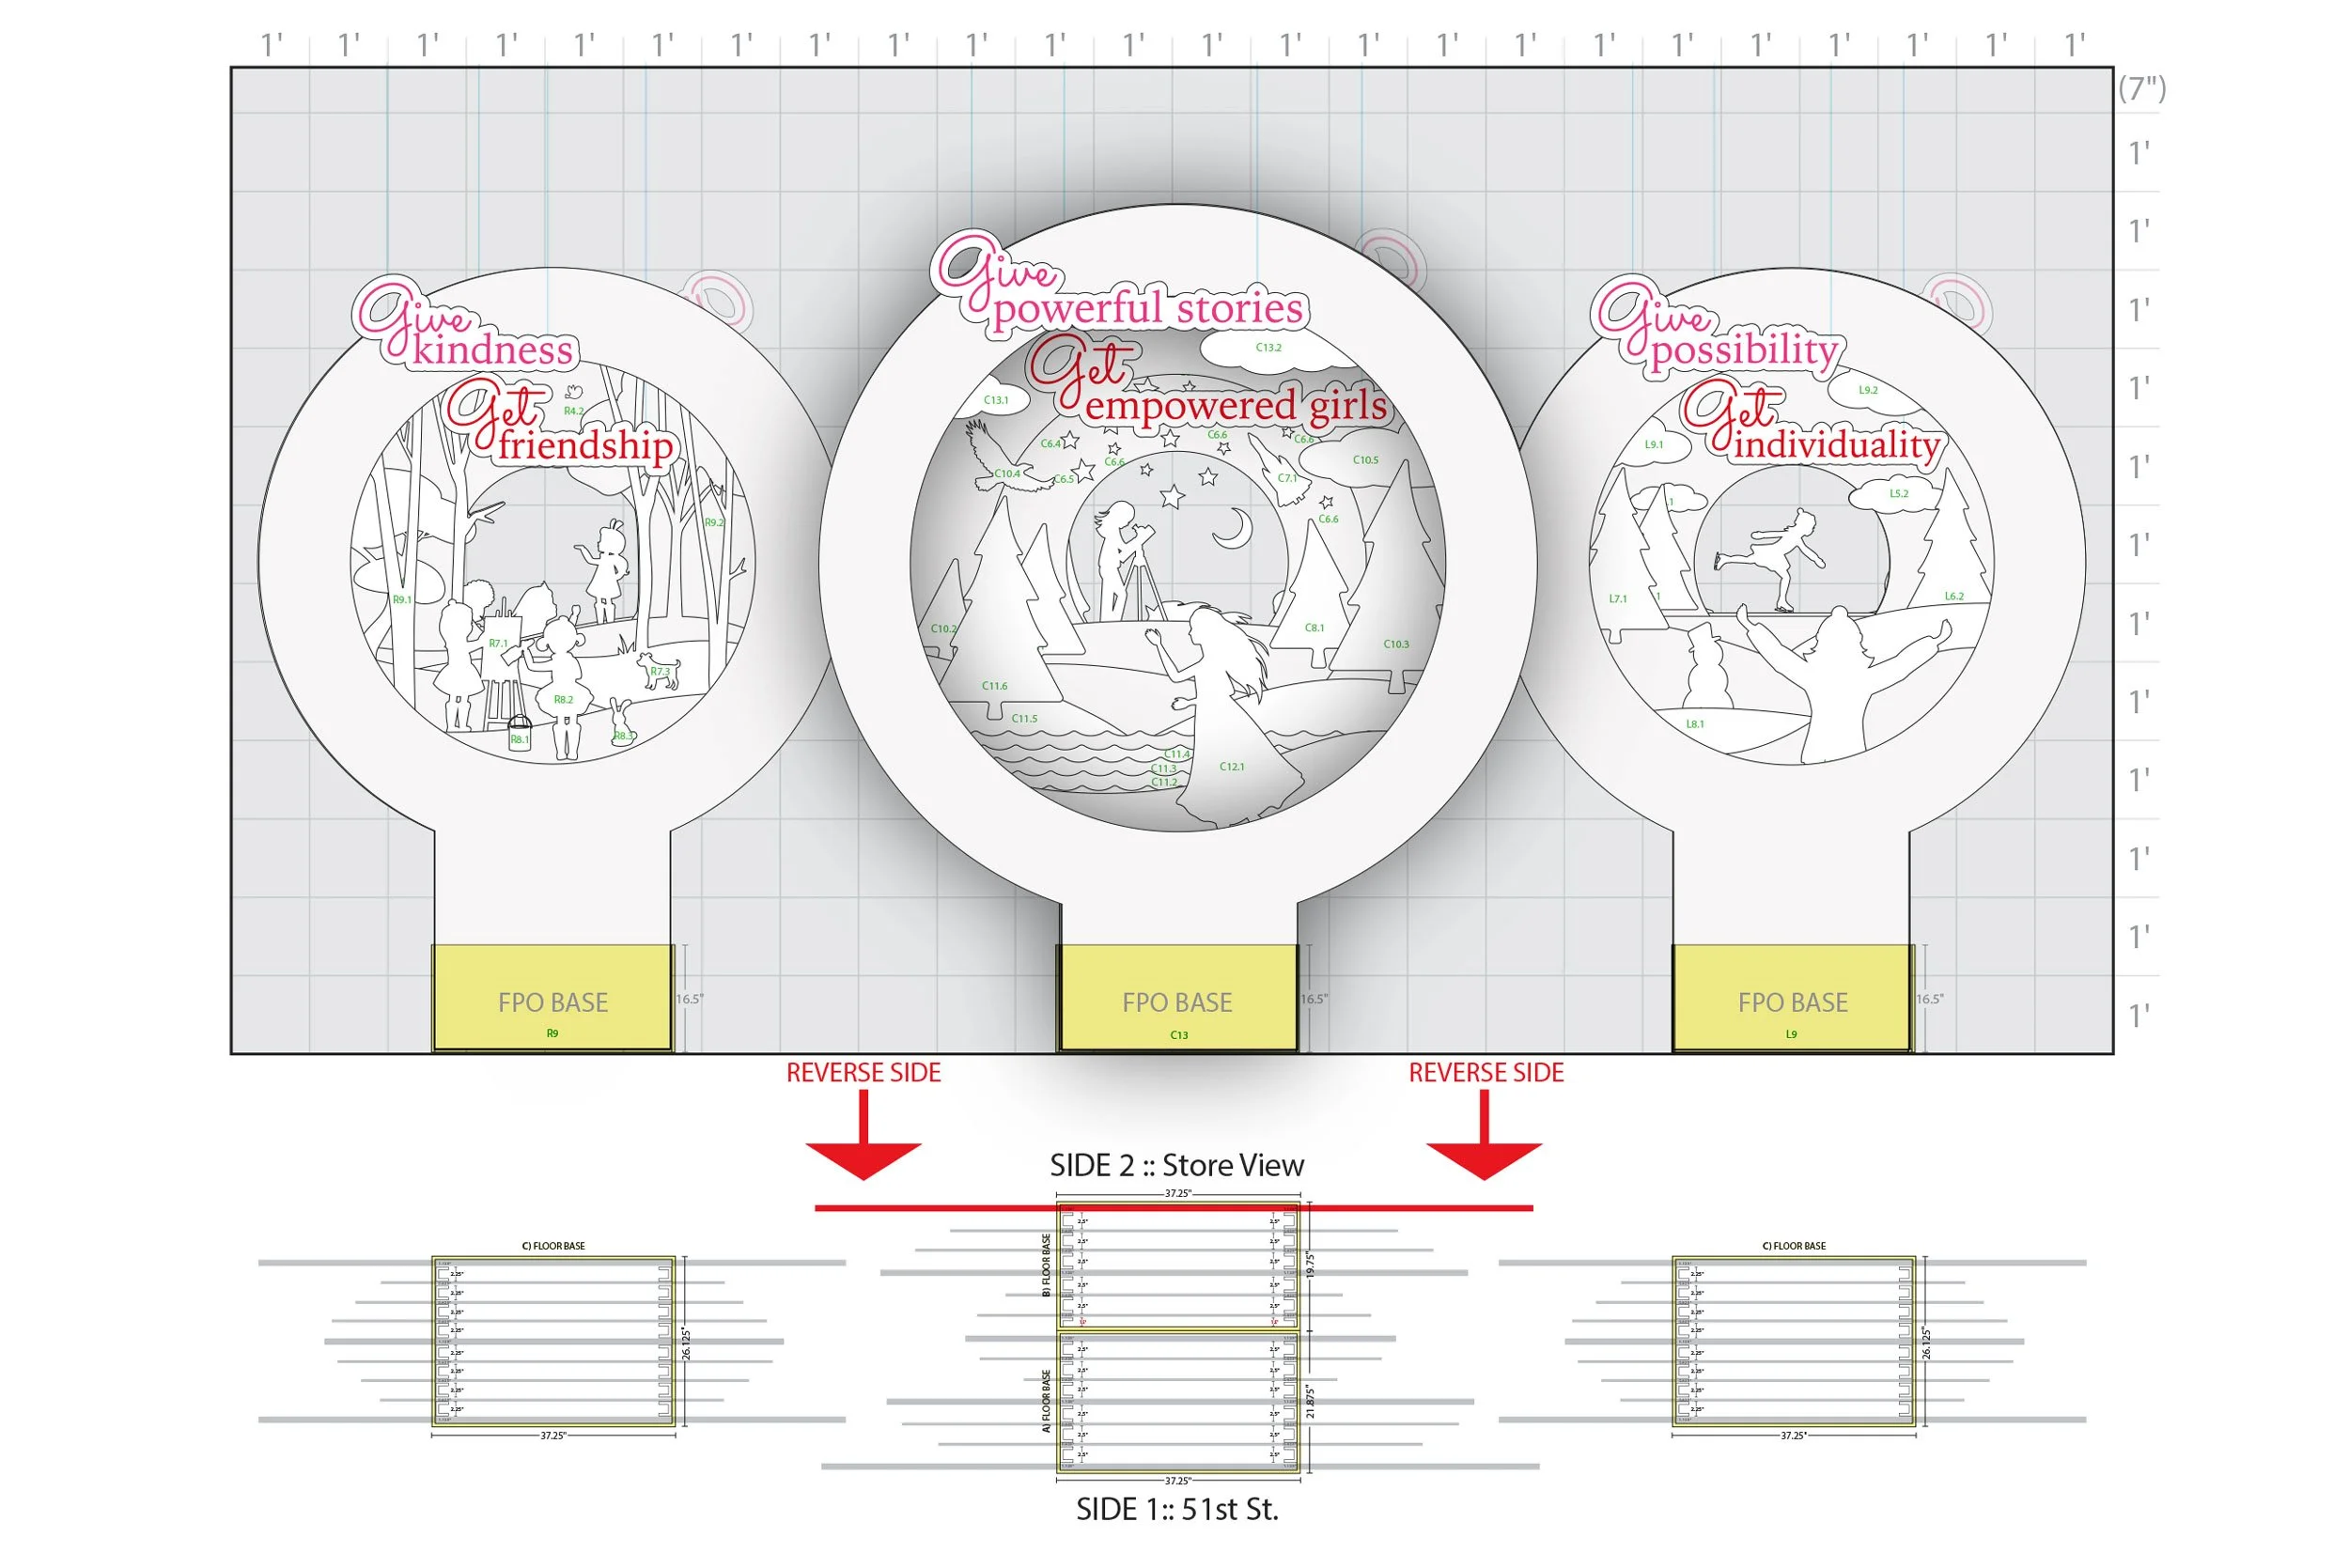
Shadow Box Construction (Store Side 2)
Final composite image
Installation Guide
-
![]()
-
![]()
-
![]()
-
![]()
-
![]()
-
![]()
-
![]()
-
![]()
-
![]()
-
![]()
-
![]()
-
![]()
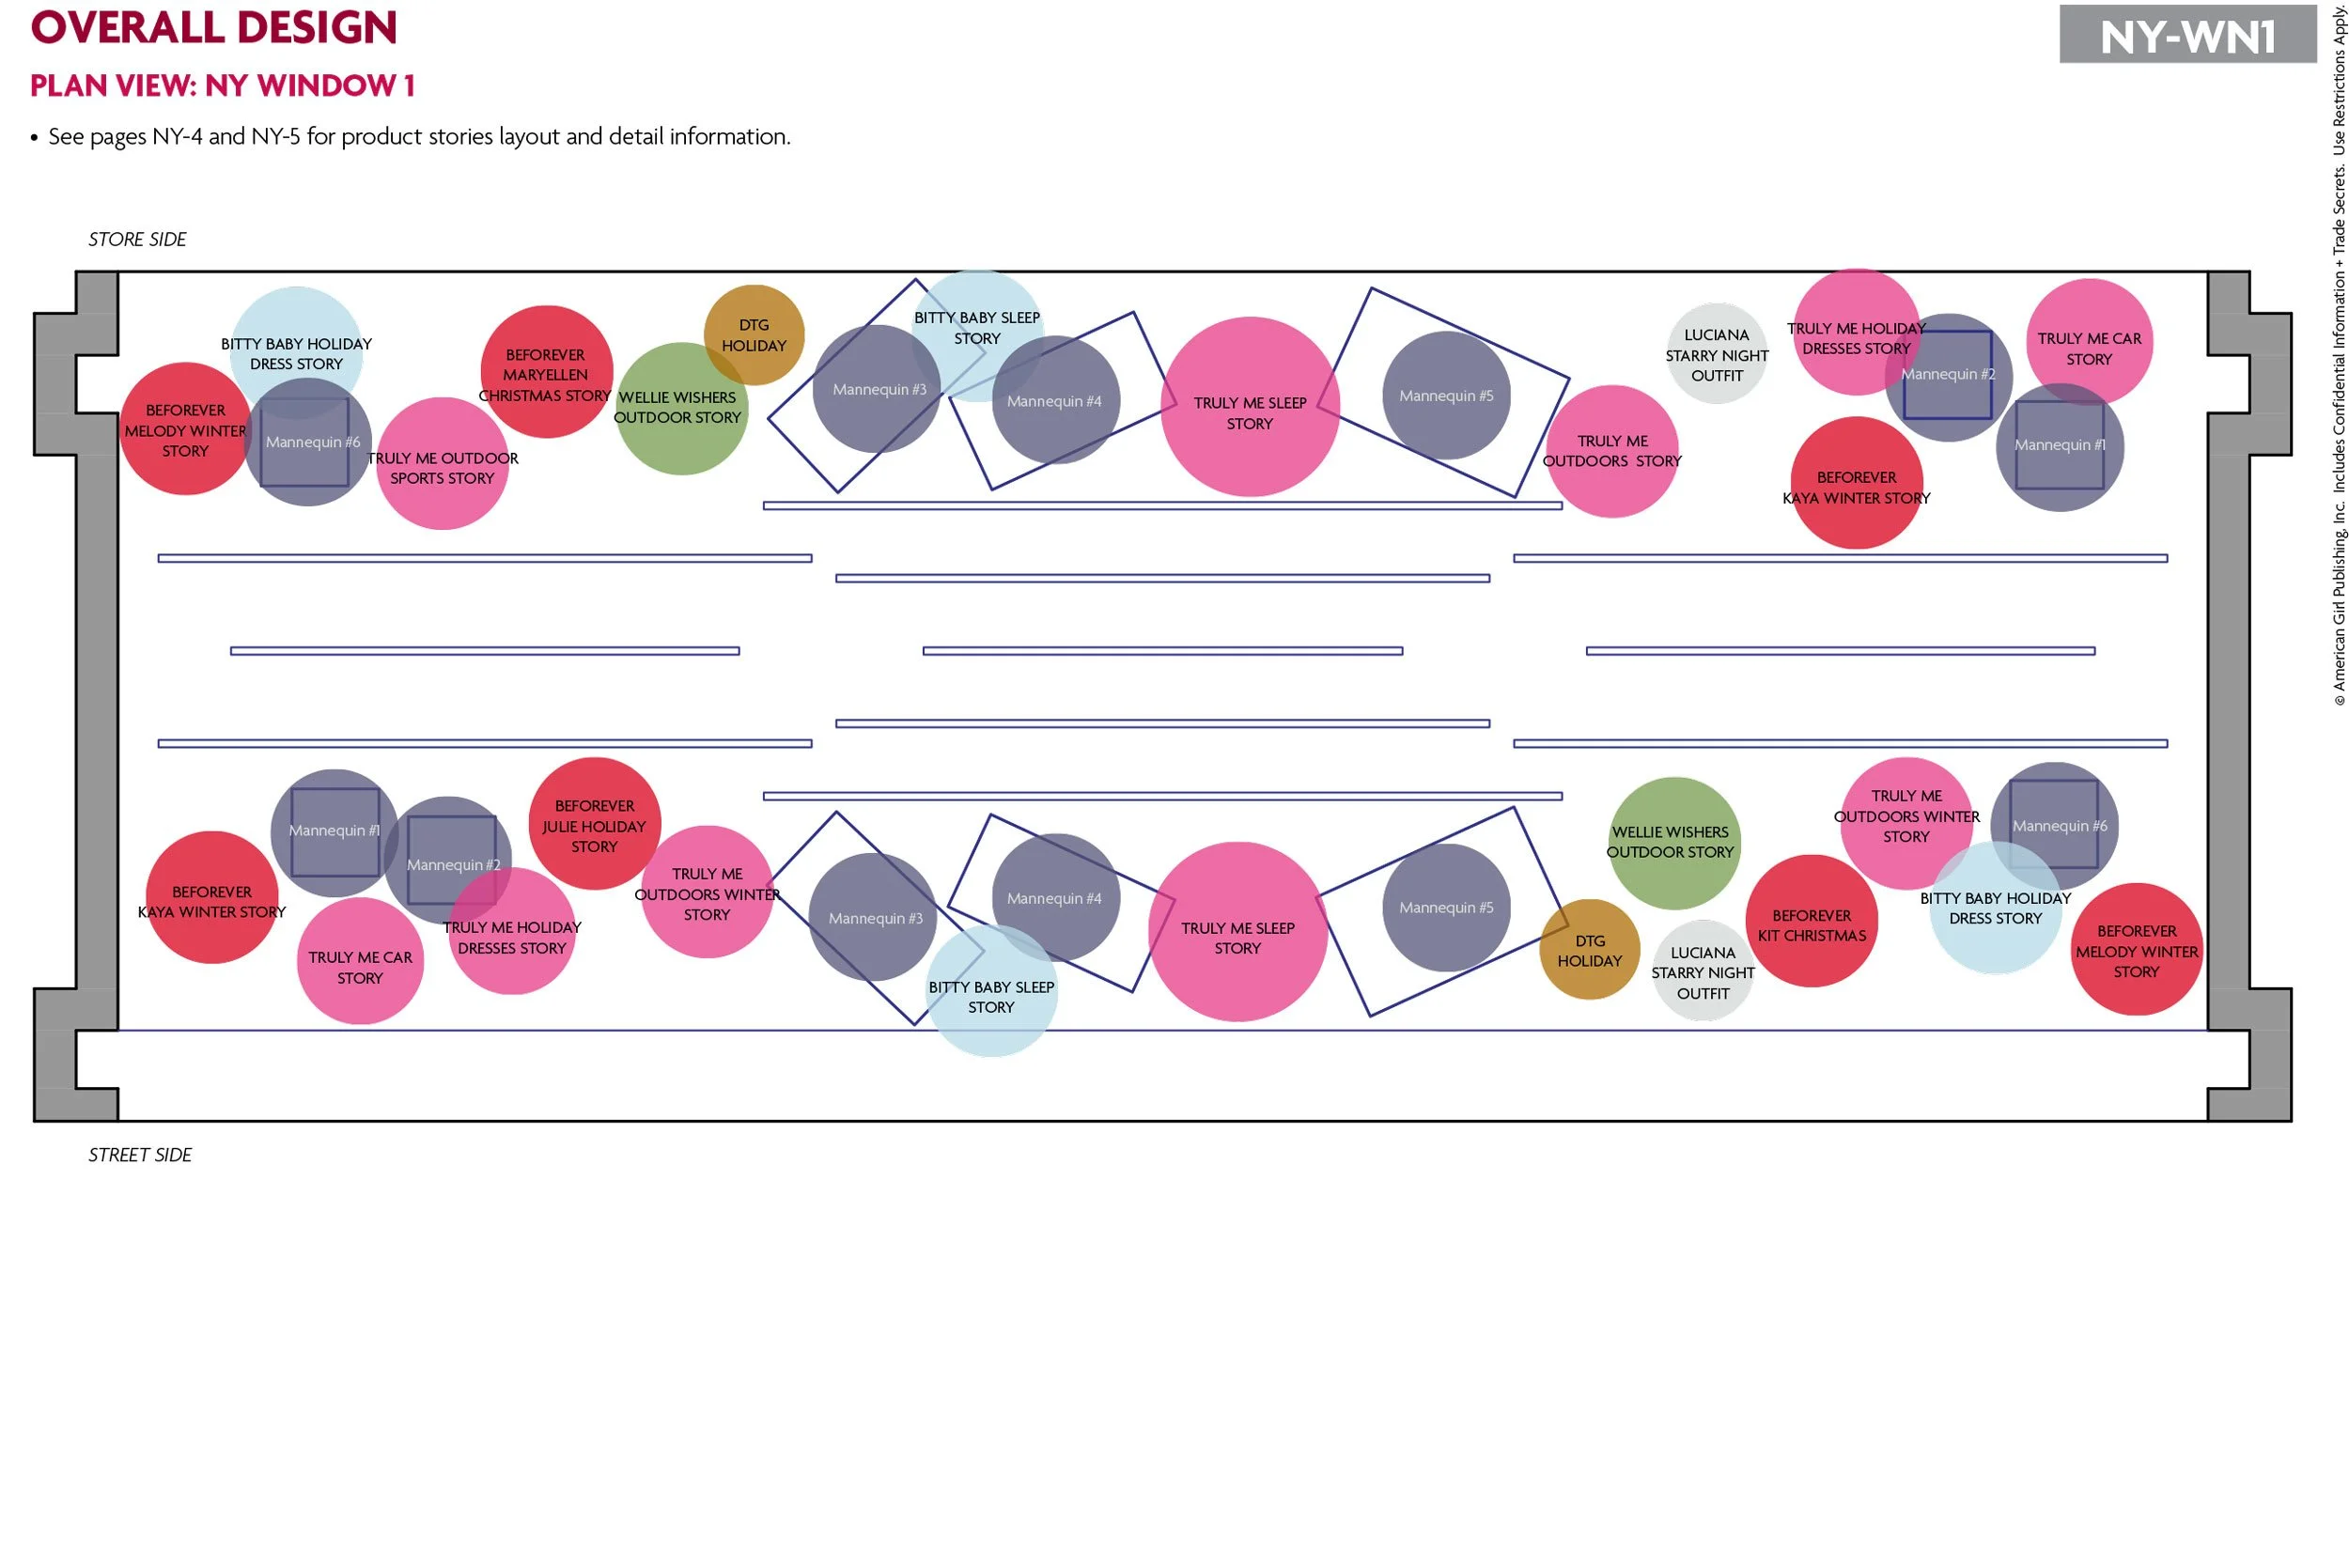
**Merch plan view provided by former co-worker (and good buddy) Alexandra Warner.

